Renovation on Millionaire’s Row

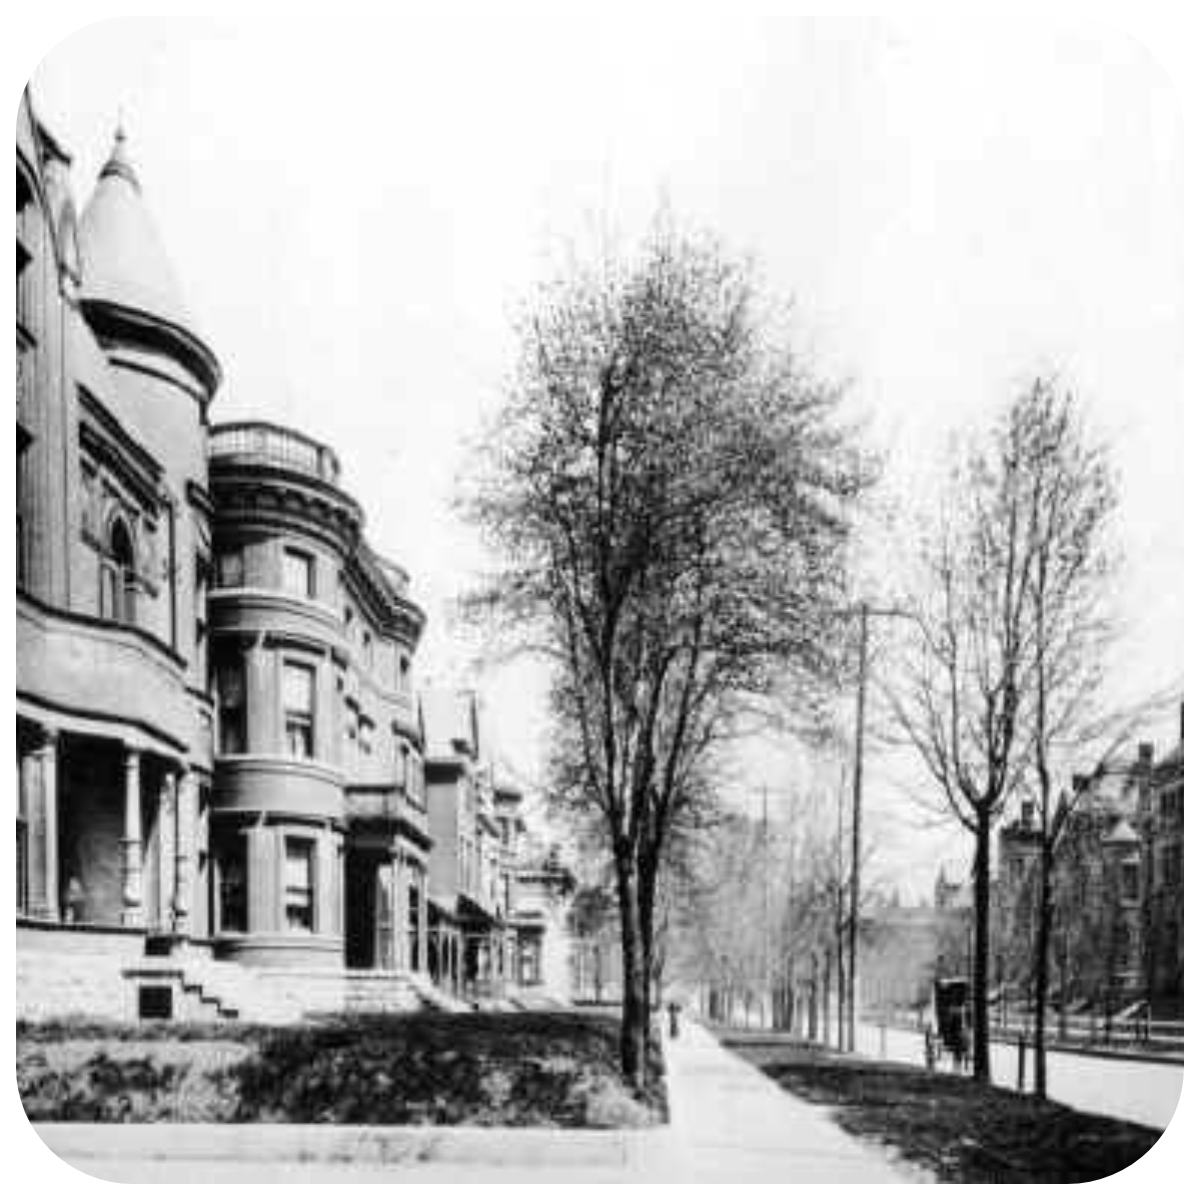
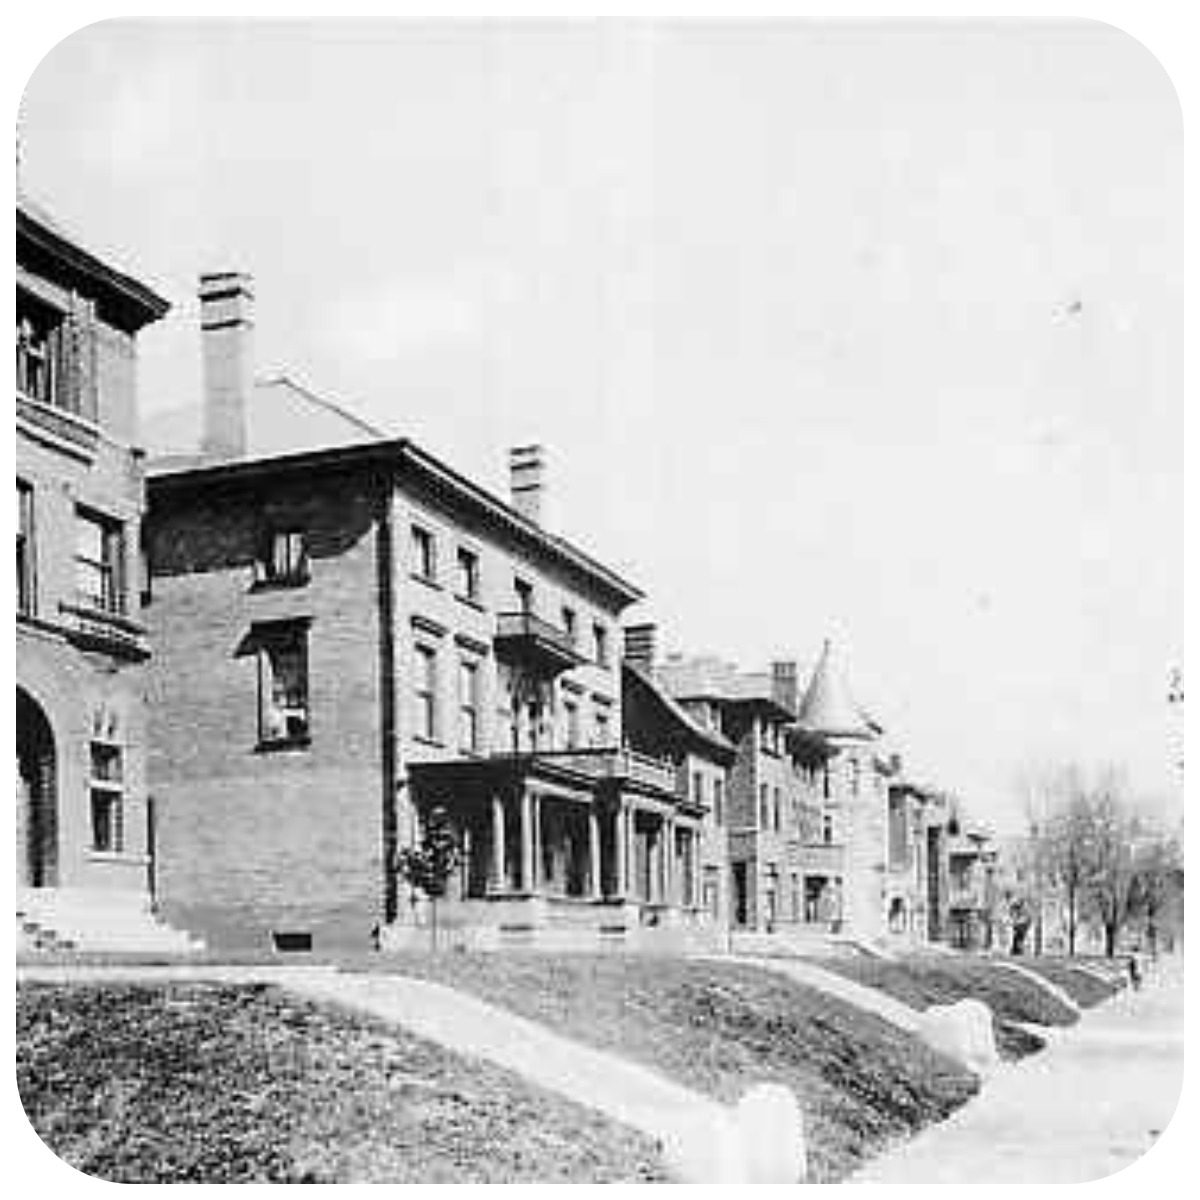
Living Spaces by Lyn had the pleasure of working with a homeowner to gut, renovate, and restore a glorious home built in 1900 and located on Millionaire’s Row in historic Old Louisville. Millionaire’s Row is a section of stately homes on Third Street, once called Third Avenue, and previously before that, Plank Road. Third Street in the 1900’s had some of the finest and most expensive mansions in the nation line it’s street.
In its peak in the late 19th century, Old Louisville and 3rd Street was the center of Louisville’s social life and wealth. These homes were built by racetrack owners, bourbon barons, and prominent business owners, and they spared no expense in showing off their wealth. According to Wikipedia: “Old Louisville is the third largest historical district in the United States, and the largest preservation district featuring almost entirely Victorian architecture. It is also unique in that a majority of its structures are made of brick, and the neighborhood contains the highest concentration of residential homes with stained glass windows in the U.S. Many of the buildings are in the Victorian-era styles of Romanesque, Queen Anne, Italianate, among others; and many blocks have had few or no buildings razed.”
 Unfortunately, by the mid-twentieth century, Old Louisville and Millionaire’s Row underwent a period of decline mostly due to costly wars, suburban expansion, and the extremely expensive upkeep of the large homes. Many of the homes, often in disrepair, were divided into multiple apartments, boarding homes, or split up for small businesses. This home was split up into “individual rooms” as well. It was at one time owned by the 4th Avenue United Methodist Church that is directly located behind the home. It is believed that the Methodist missionary women and Deaconess may have lived here, as each of the bedrooms had their own lock on the doors. It is believed that the male Deacons lived next door in another mansion.
Since the 2000’s the preservation movement in Louisville has saved many of these historic homes and the drive to refurbish the mansions continues. In 2019 Living Spaces by Lyn began the 2-year renovation and restoration of this great home.
The nearly 5000 sq ft home consists of six bedrooms and 3.5 baths. The home has double staircases, beautiful hardwood floors that have been refinished and/or added to achieve a uniform look throughout. This home has been restored and improved with top of the line materials (all marble) and workmanship. Everything was replaced with materials that the wealthy society would have required during the 1900’s. All the paint colors and finishes we chose were traditional and historically accurate. We wanted to restore this home to its original glory while making it relevant to modern day living.
This was our journey.
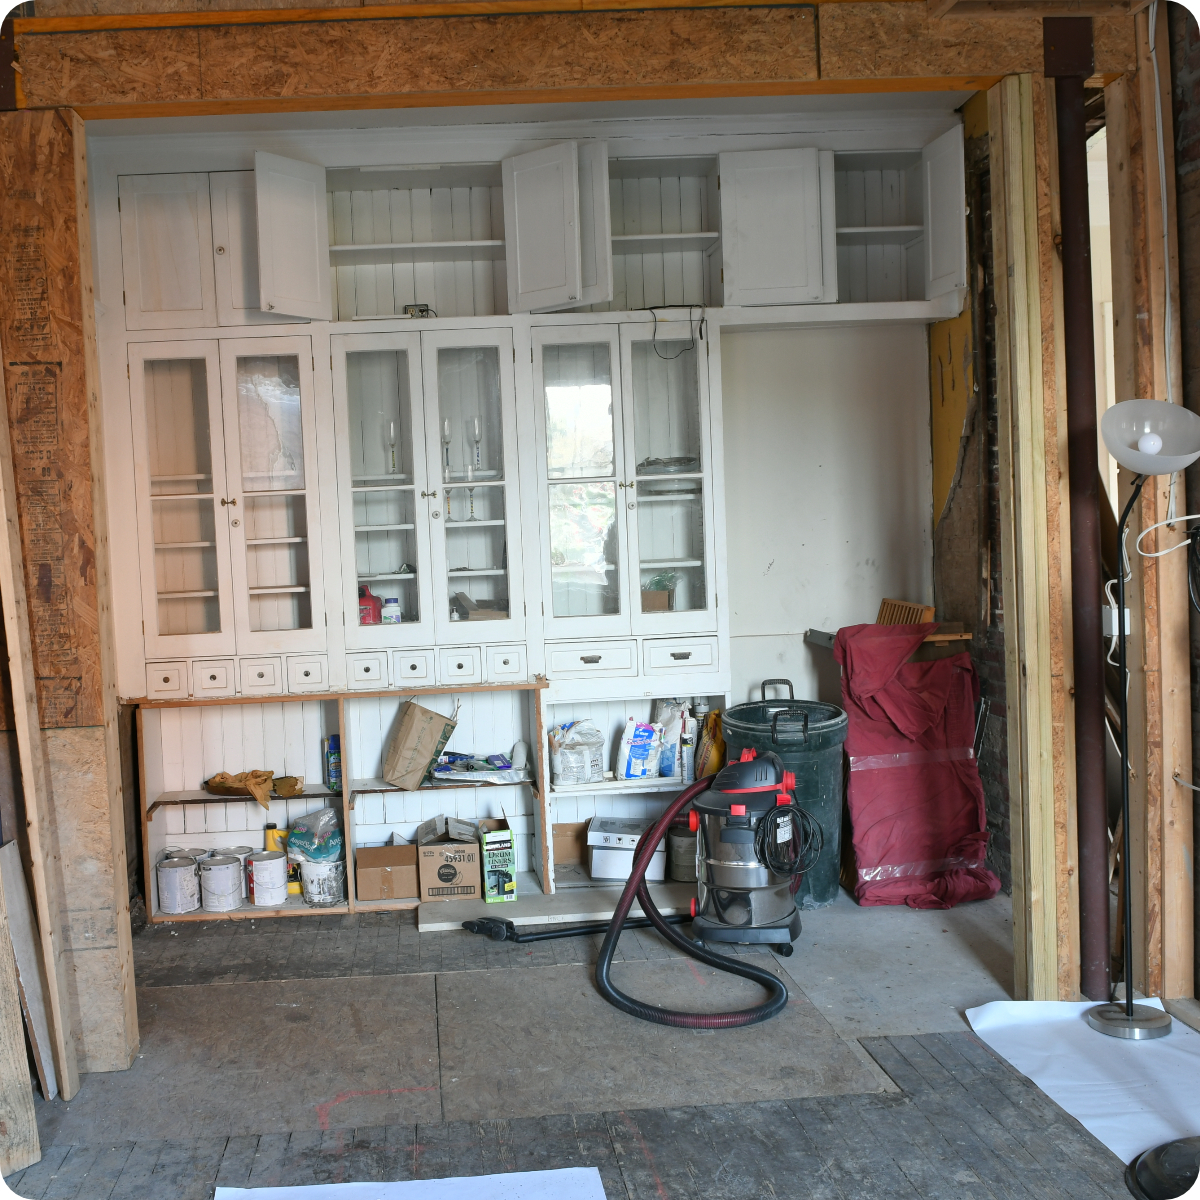
Our project began with the kitchen. We were called for an initial design consultation because the client was looking to renovate her kitchen. After our consultation, we ended up restoring the entire home! Thanks to this wonderful rendering from Karen Stewart at Century Entertainment we were able to woo our client into letting us, specifically our Project Manager- Kim Falvey, manage the restoration project.
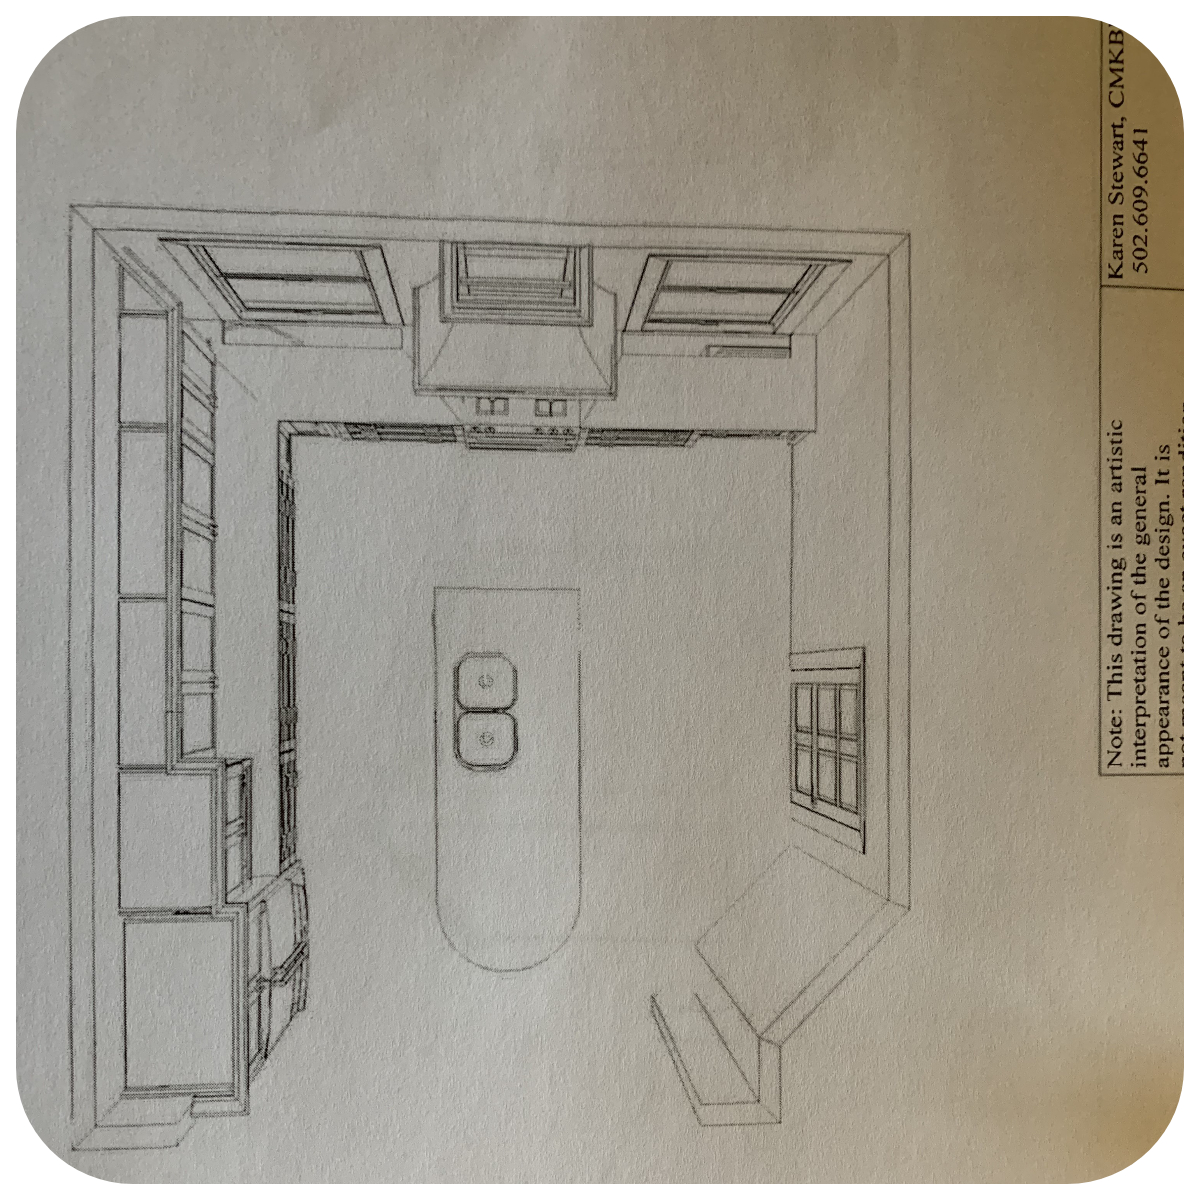
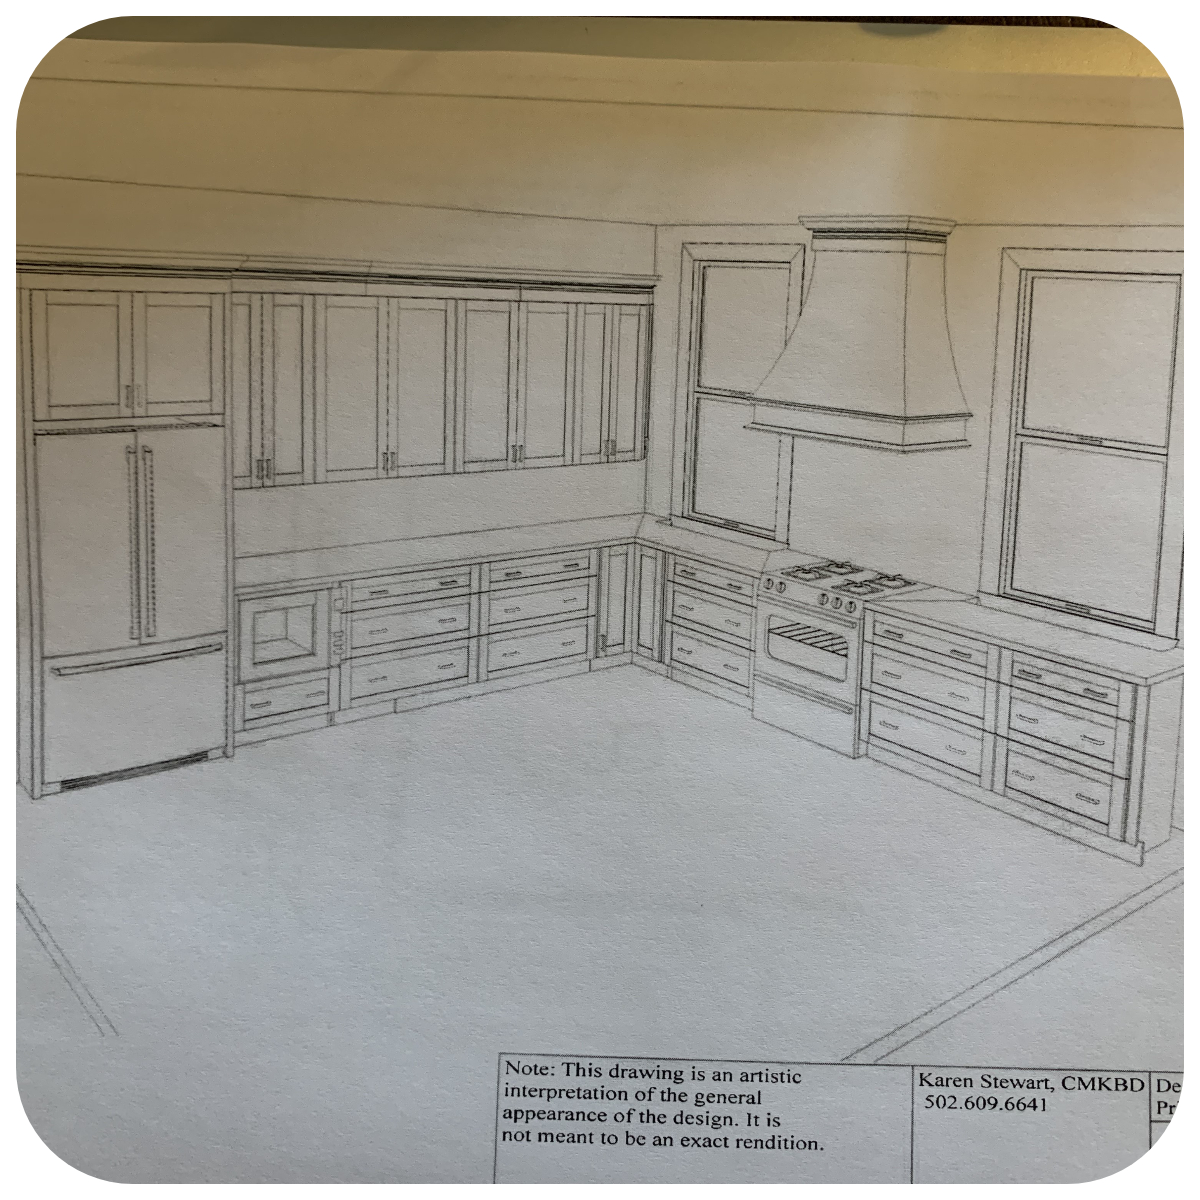
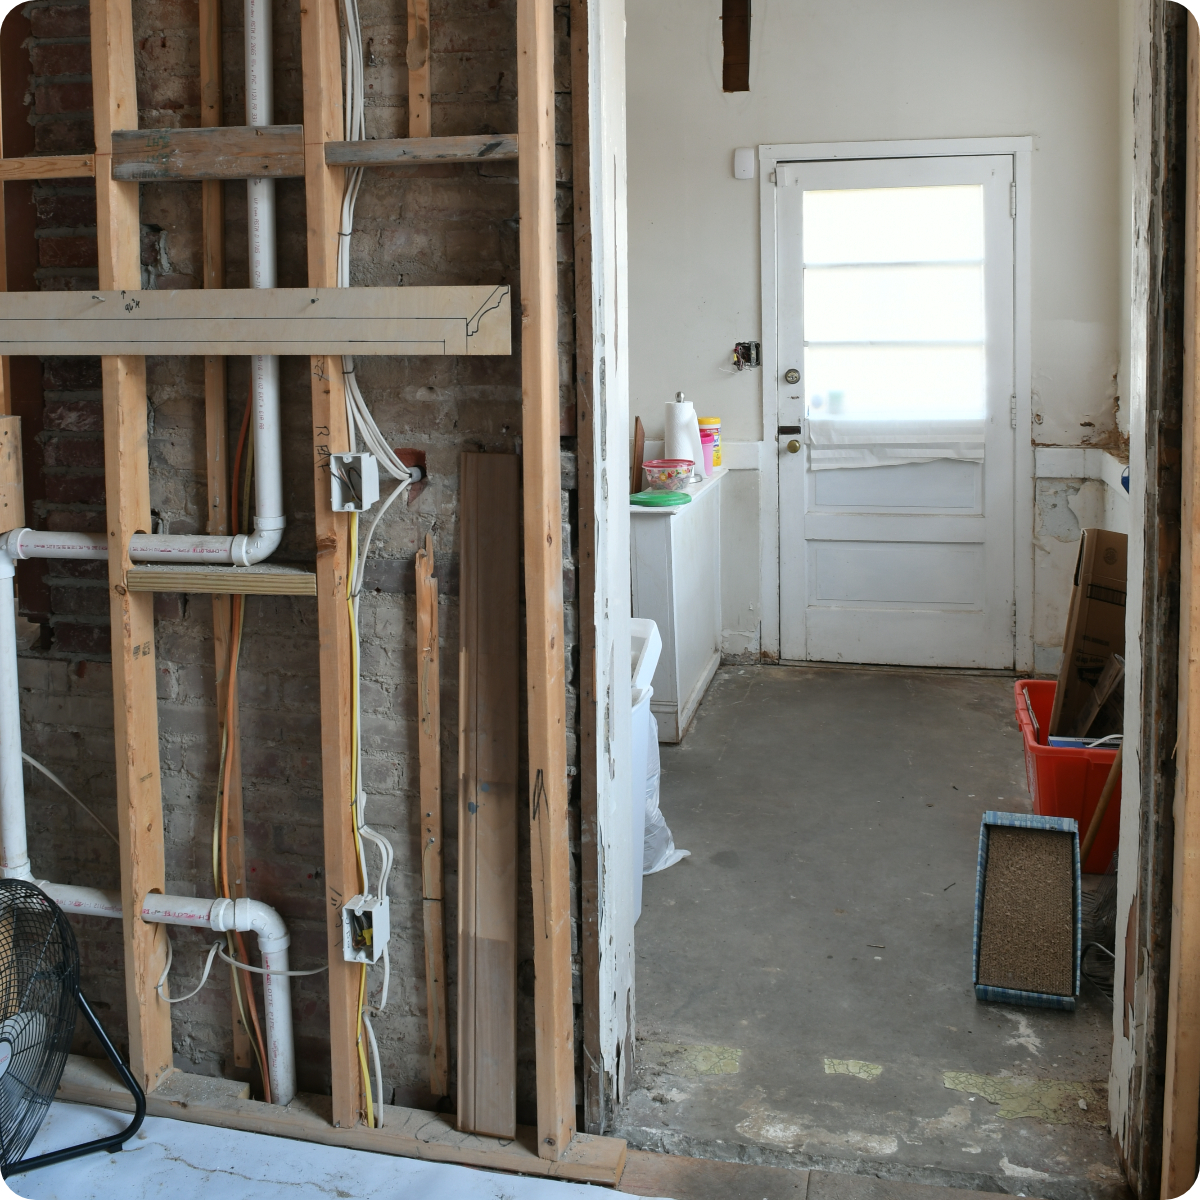
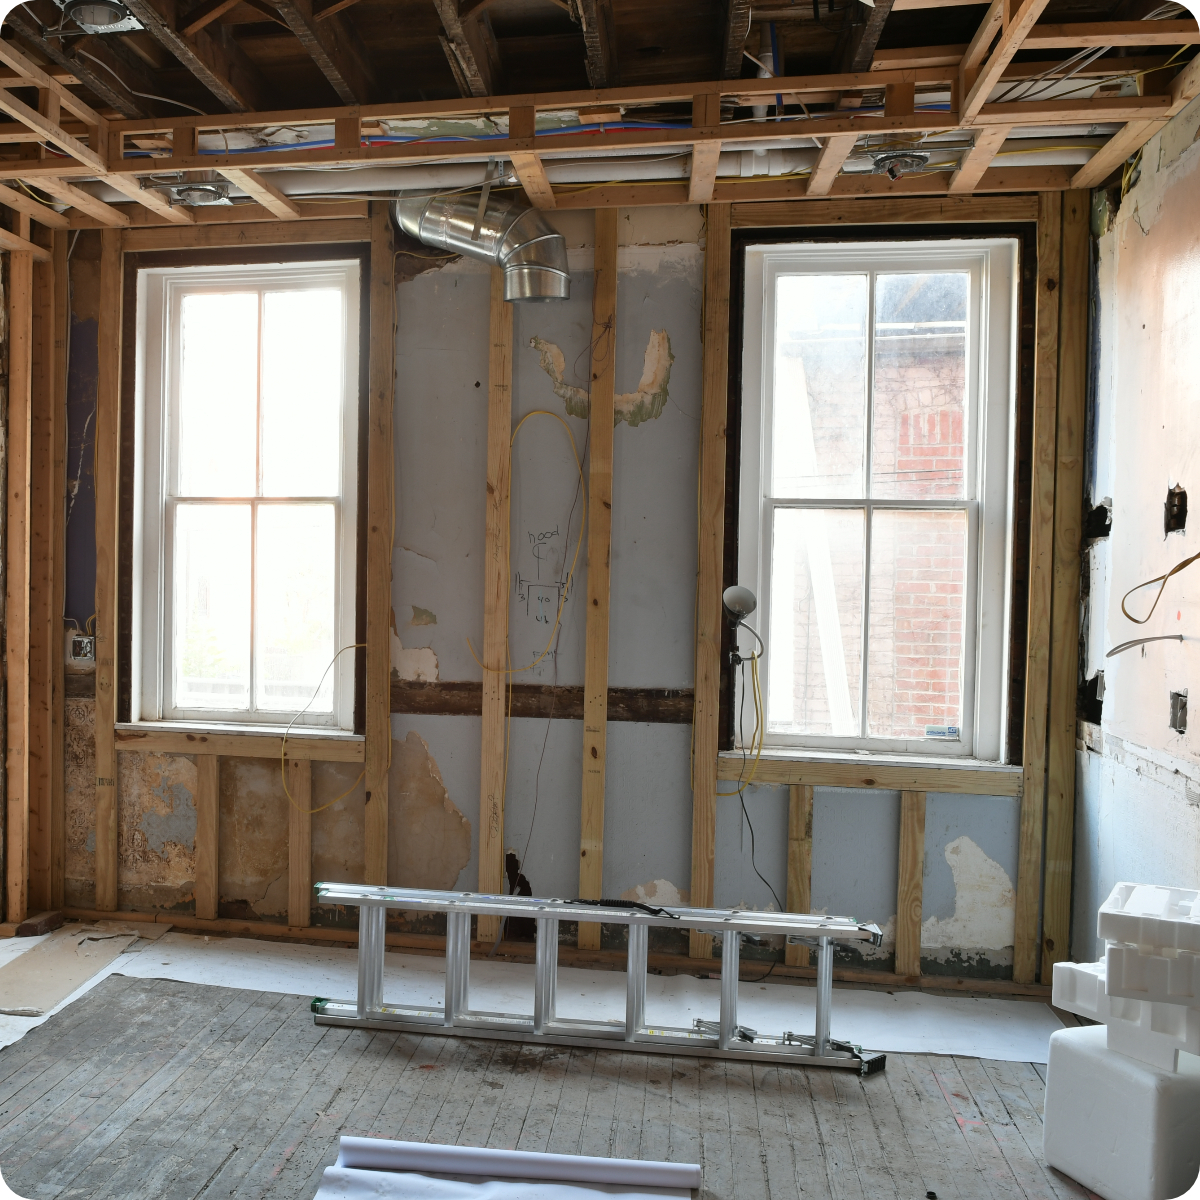
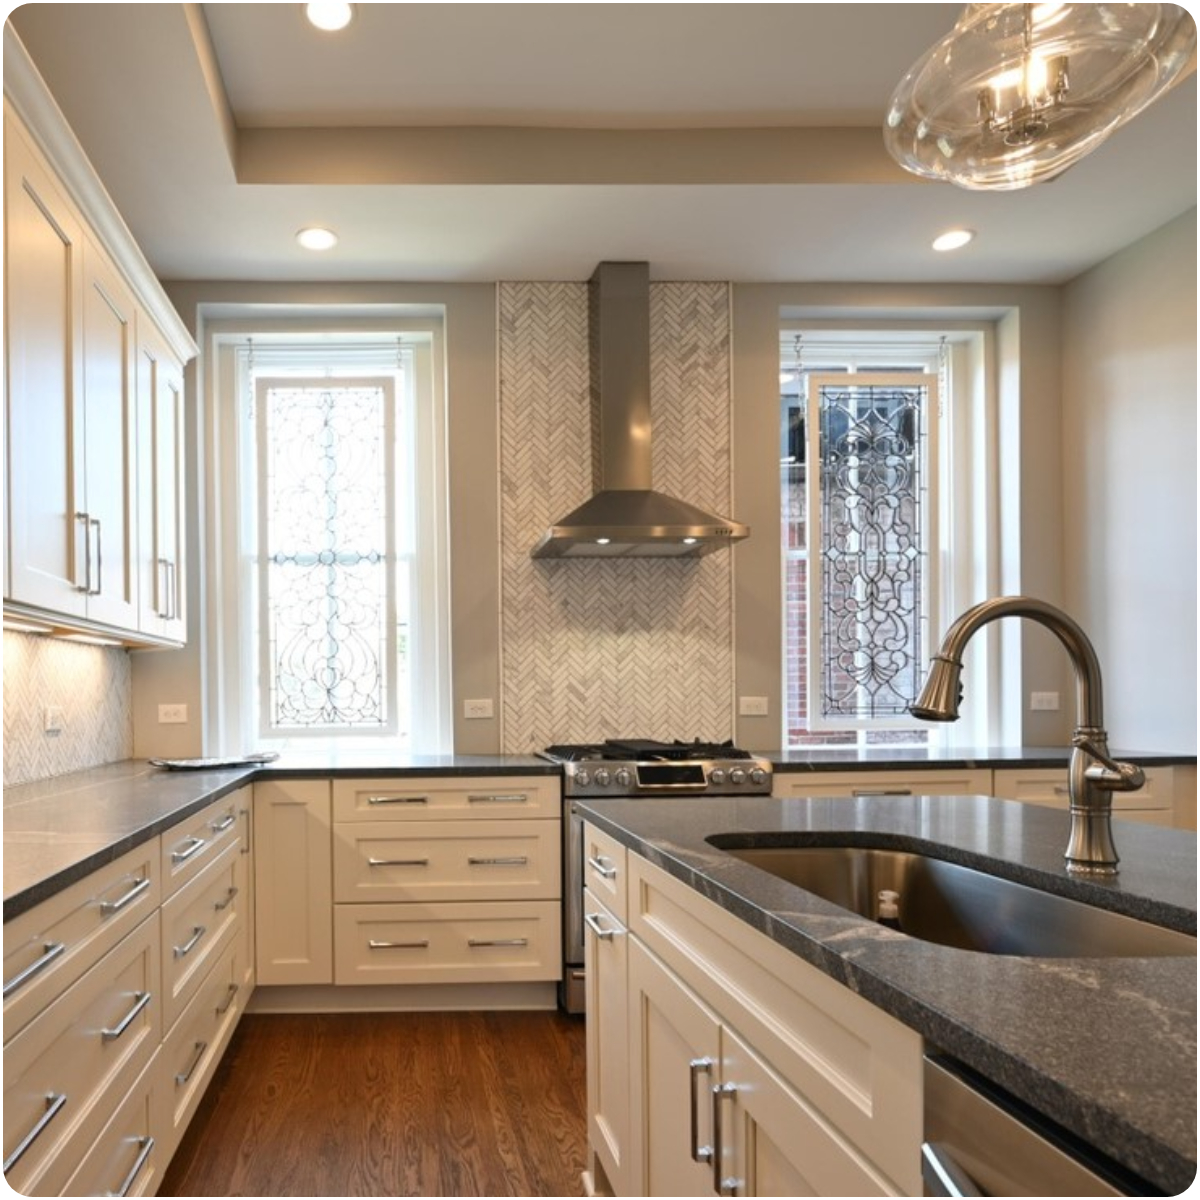
The kitchen was completely gutted and reframed. We closed off a window and an opening to the sun porch. We added all new mechanicals and plumbing.
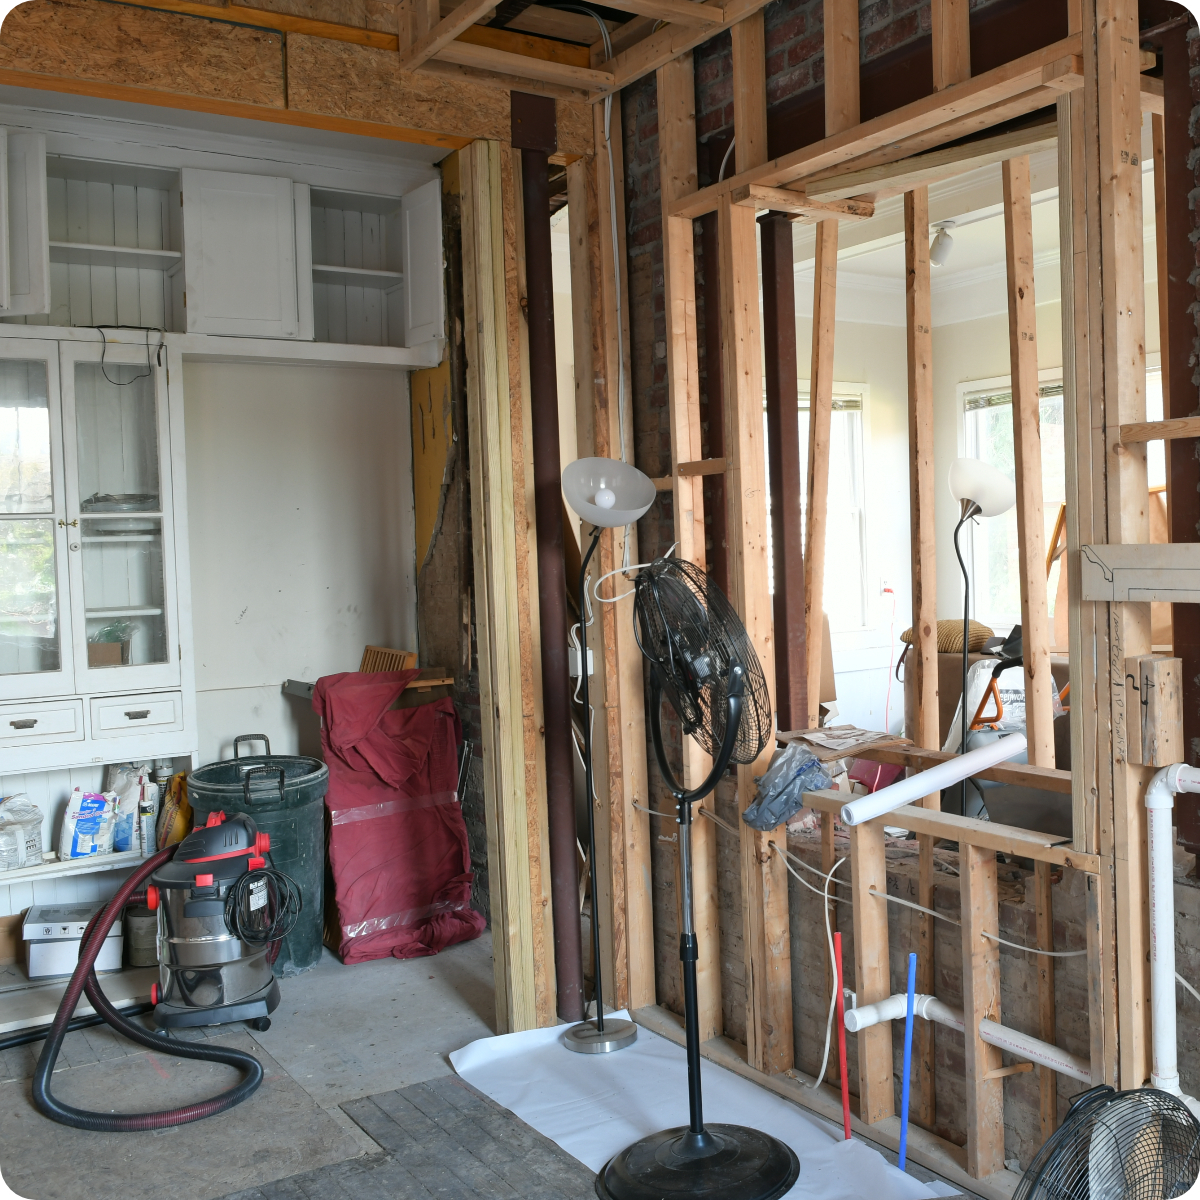
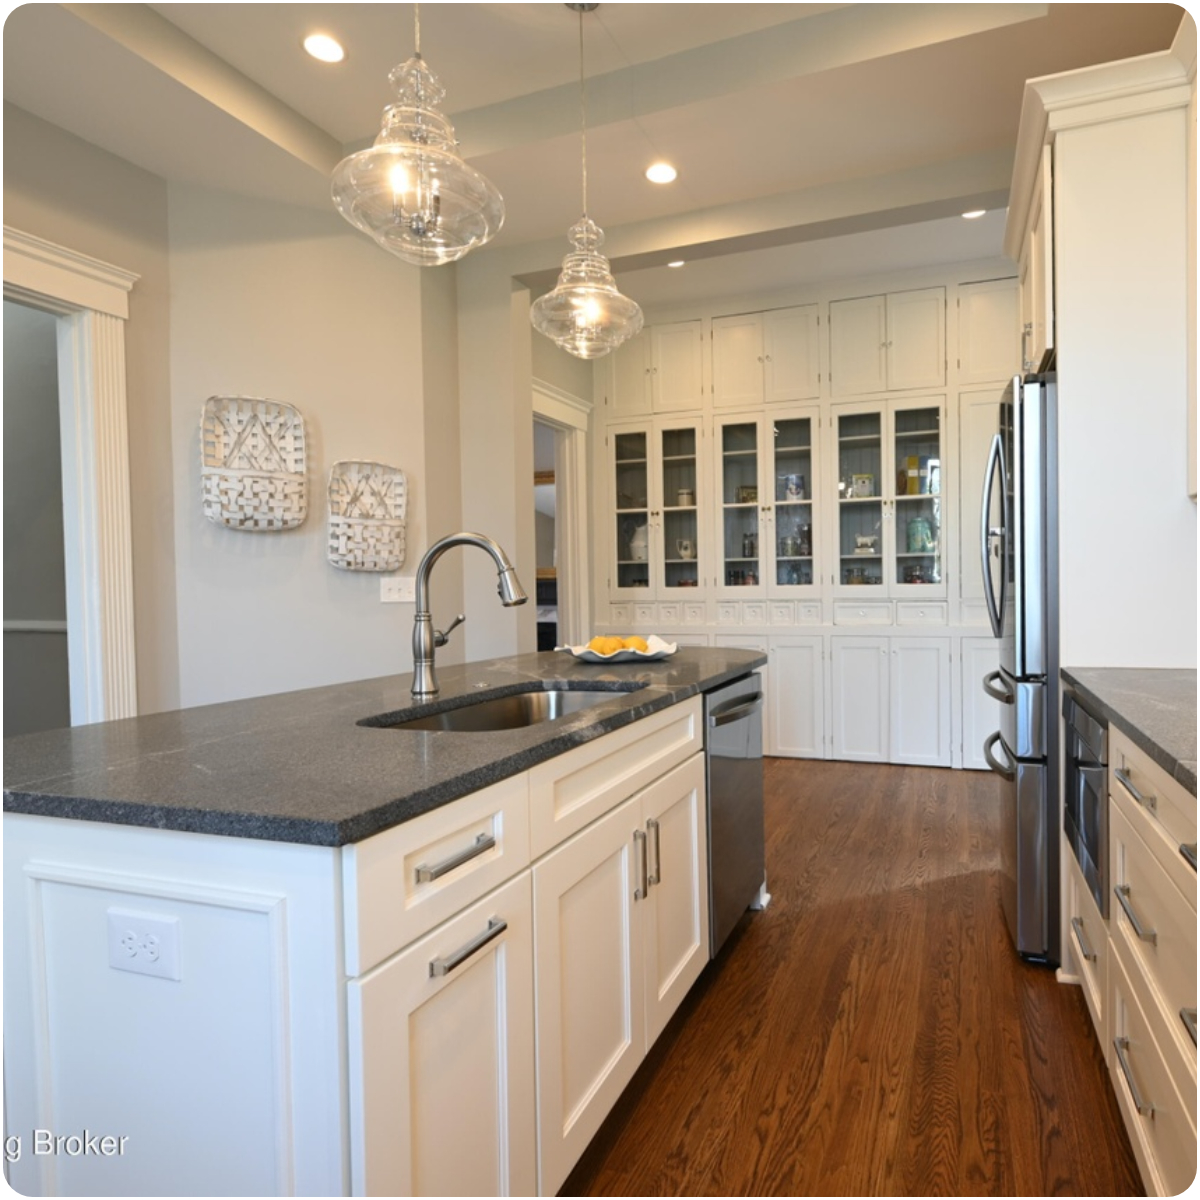
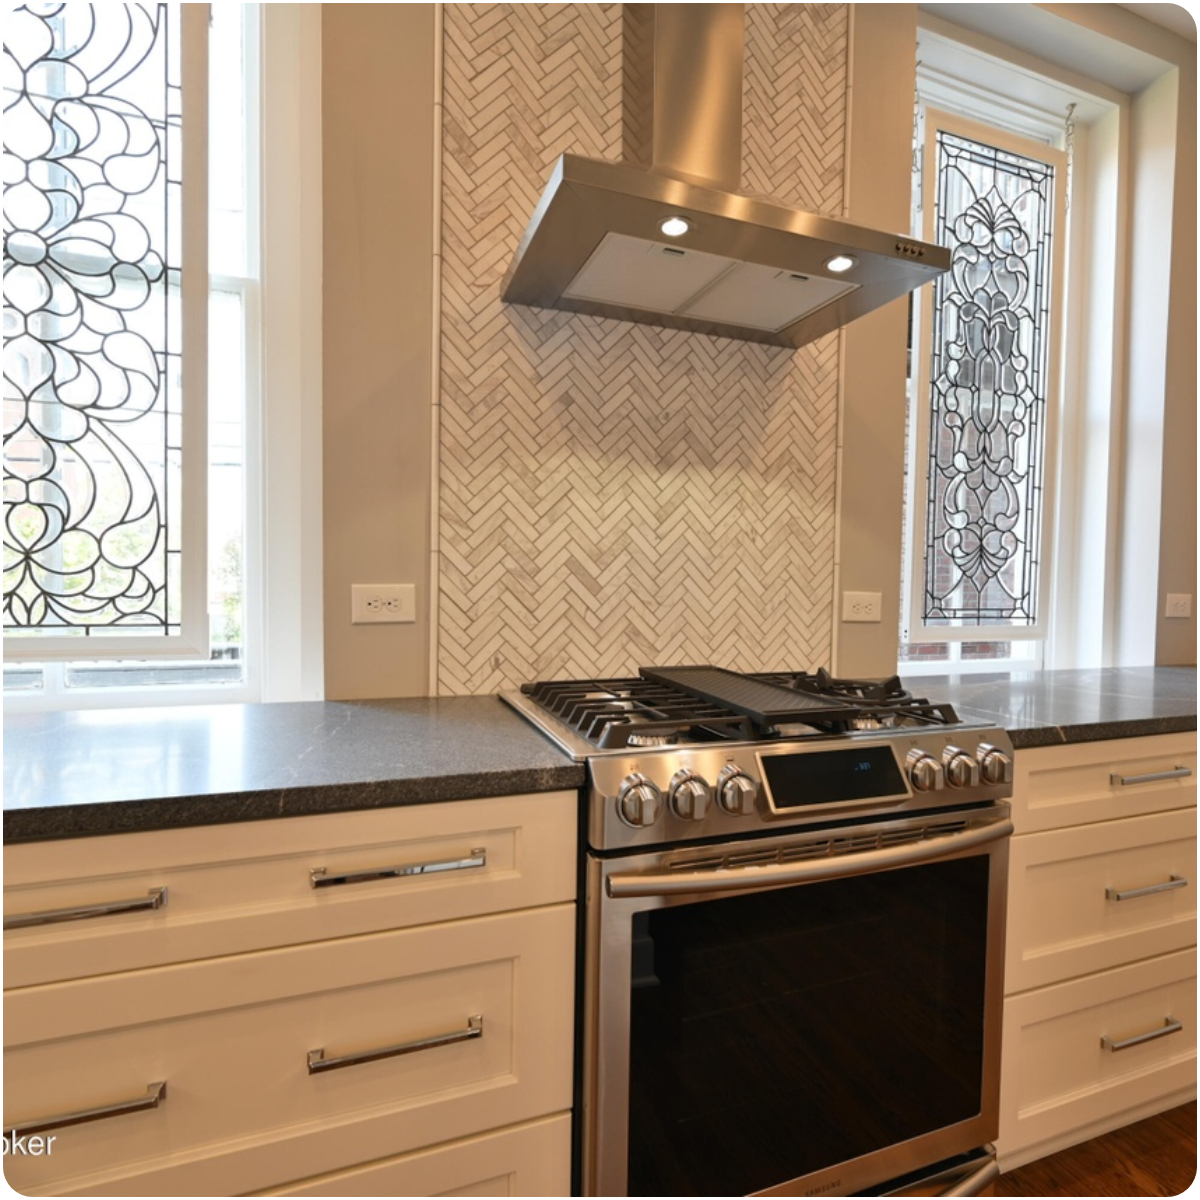
Top of the line granite countertops, marble backsplash, wood flooring, and upgraded stainless steel appliances were installed.

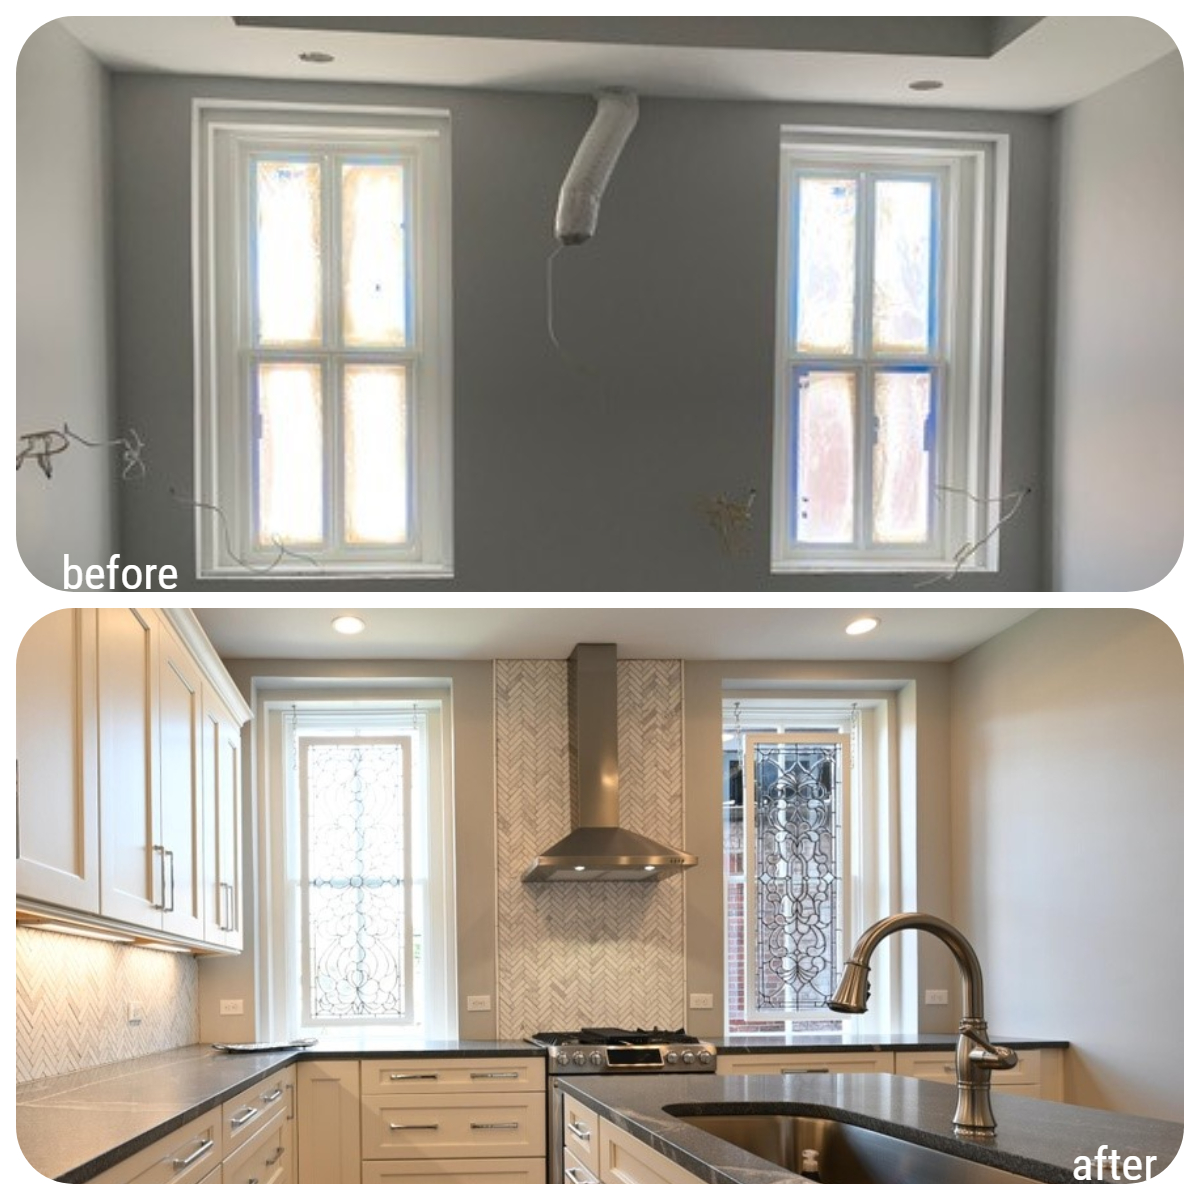
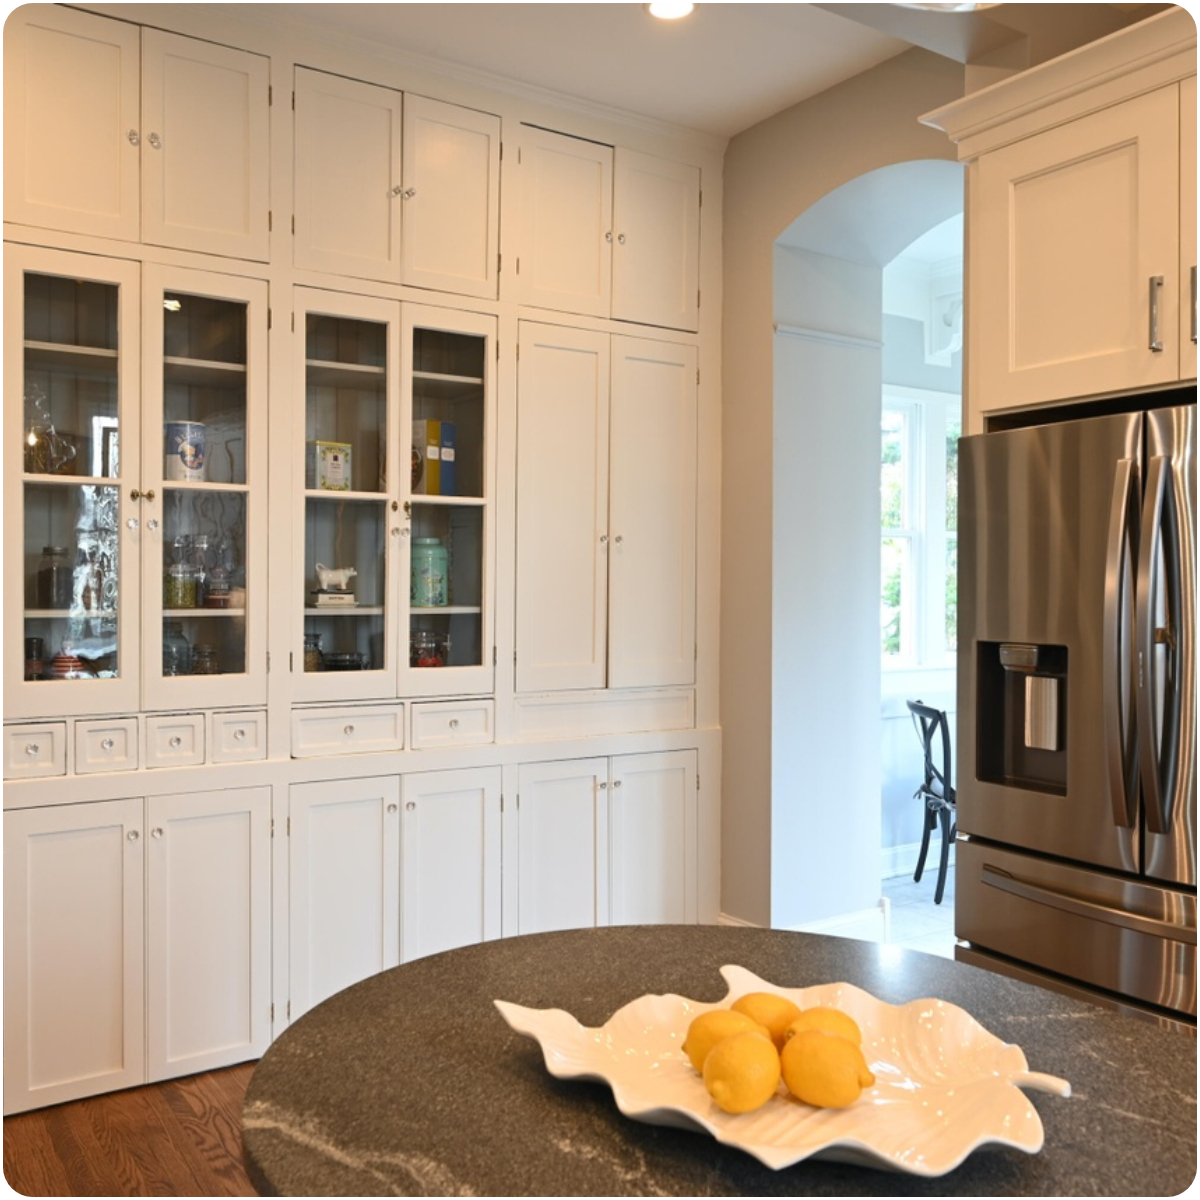
We restored the vintage built-in hutch, added a pantry to match the built-ins, and added leaded glass window coverings. The countertop is Silver Tapestry Granite found at OHM and fabricated by TradeMark.
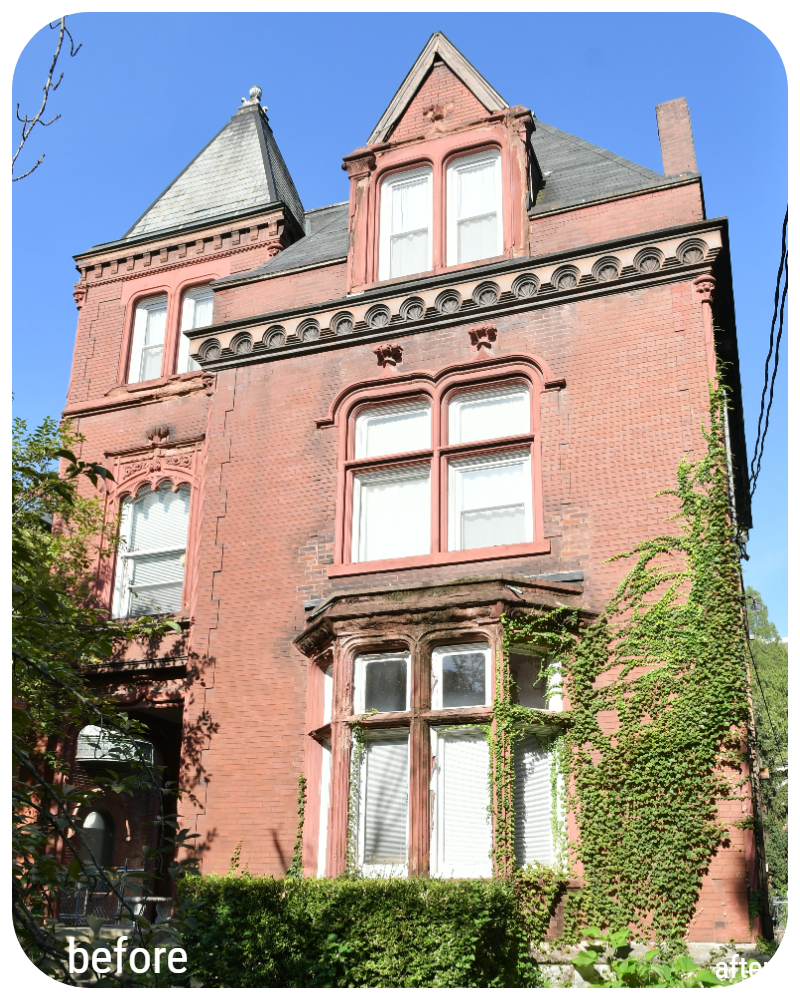
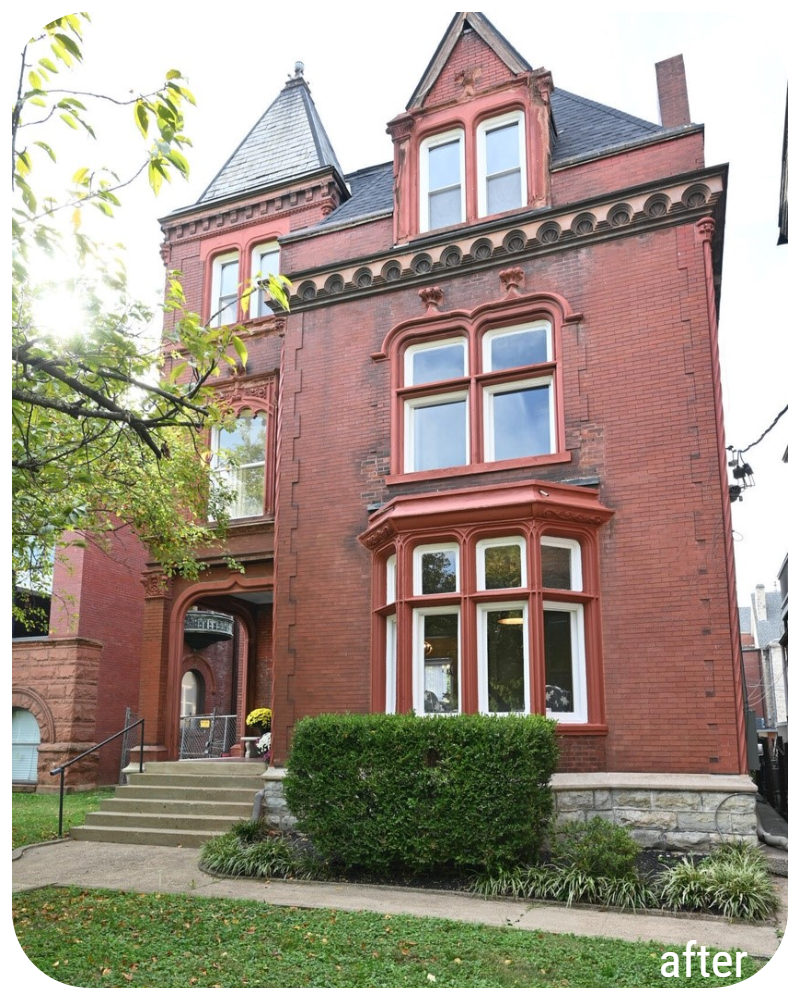
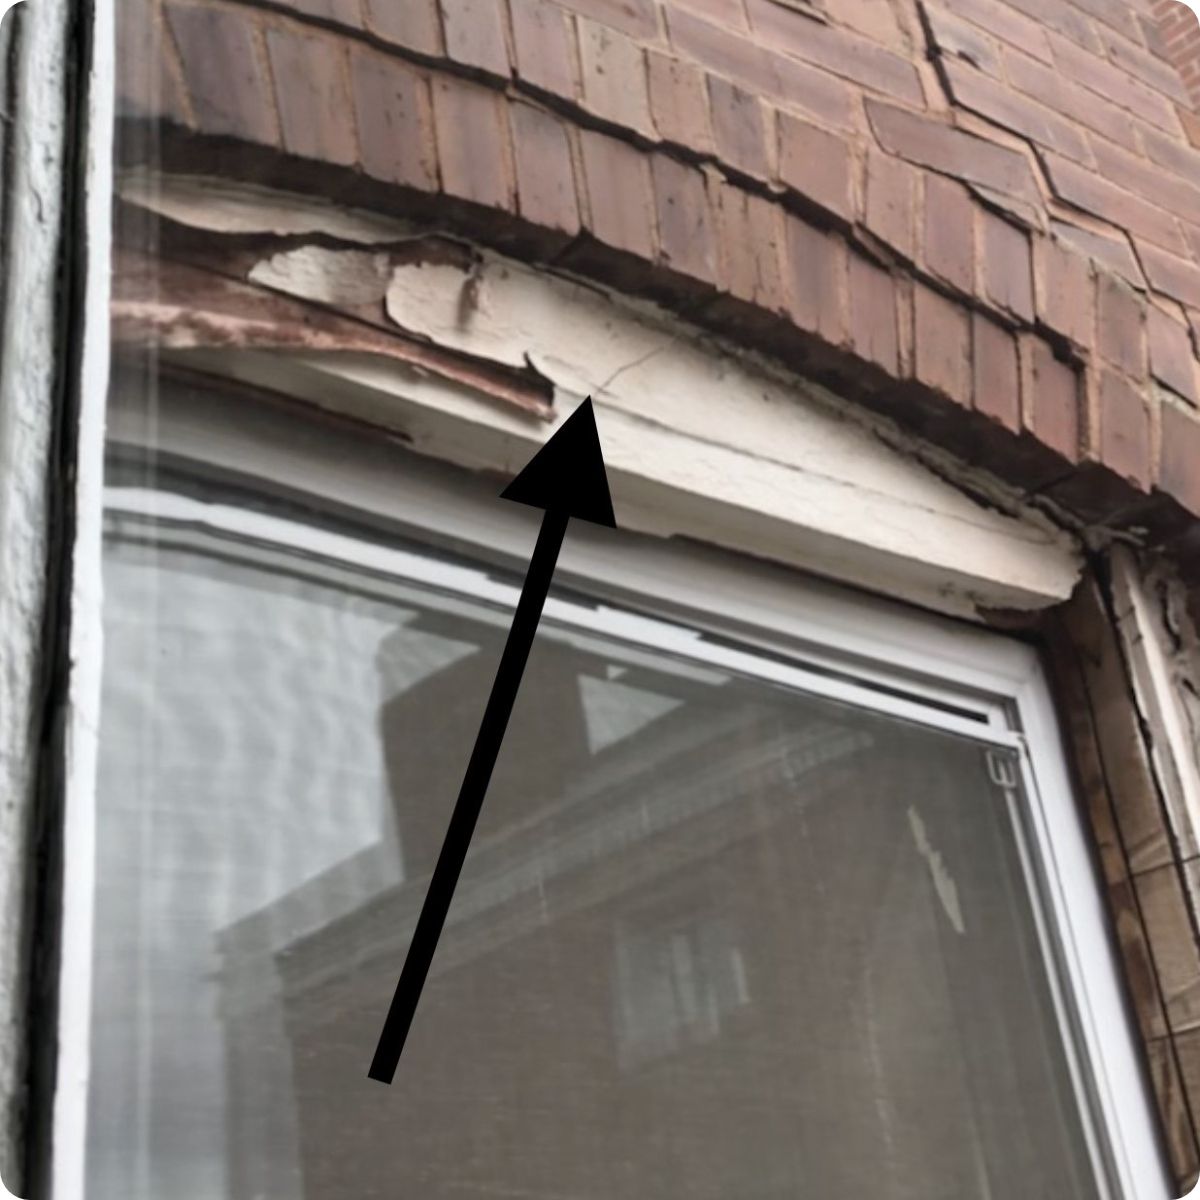
We repaired several places in the brick exterior due to water damage. We used new brick and reworked materials so that we could match the bricks natural aged look. More importantly, the 2nd and 3rd floor window lintels were falling and crumbling, and water was getting in around the windows. (A lintel is a beam placed across openings like doors, windows etc. in buildings to support the load from the structure above. When an opening is made in a home, there is a concentrated load above the doorway or window opening that must be supported.) We exited from inside the 2nd floor windows to climb on the scaffolding to repair the 3rd floor brick around windows.

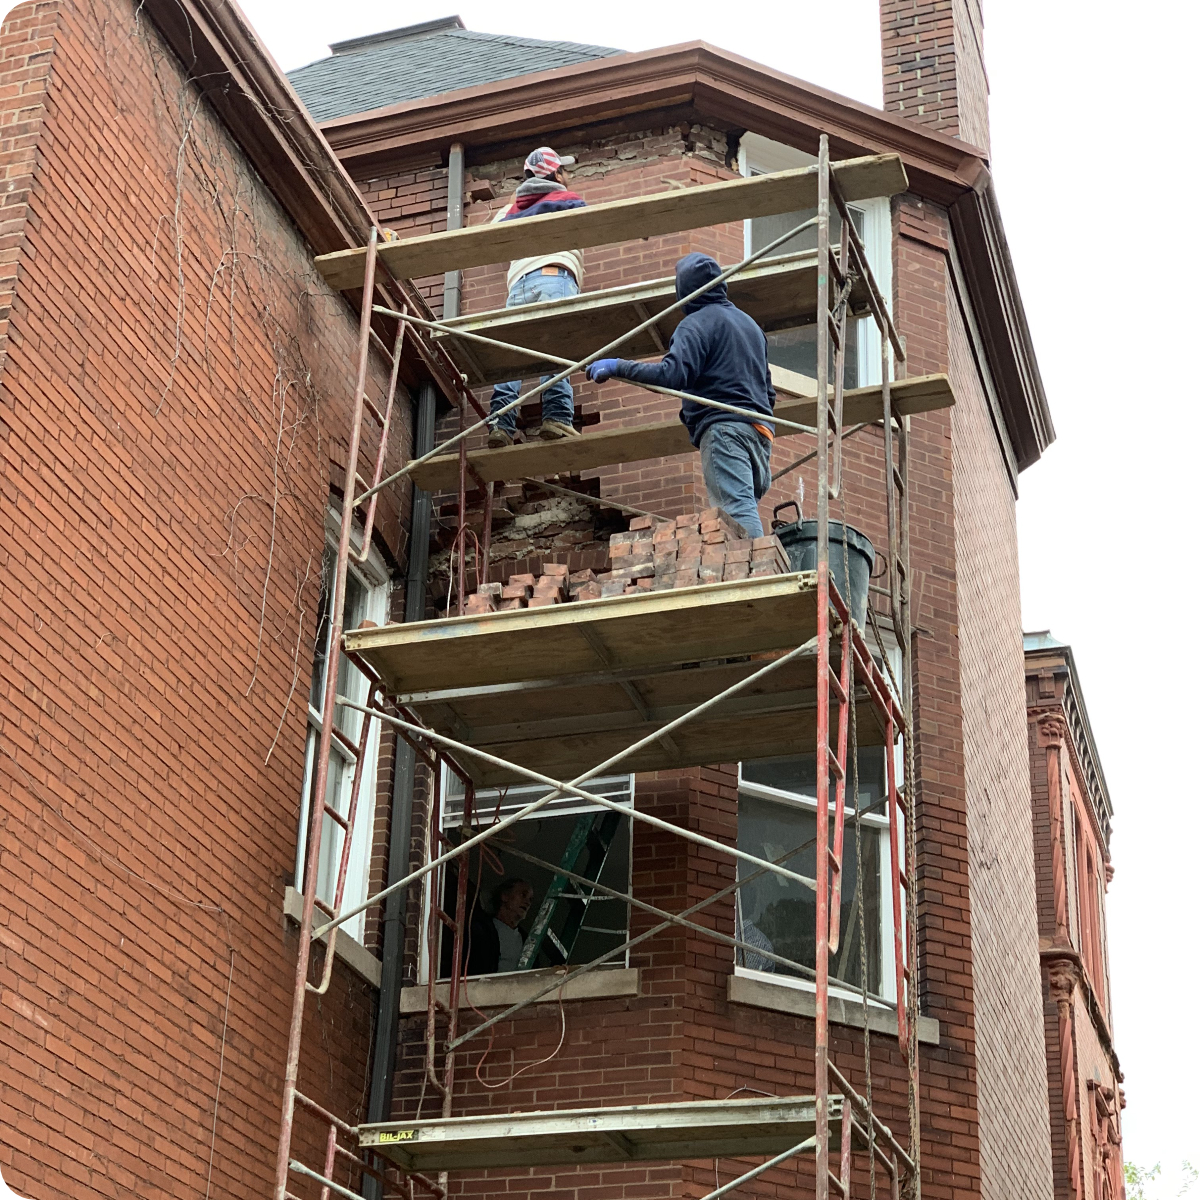
We also repaired the red sandstone on the front bay window.
The first floor consists of a large foyer, formal living room, formal dining room, a kitchen and a half bath.
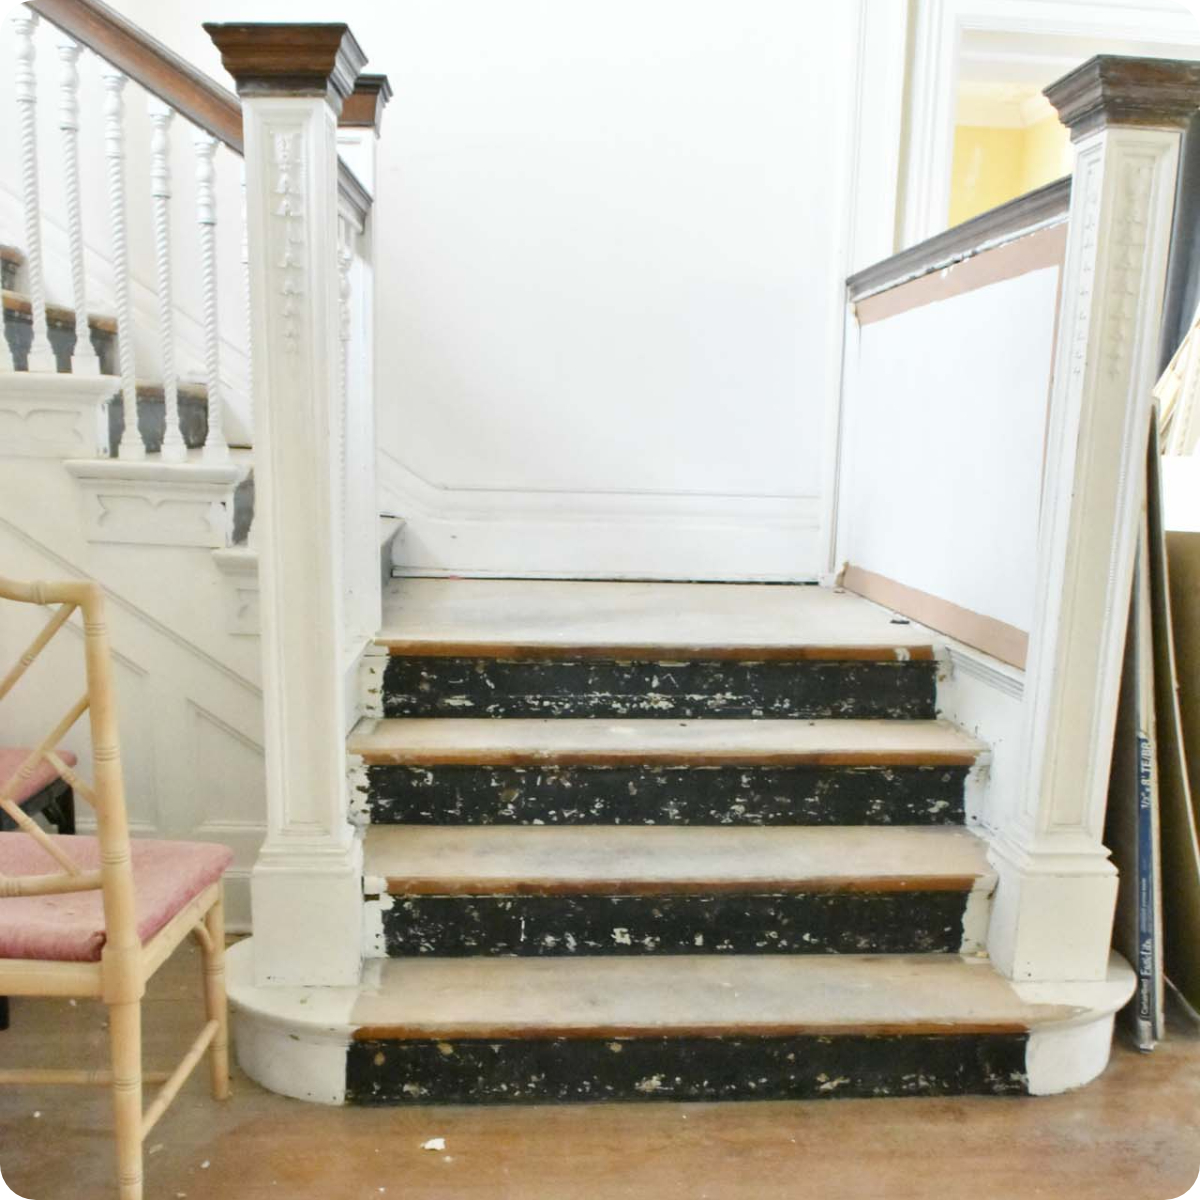 Foyer Stairs: Before
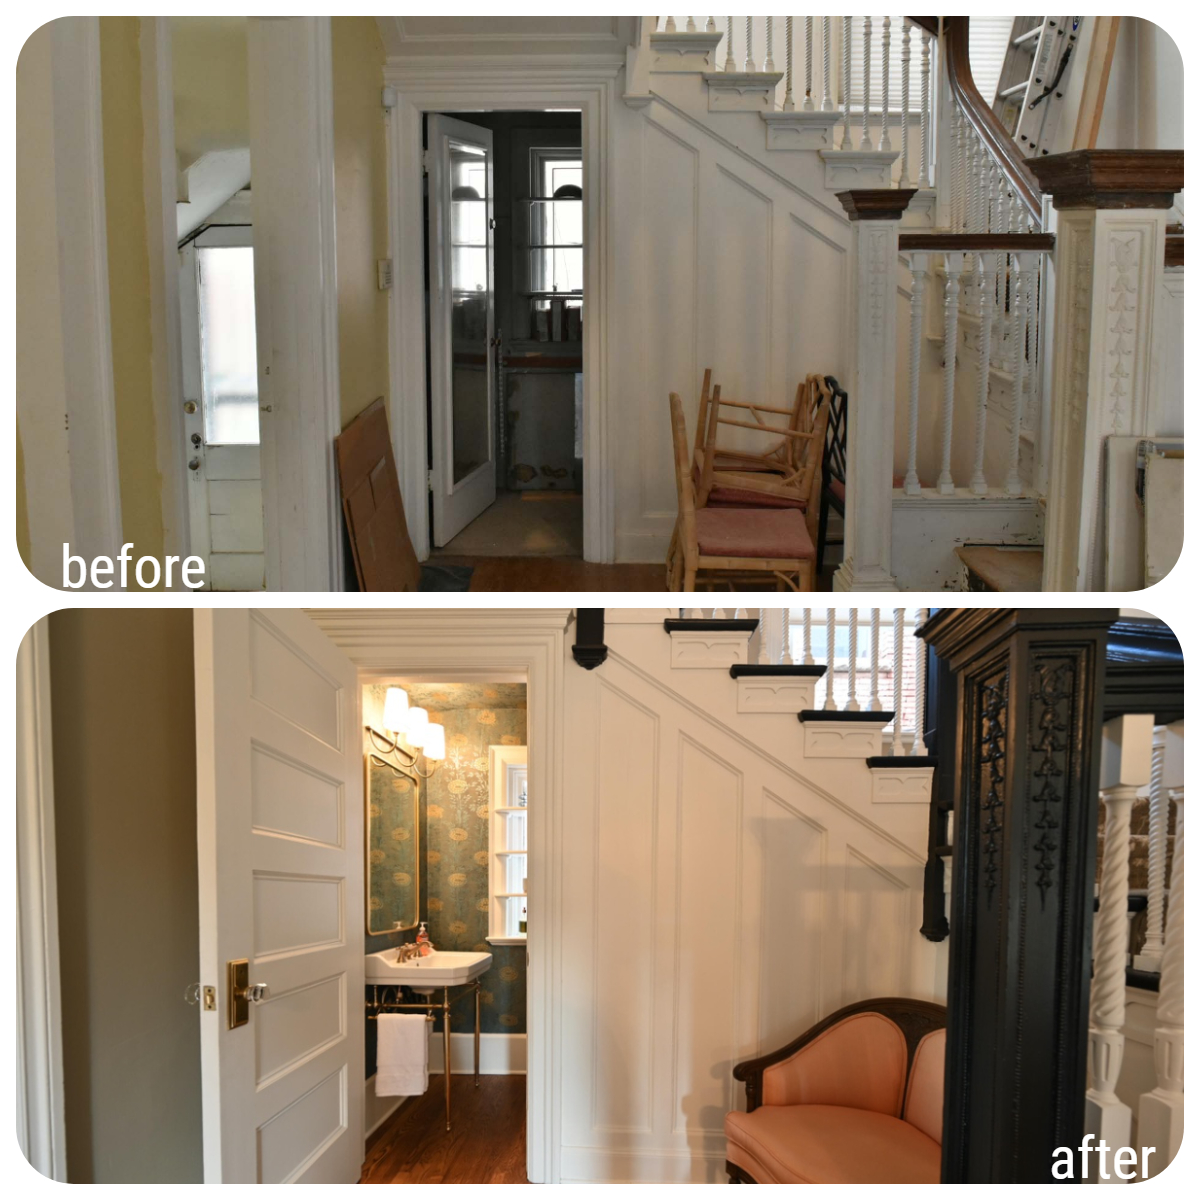
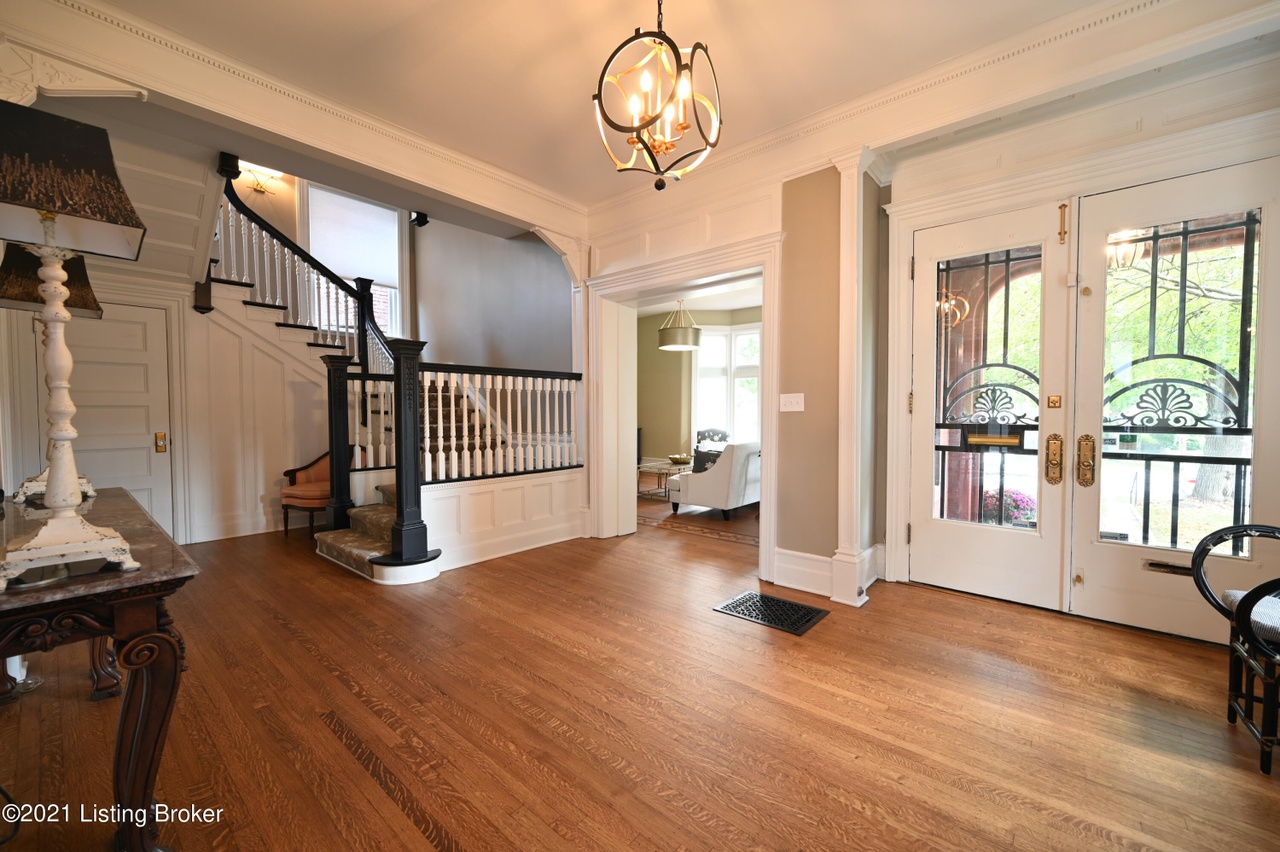
Before & After: Entry hall and staircase
A 1/2 bath was added under the stairway where a utility storage closet previously hid. A tiny unusable ½ bath was removed from the back hallway so a ½ bath was needed on the 1st floor for guests.
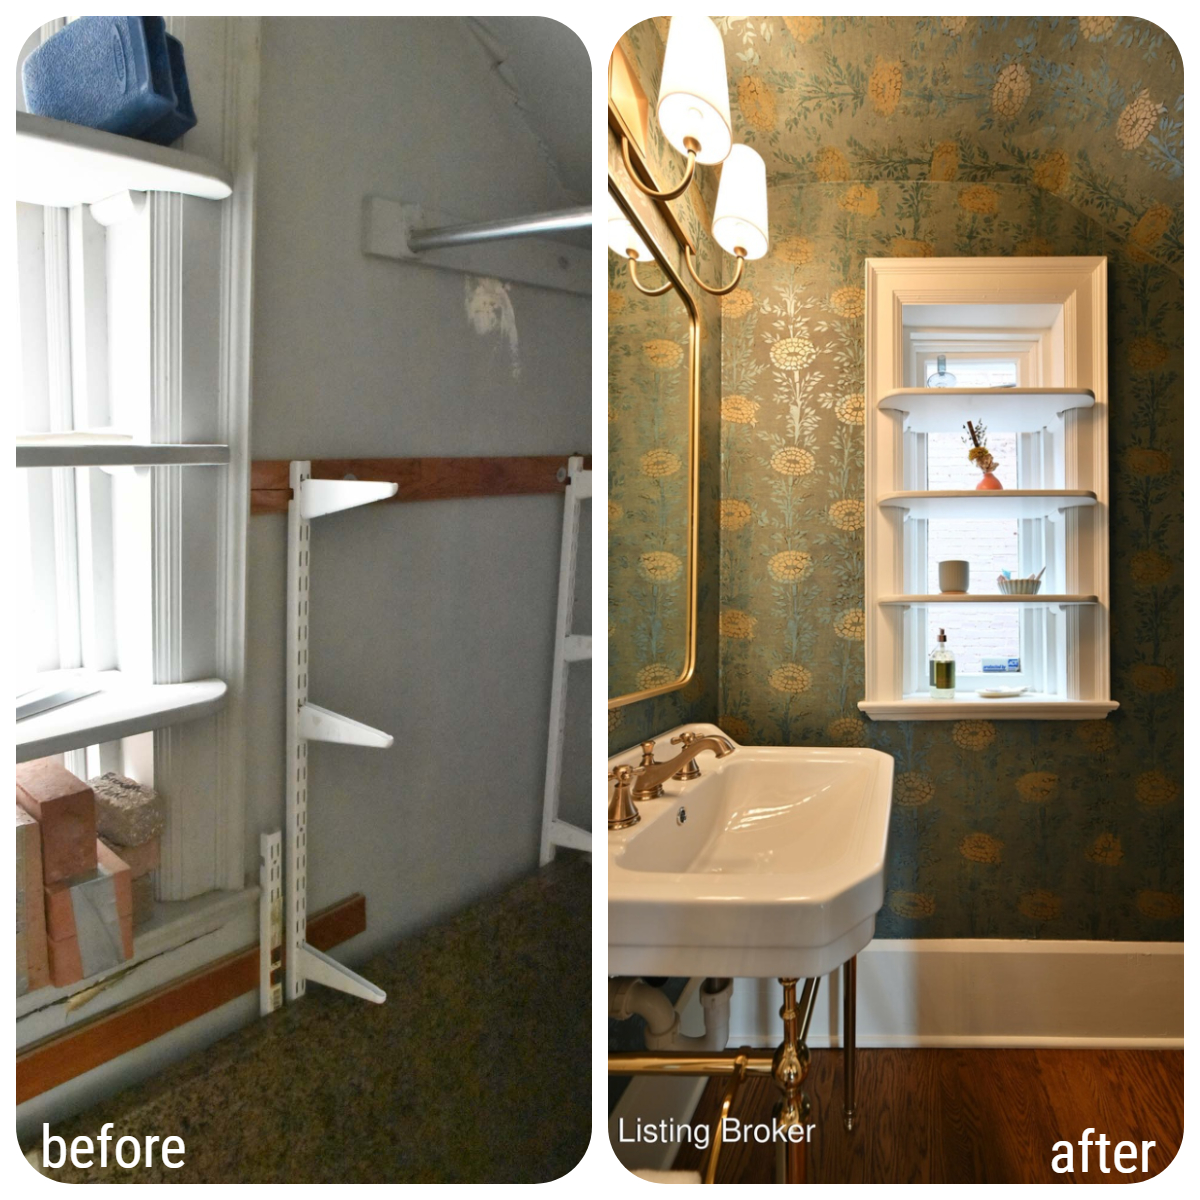

Before & After: Storage closet transformed into a 1/2 bath off the entry
 Foyer Stairs: After
 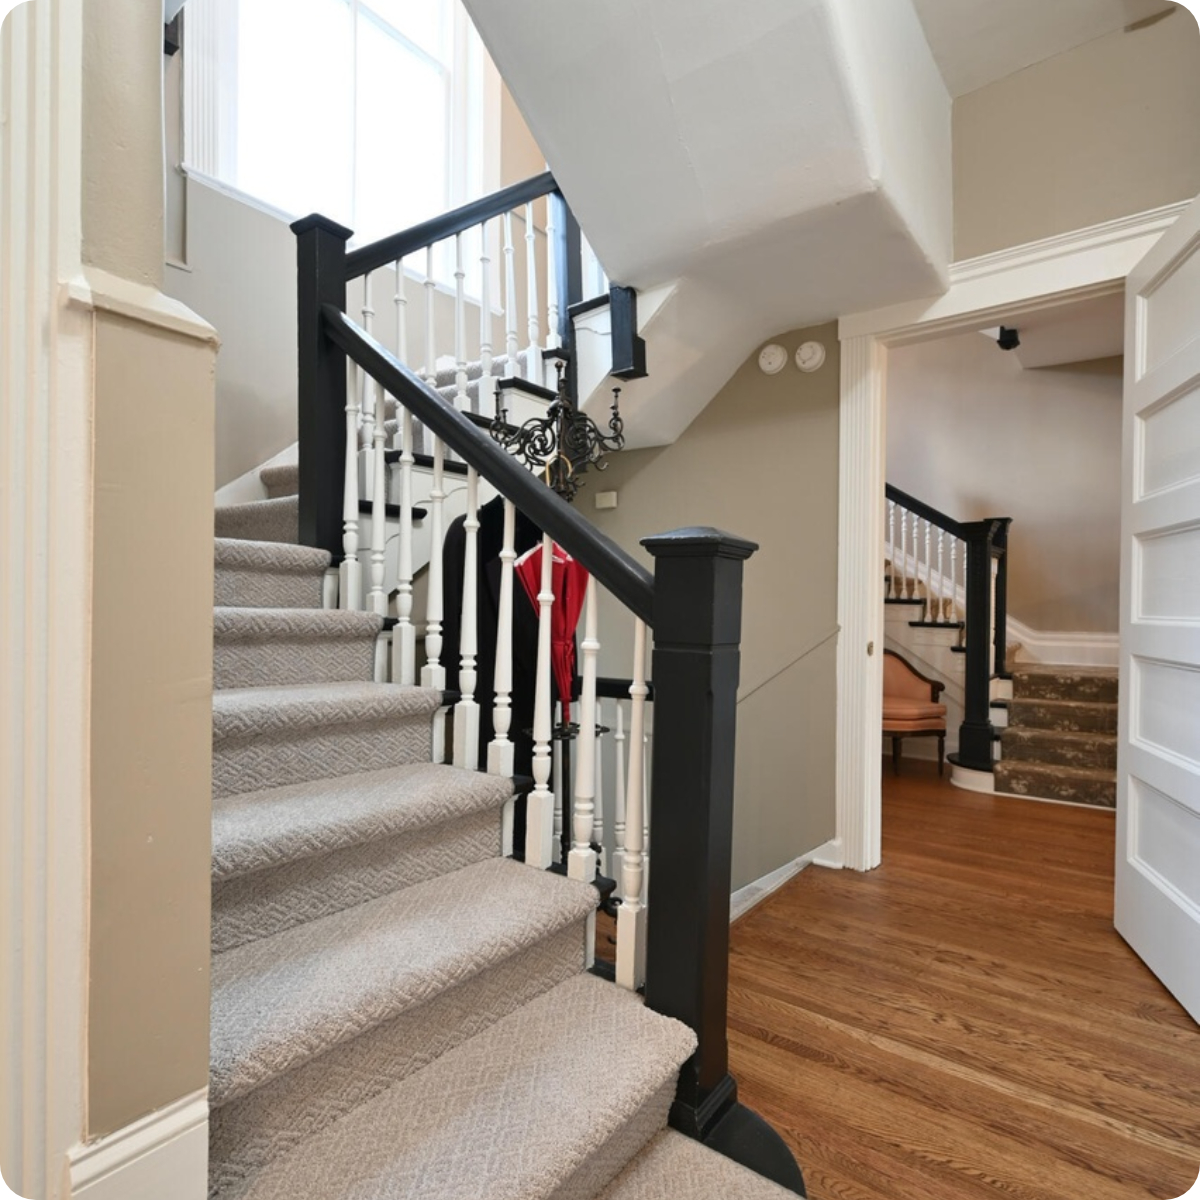 Back Hallway Stairs: After
We replaced all railing on the first floor. We removed the wall structure and replaced the individual balustrades to match the existing balusters. The steps were painted, and a carpet runner was added up to the 3rd floor on both front and back staircases.
The foyer ceiling had water damage due to a tub leaking from the floor above. The ceiling was repaired, and the entire room and trim was painted.
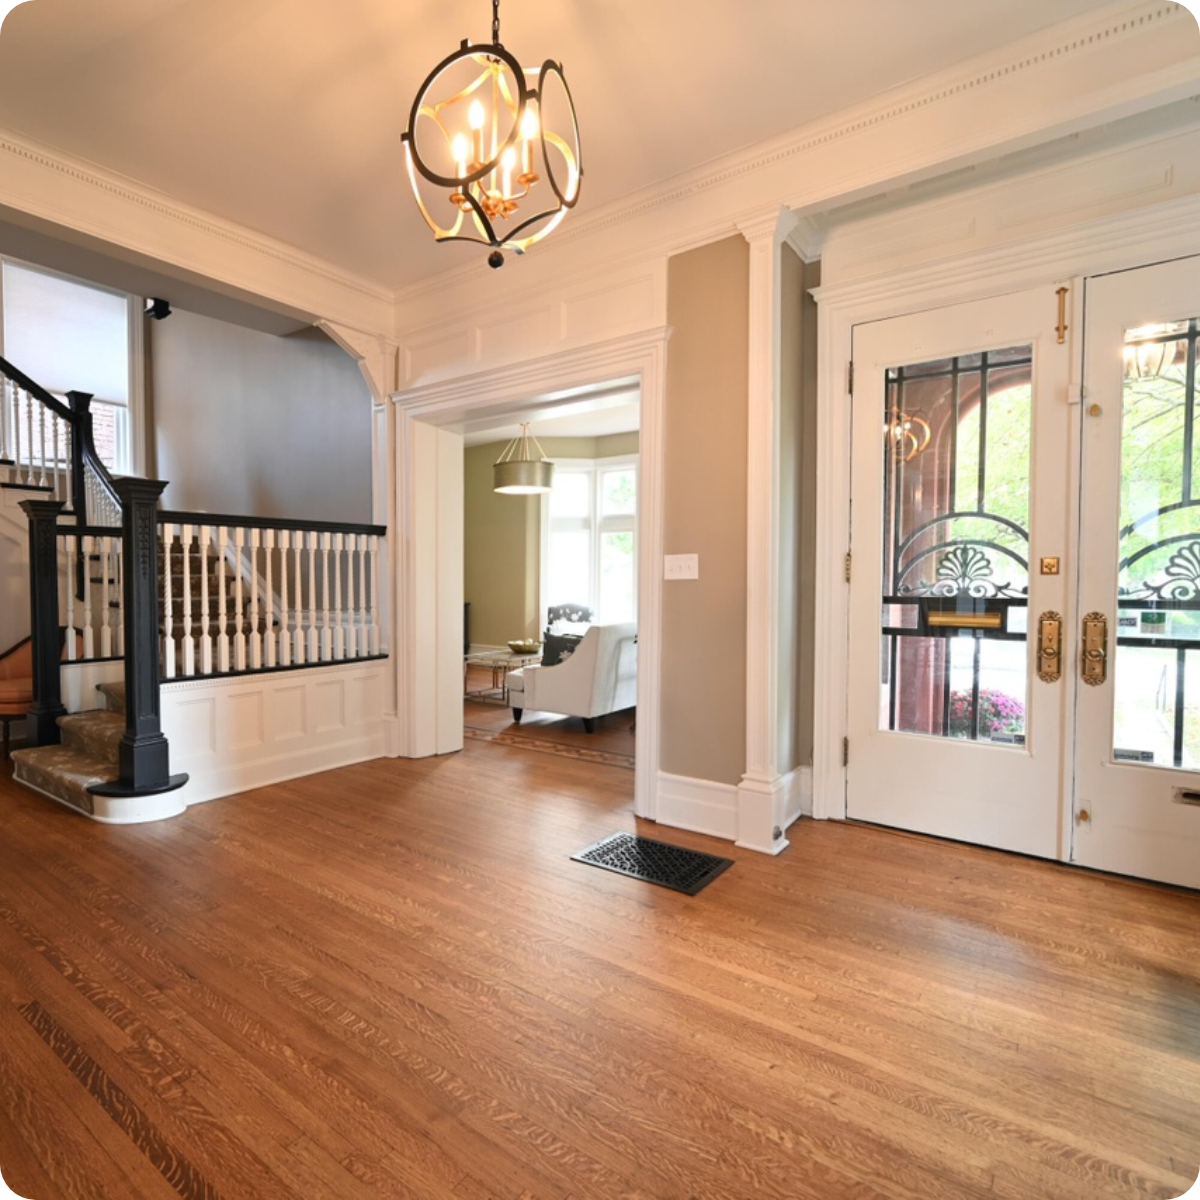 Foyer: After
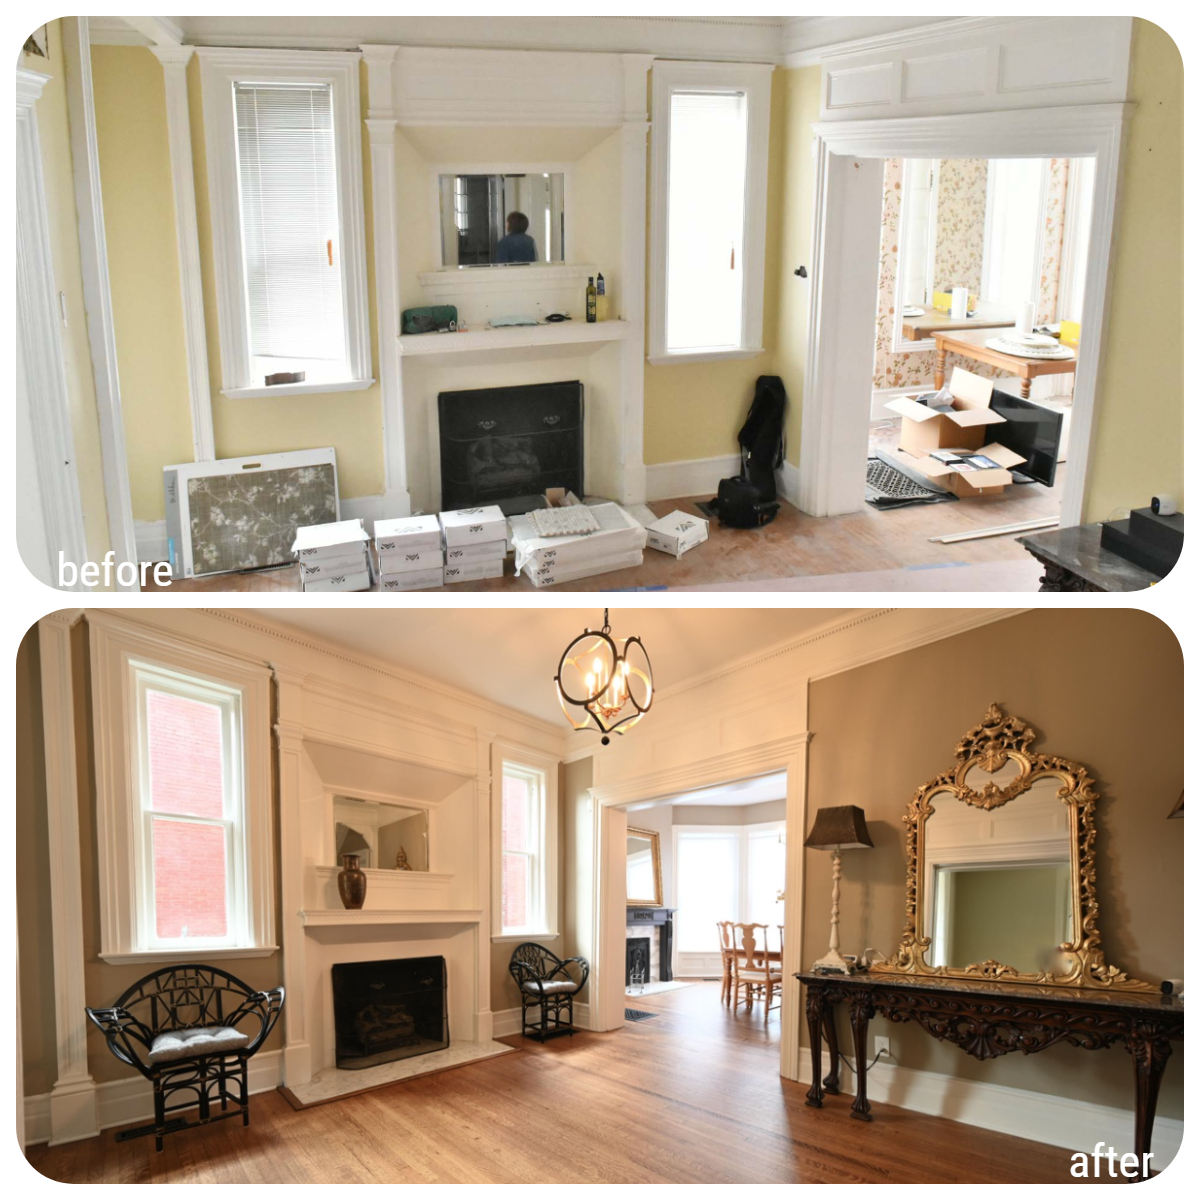
The Formal Living Room- The side wall had quite a bit of damage. We added faux fireplace mantel and façade where we believe historically there would have been a fireplace. The floors were also restored, refinished, and patched all by hand.
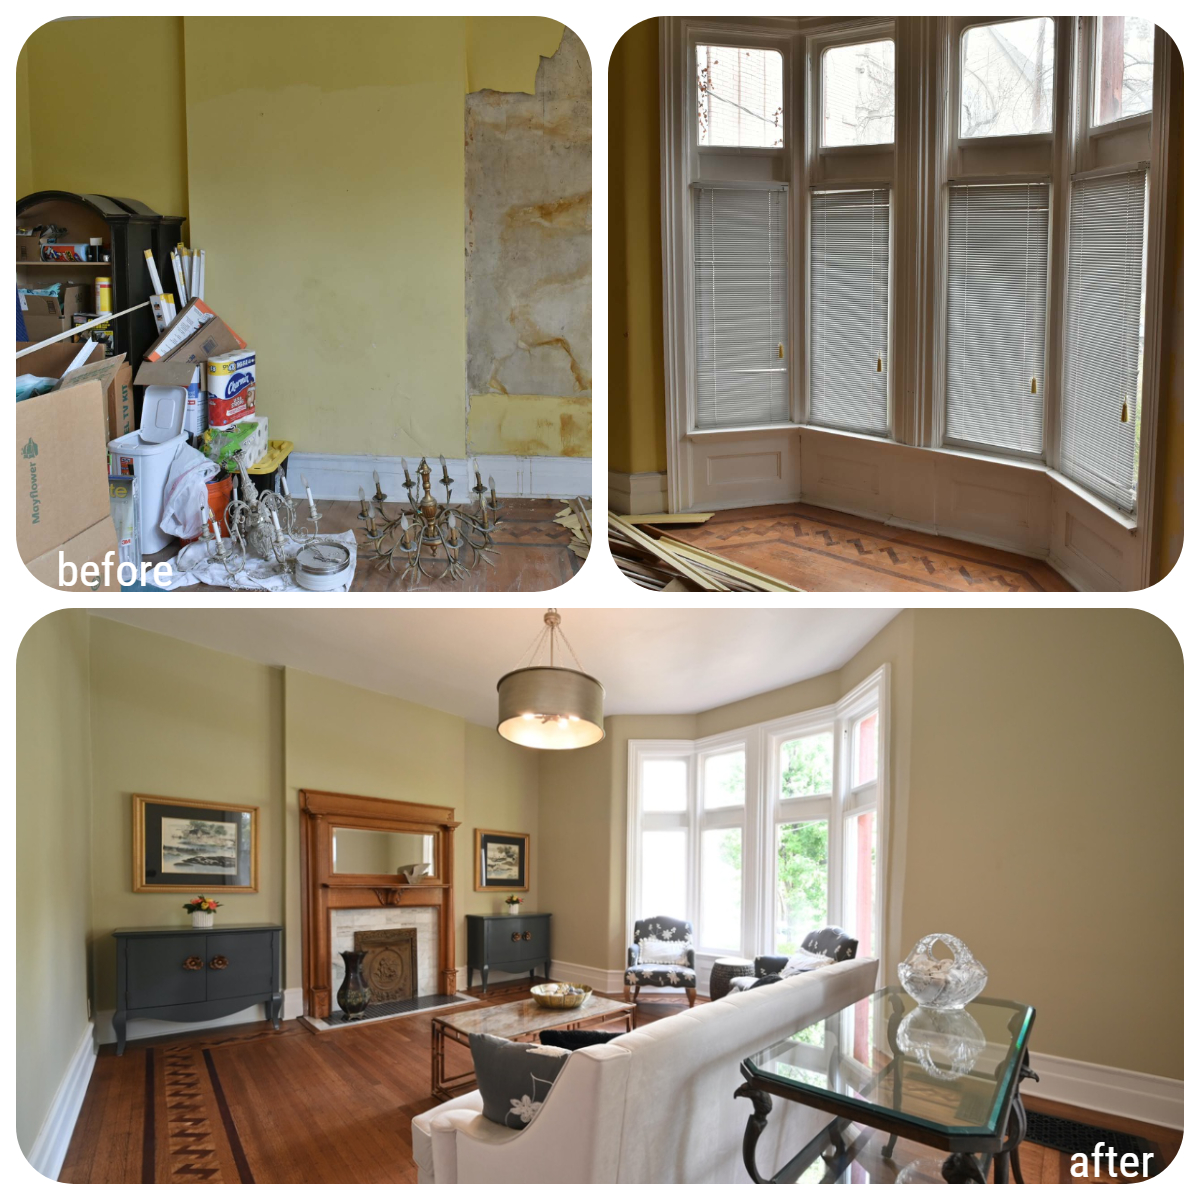
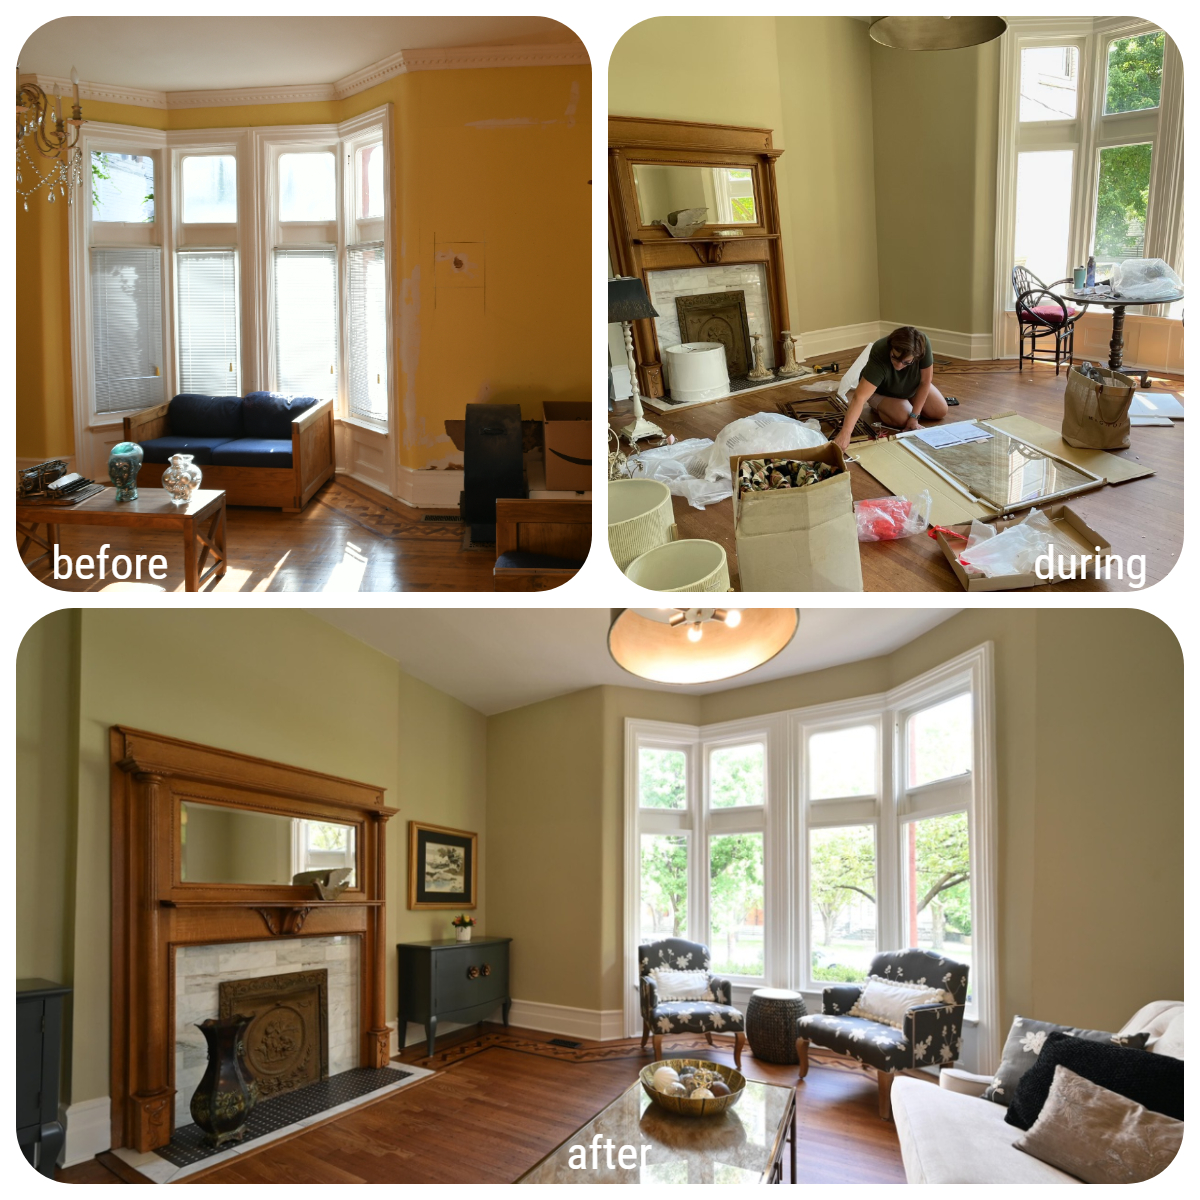 Before & After: Bay Window
 After: Living Room- Restored decorative inlay in original wood floor
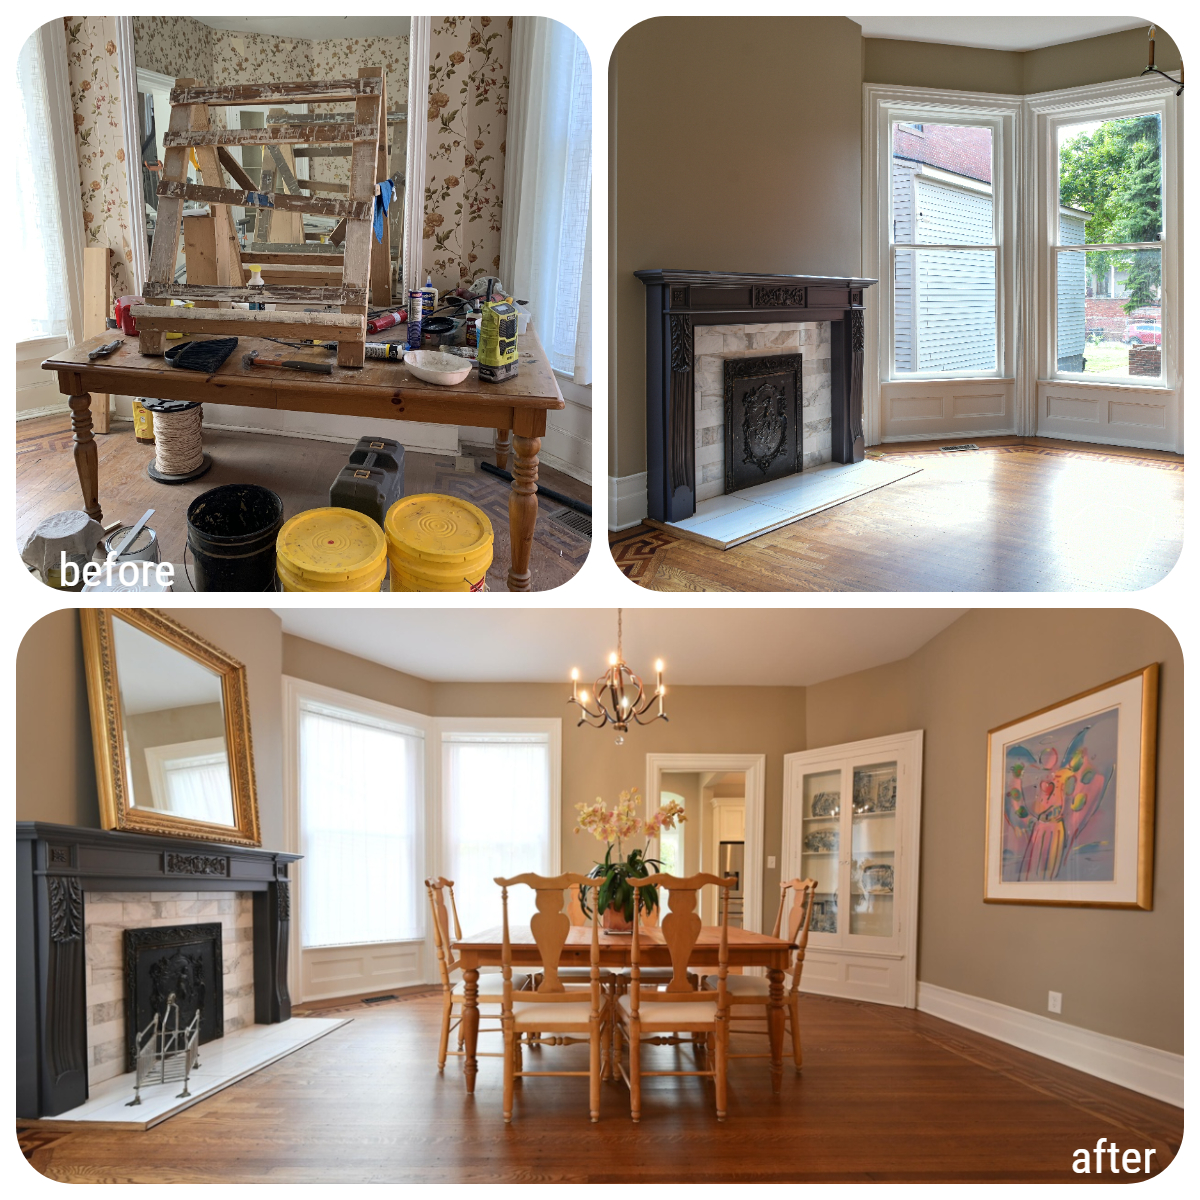
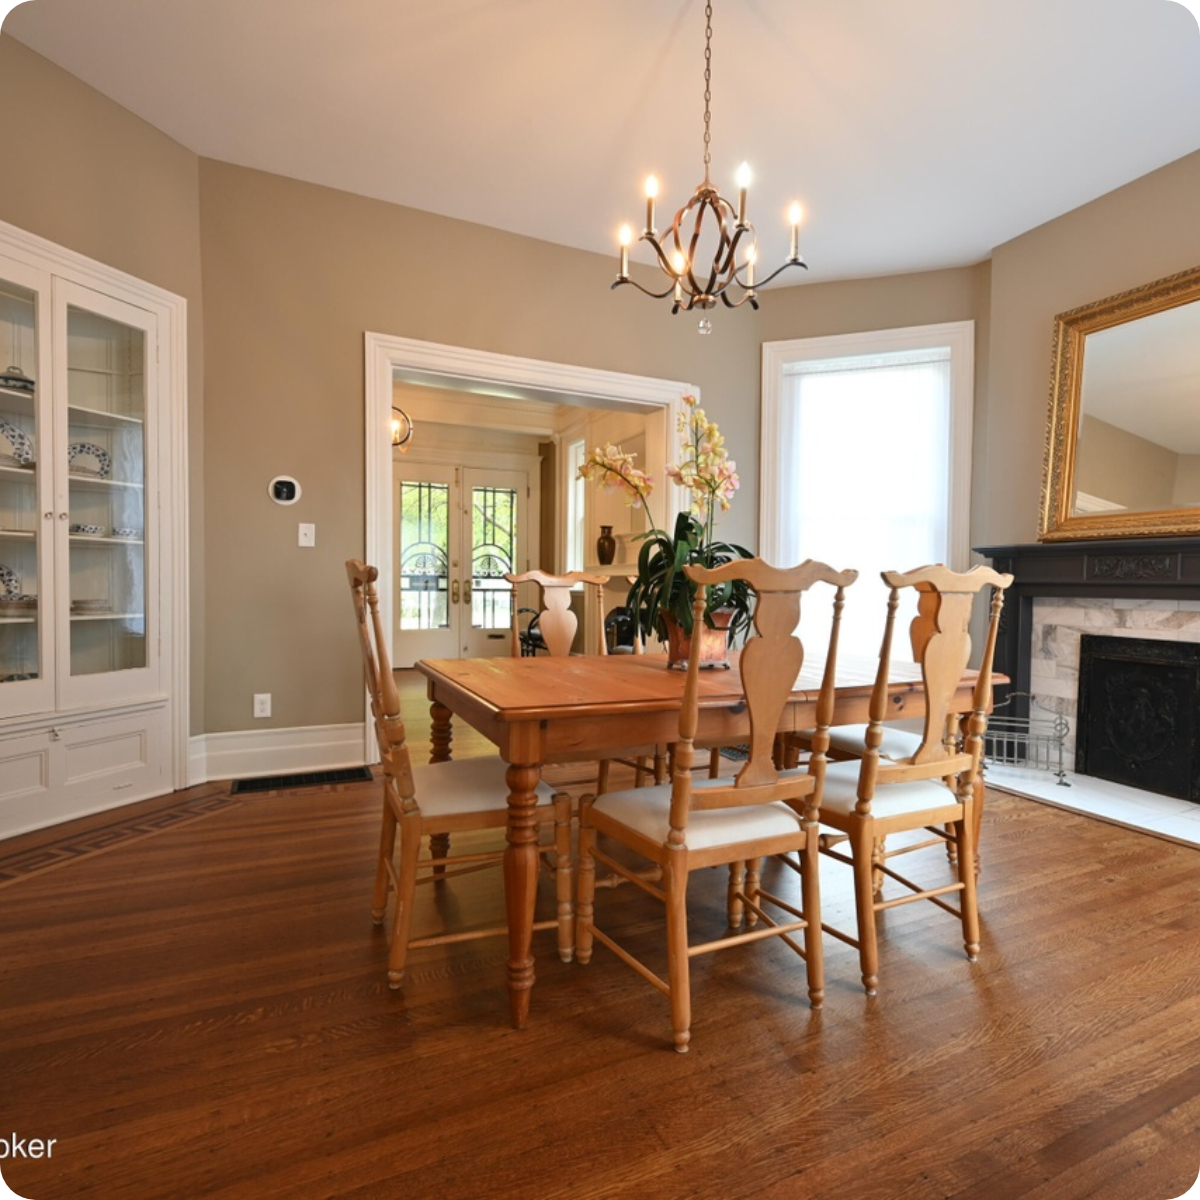
In the Dining Room, we removed the wallpaper, and installed a fireplace façade to add architectural detail to the room, once again in an area where we believe a fireplace once was placed. We updated the hardware on the corner built-ins and our wood guy patched in wood to make the inlay match the original flooring. Sometime in the past, vinyl flooring was placed down in this room damaging the original wood floor.
The Sun Porch- we closed a doorway and opened a new arch doorway. New tile was added. All windows were cleaned, reworked, and glazed to make them operable.
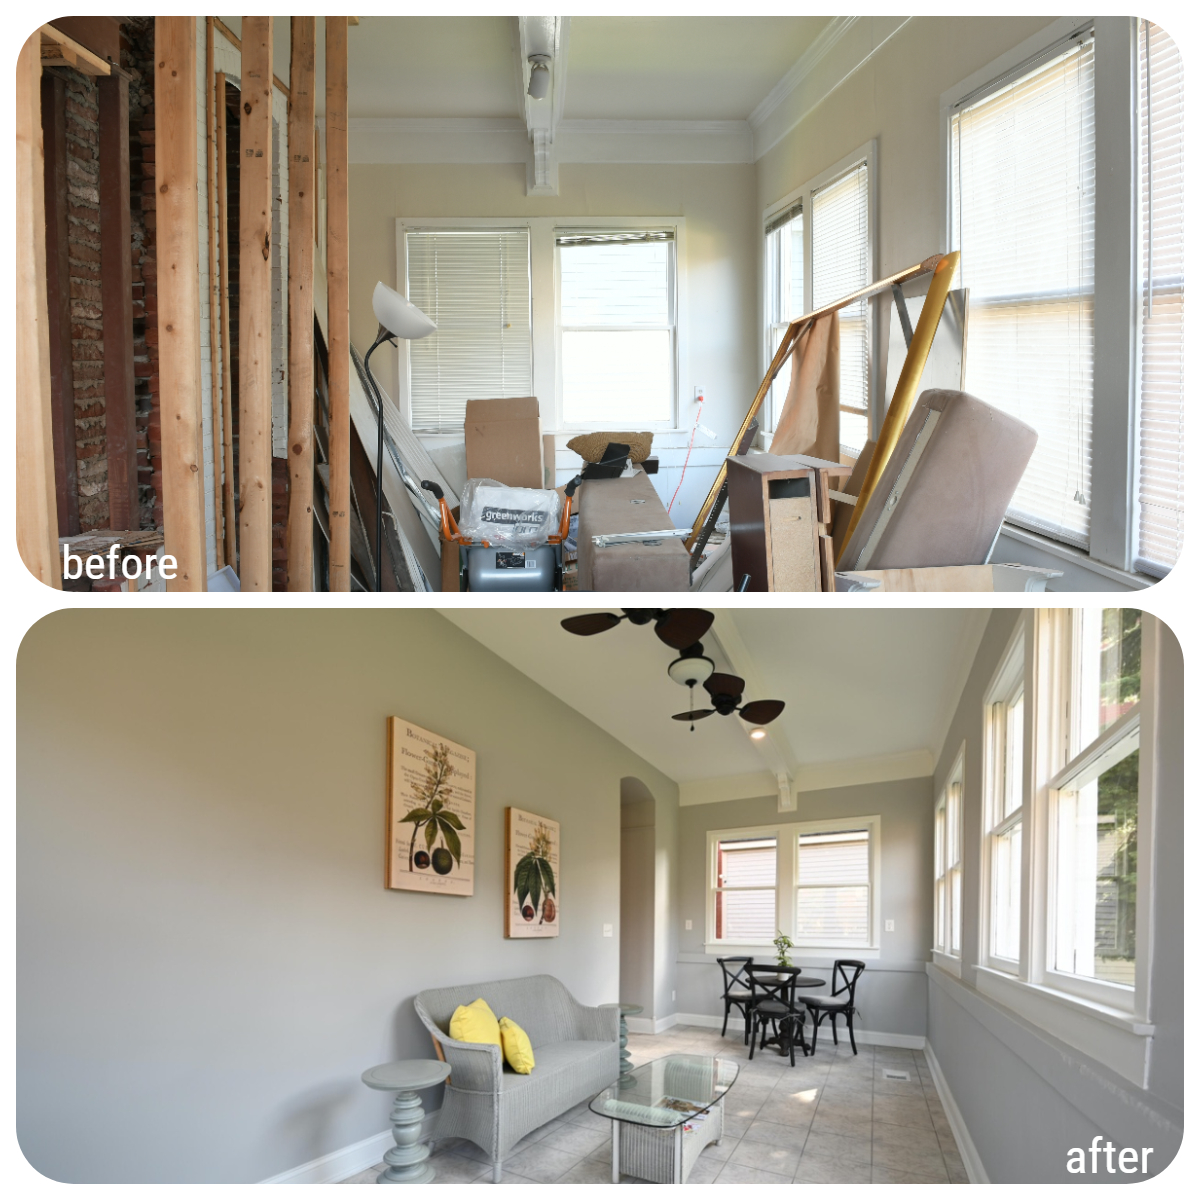
 Before & After: The Sun porch off the kitchen
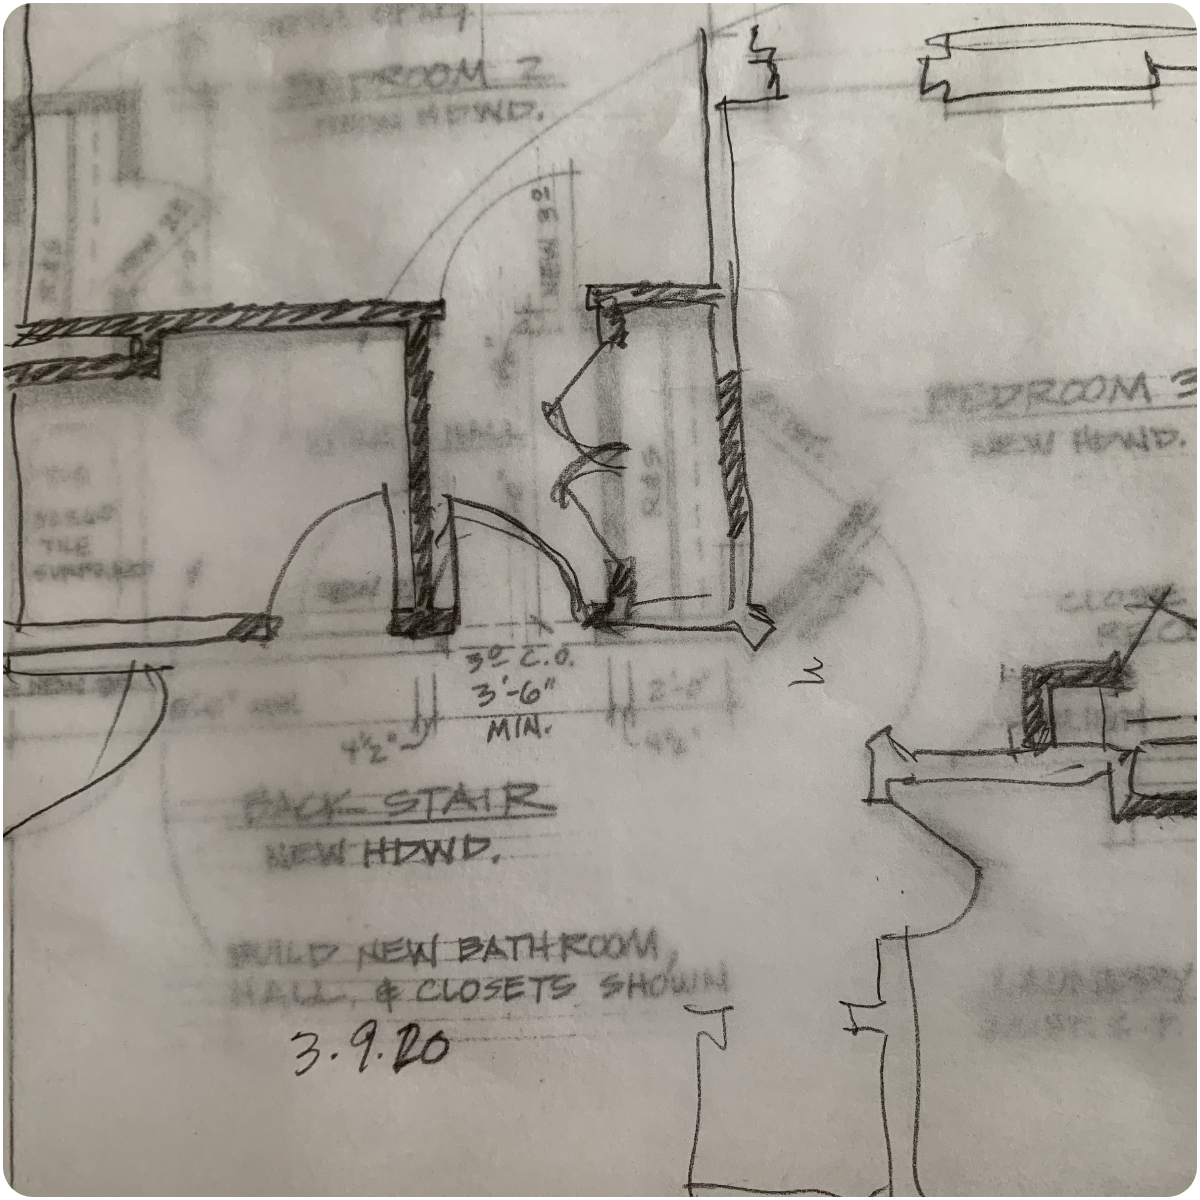
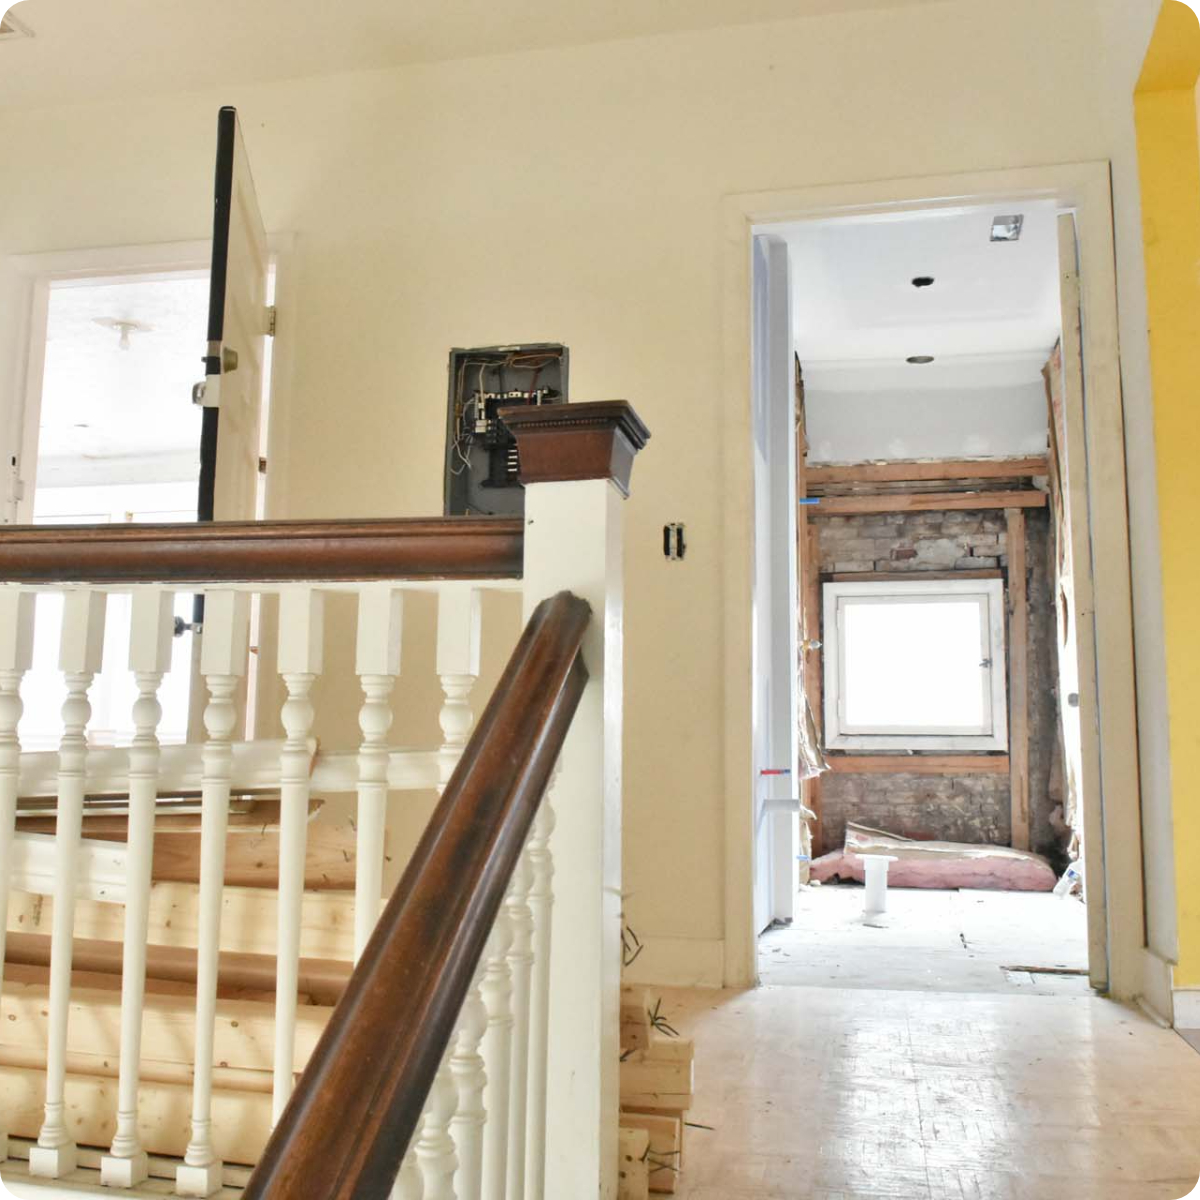
The 2nd floor landing beam supports were removed in stairwell. These were removed to make staircase open and clean looking. All new supports were added to the stairwell to support the weight of staircase.
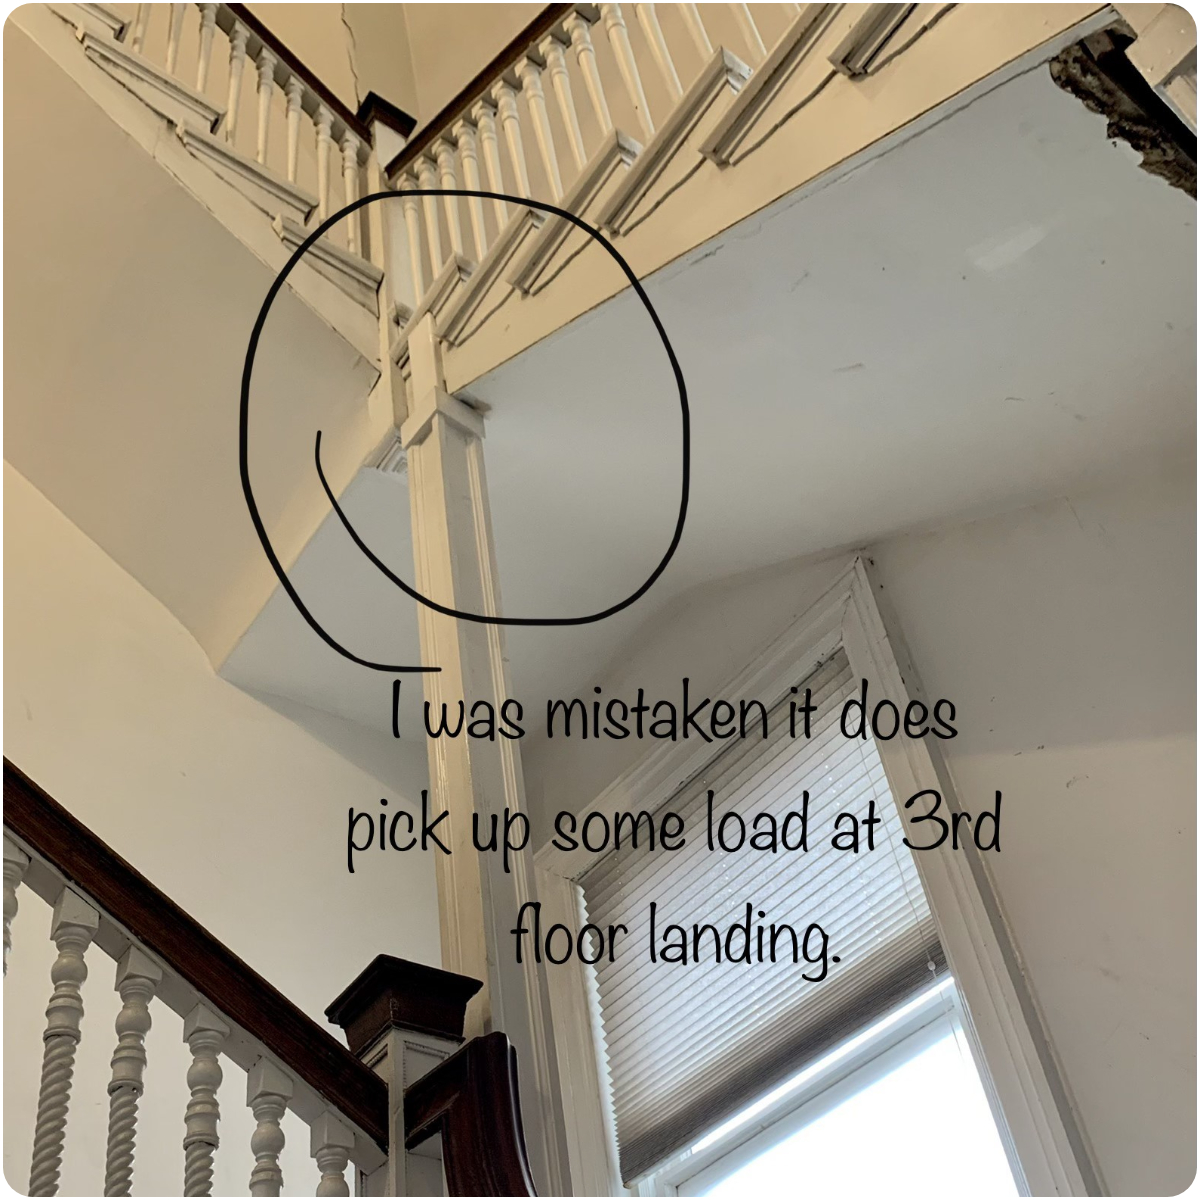
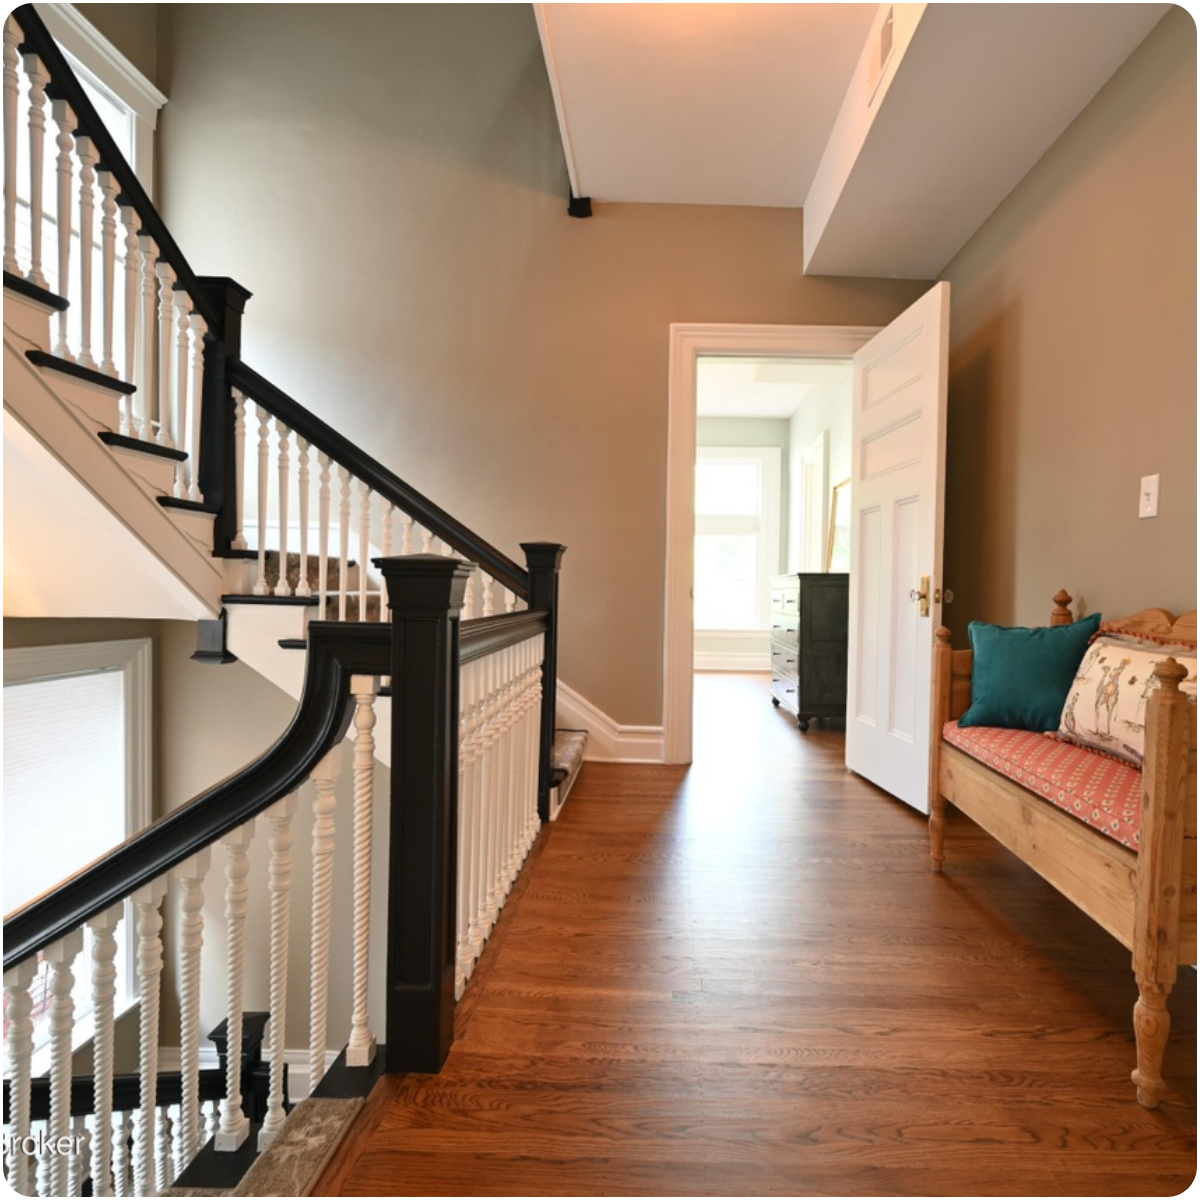
 Before & After: Stairwell without beams
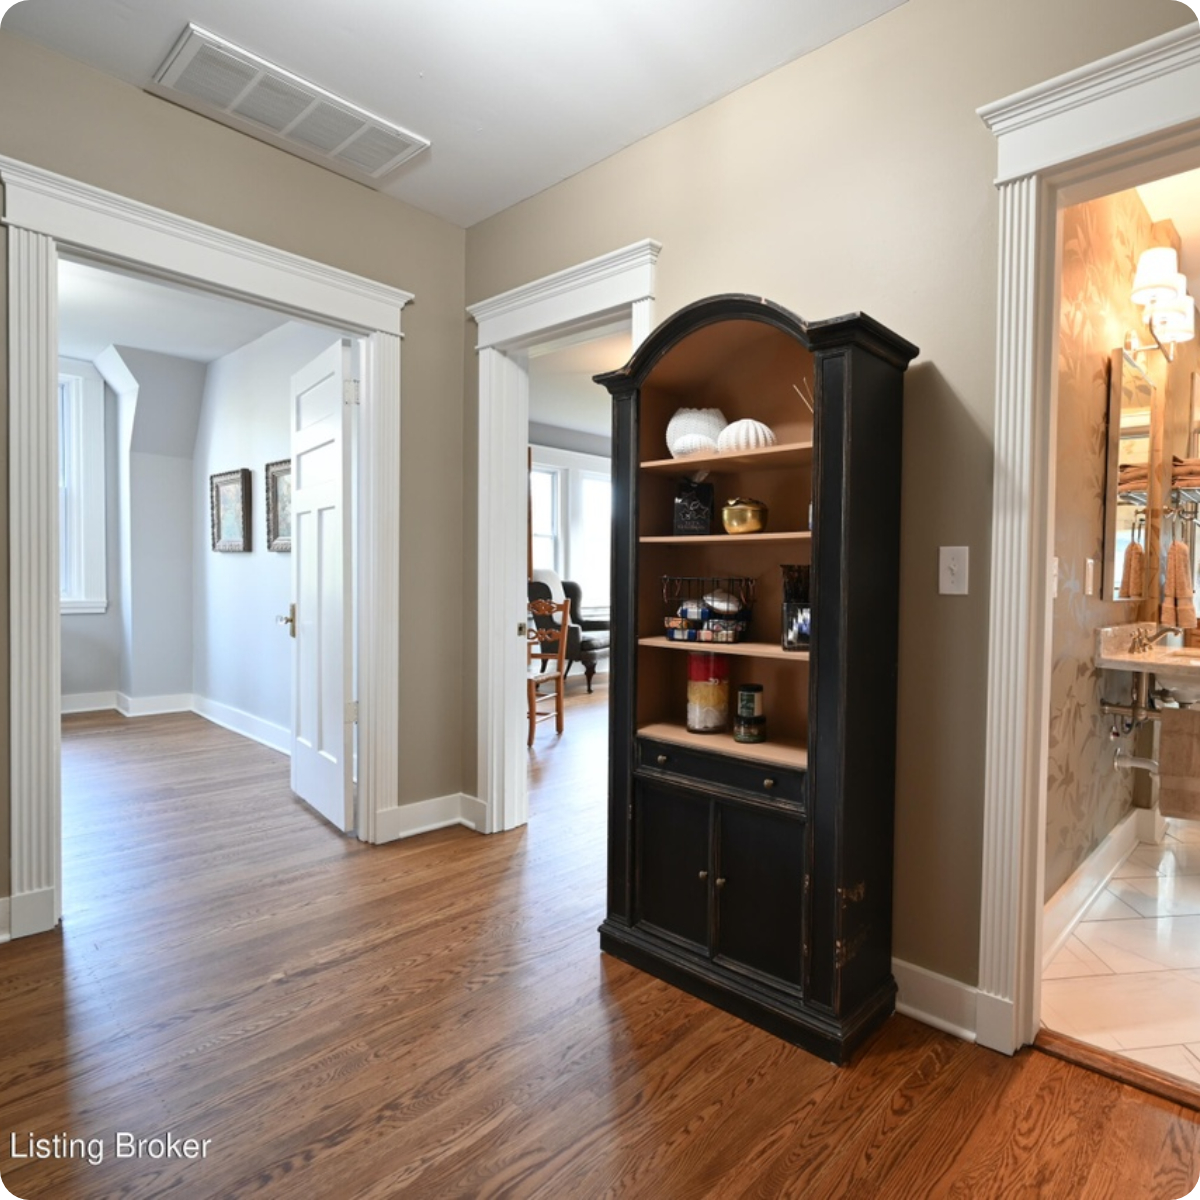
On the 2nd floor, we took space from the hallway and used it for the primary bathroom. We also used the extra space to create a hallway bathroom.
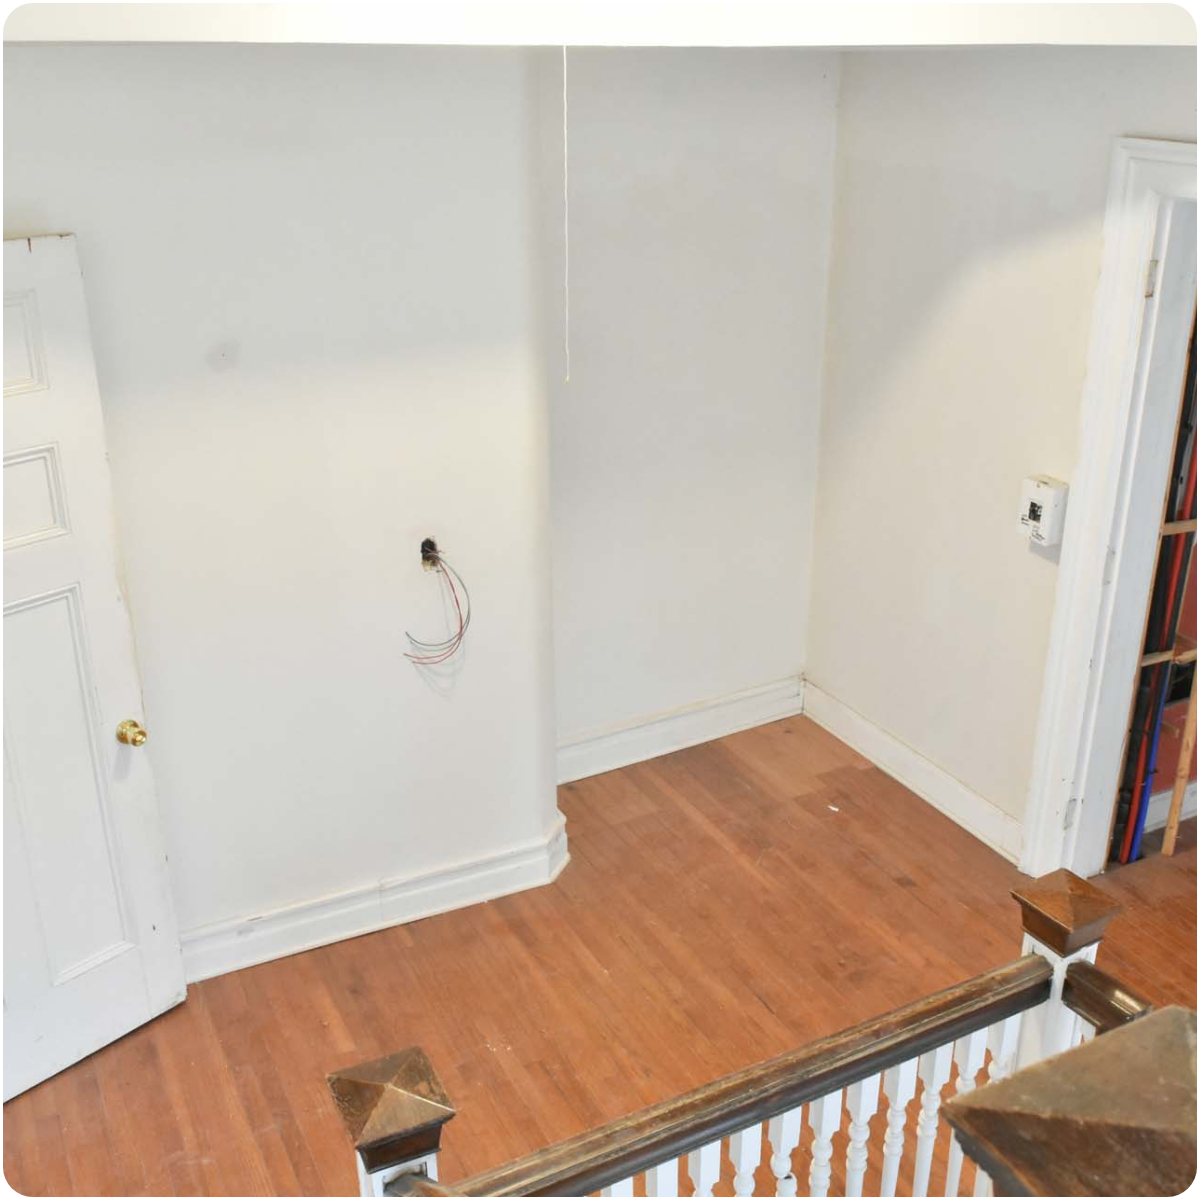
 Before & After: 2nd floor hallway
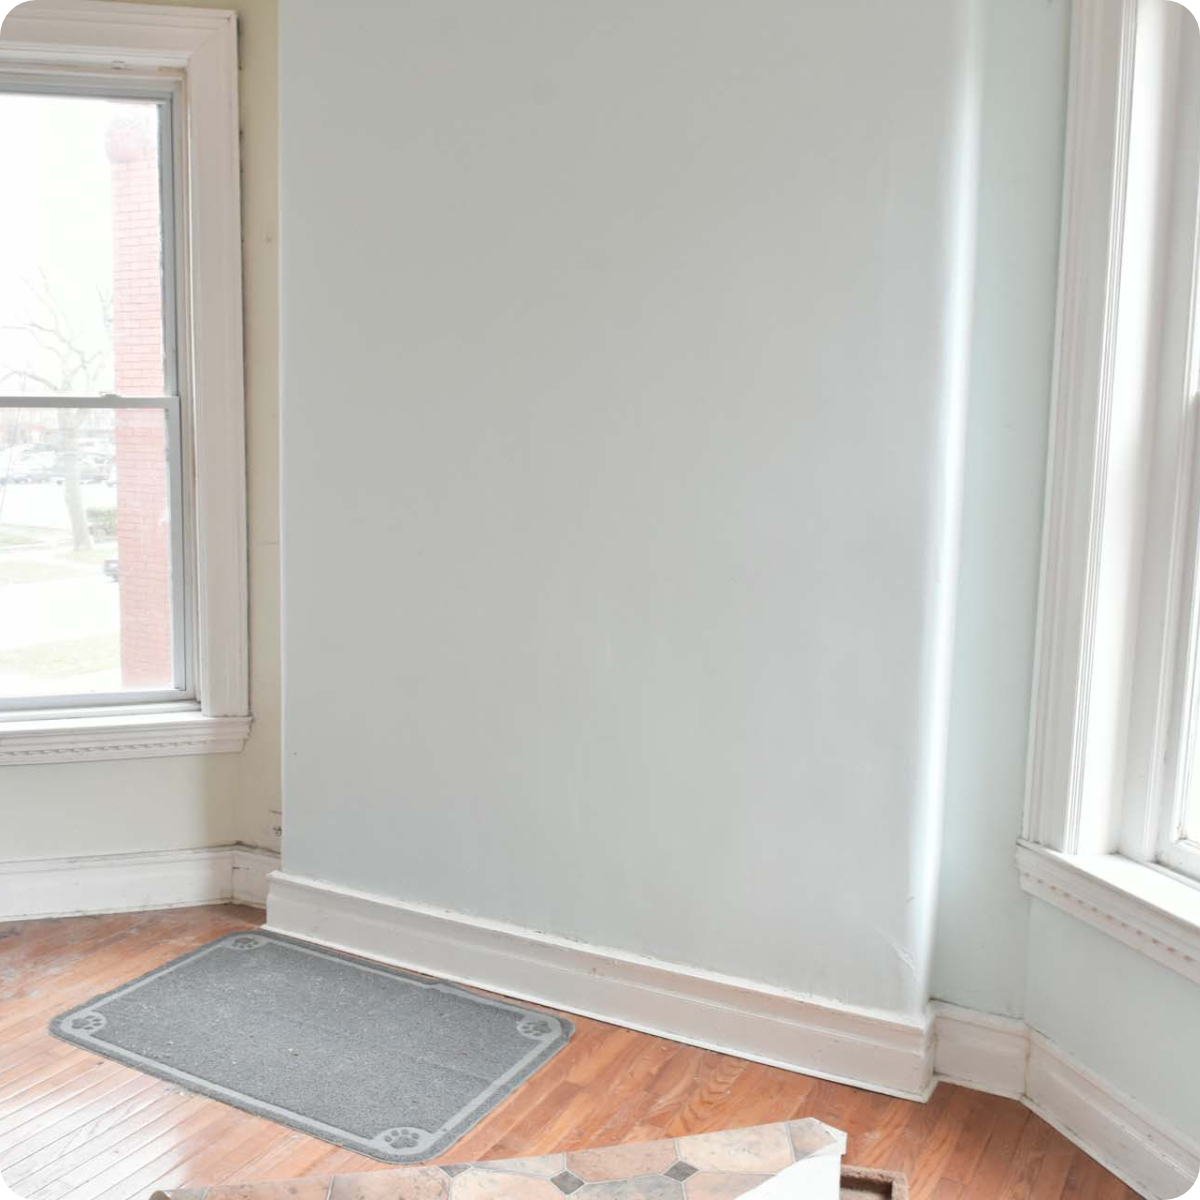
The primary bedroom and bath were gutted. More supports were placed in the floor joists.
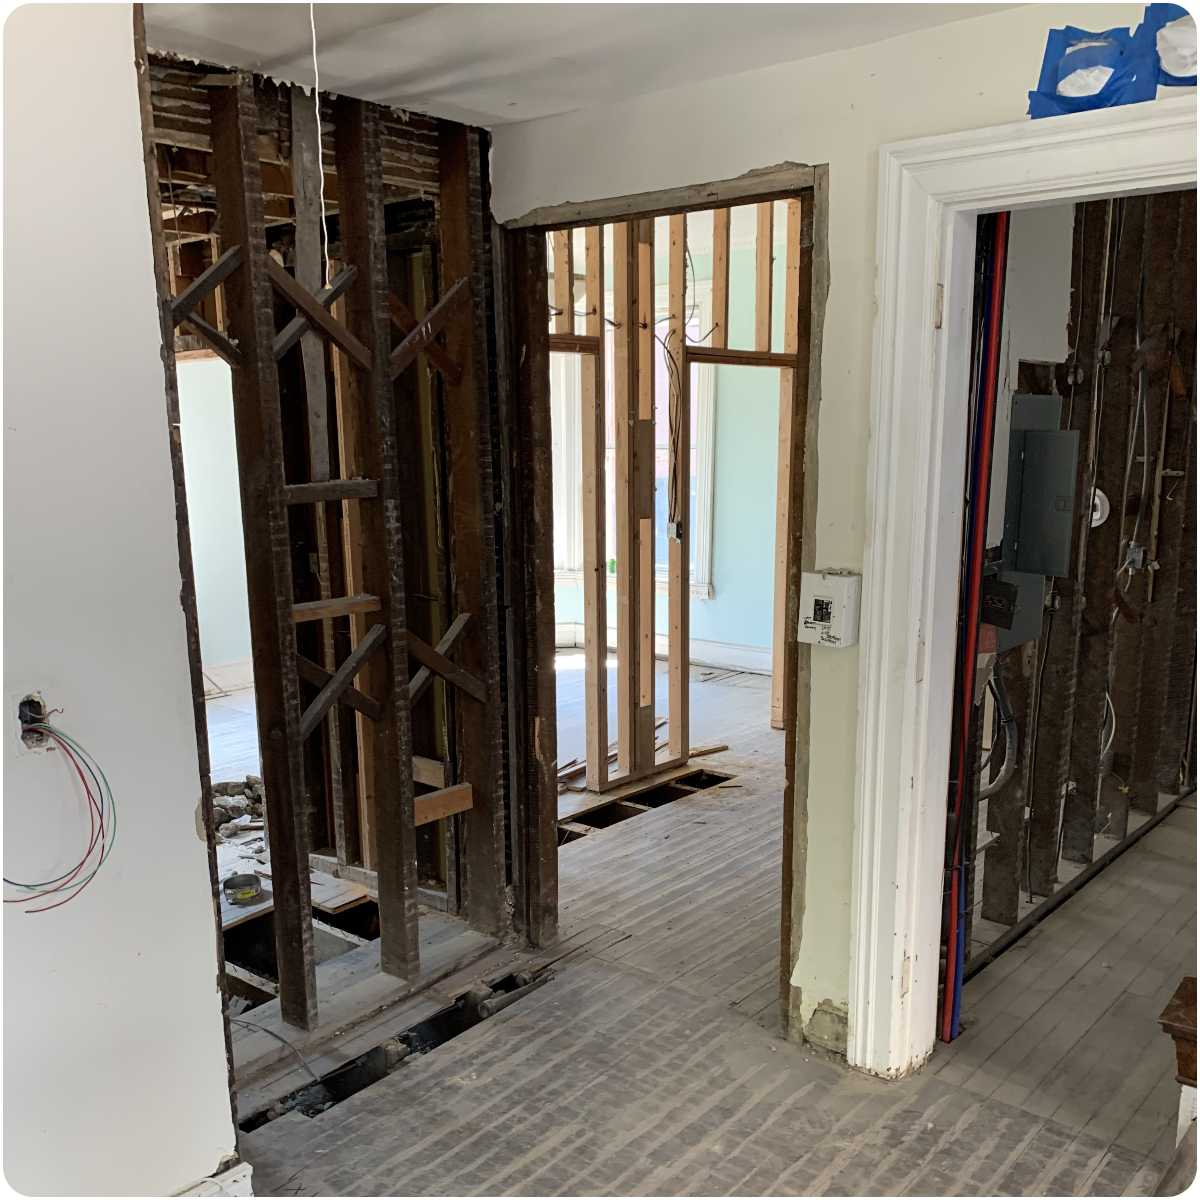
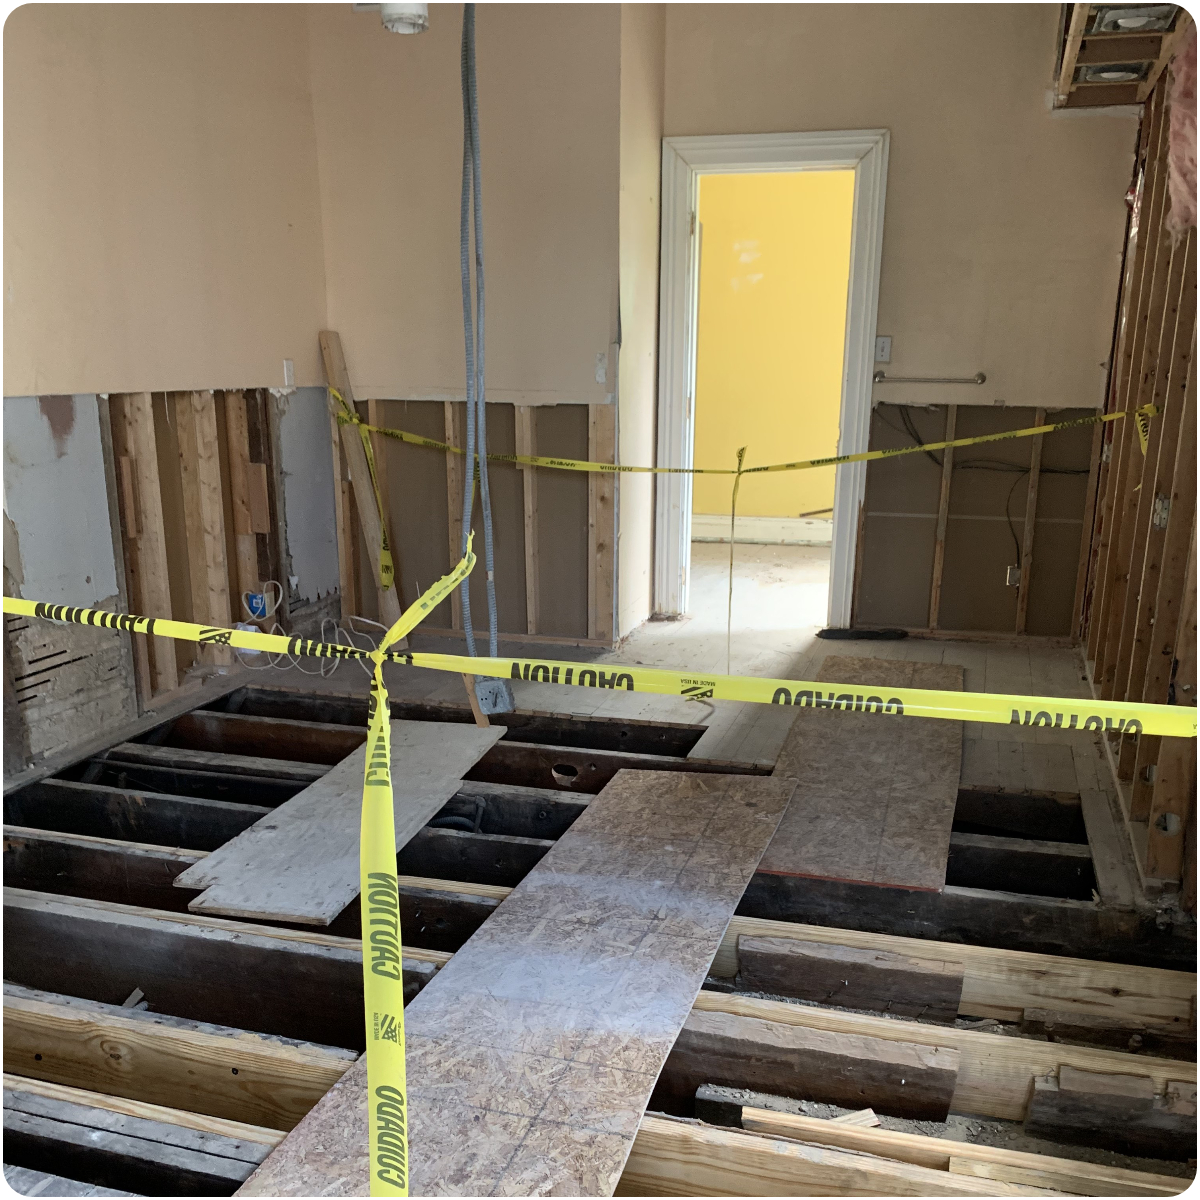 Before/ During Construction: Primary bedroom and bathroom
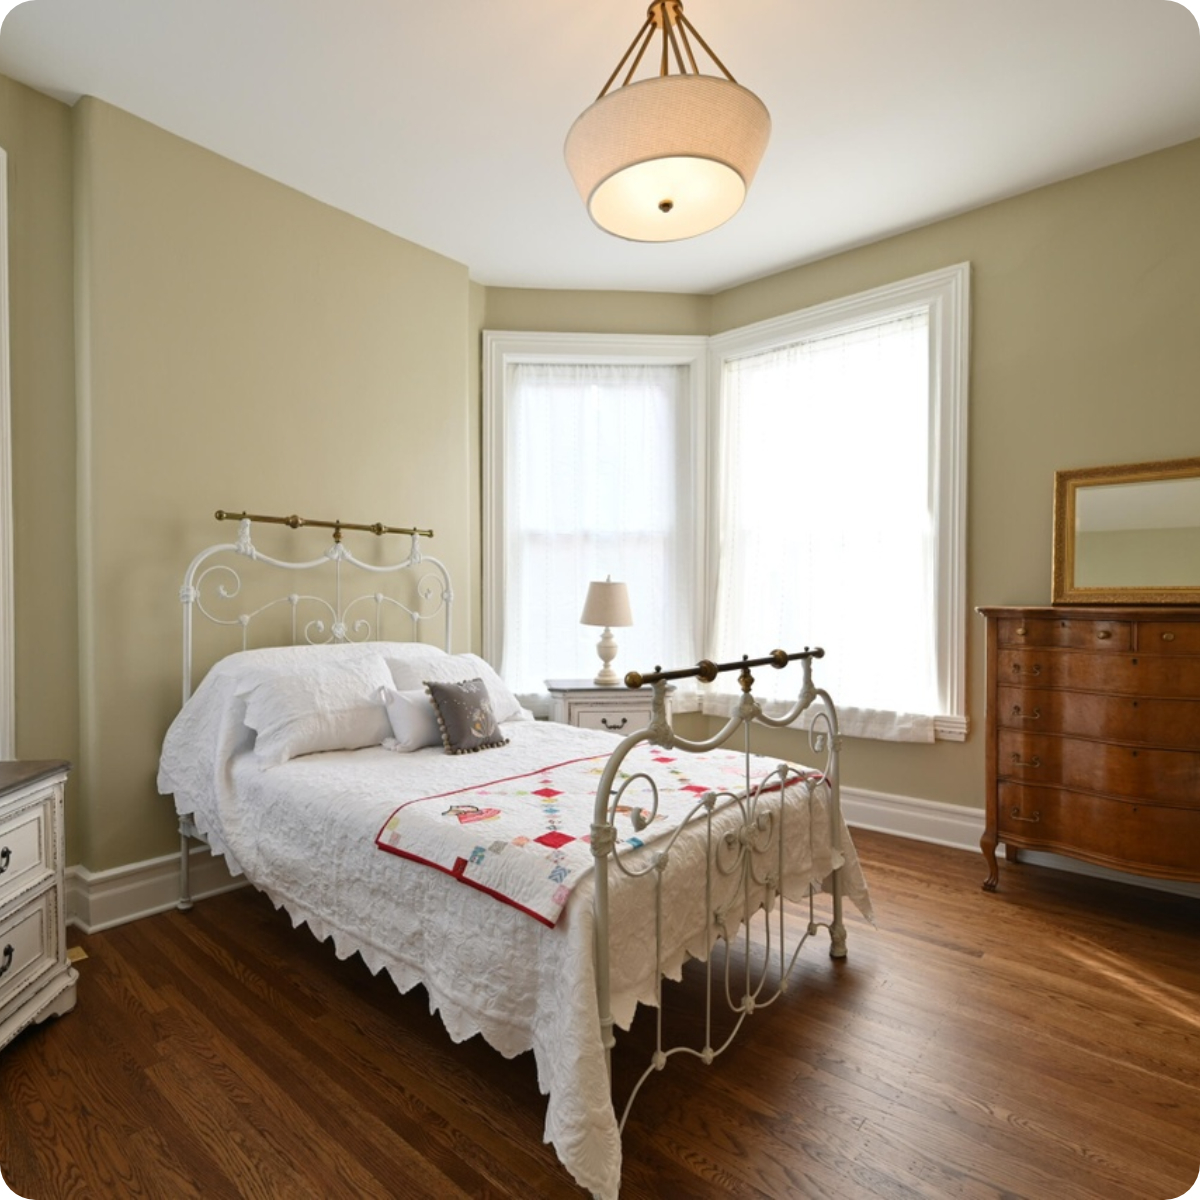
The Primary Bedroom kept most of the original footprint, however we captured space from the hallway to expand closets and expand the primary bath. We added all new wood flooring. The primary suite comes complete with a vanity nook and morning kitchen.
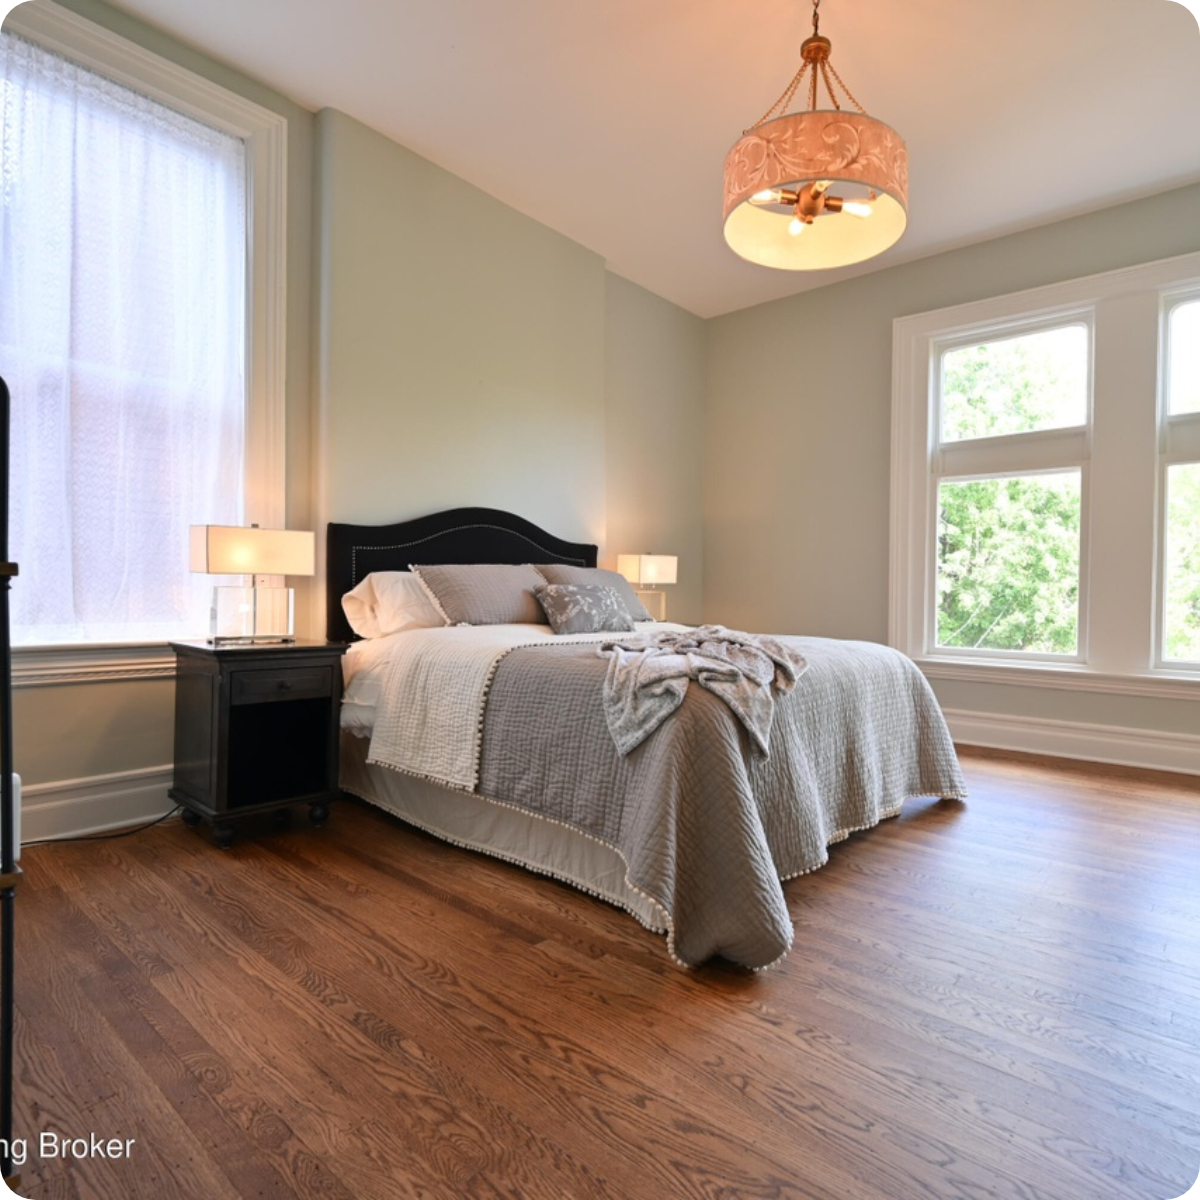
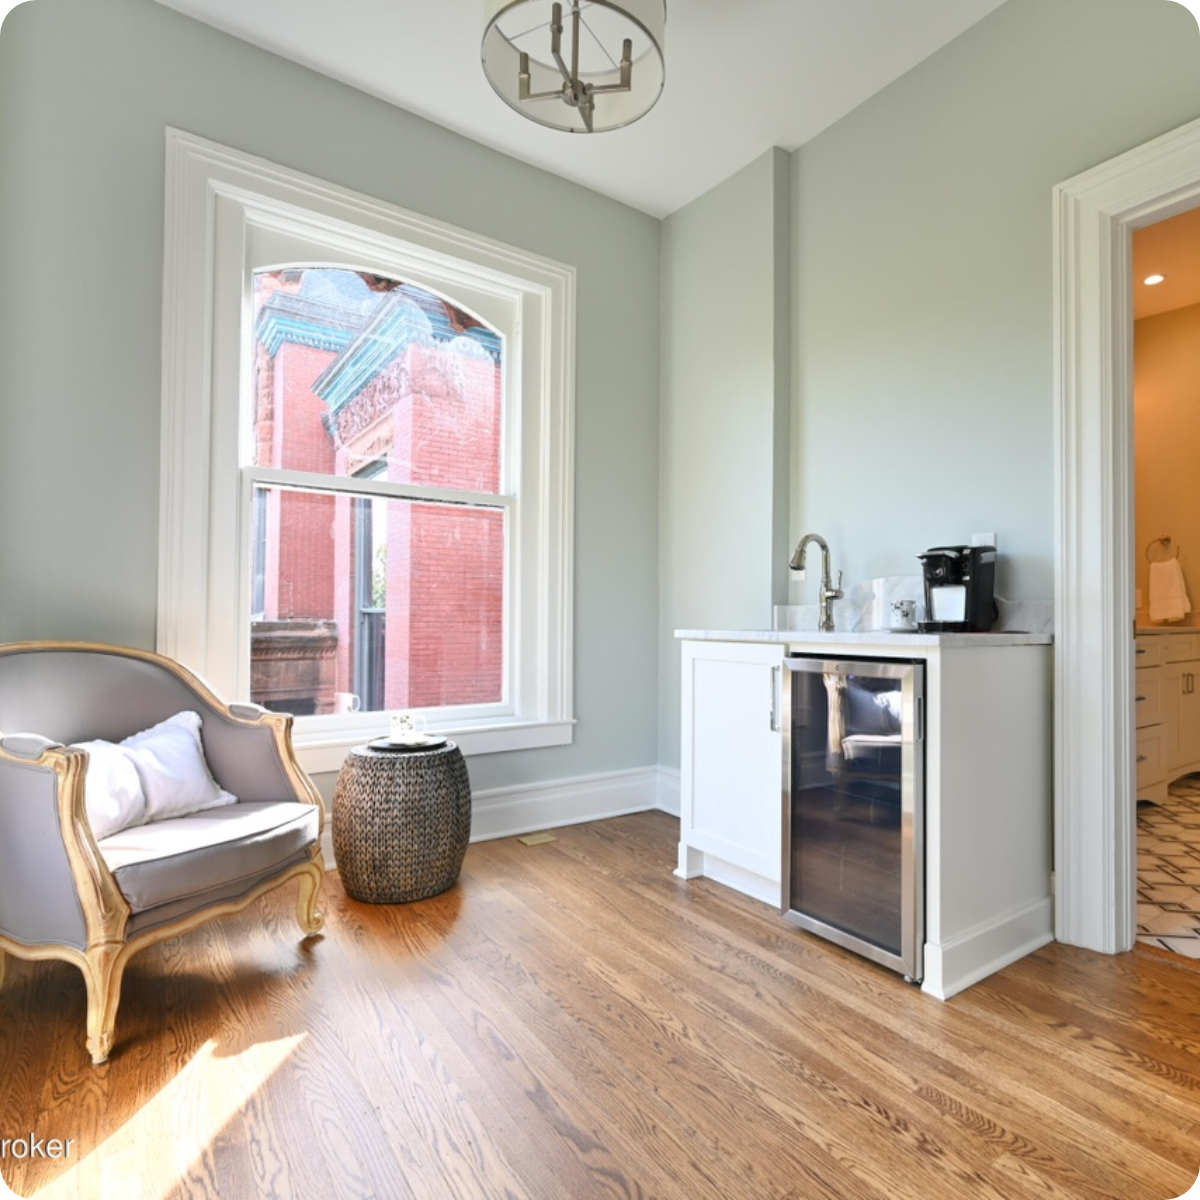 After: Primary Bedroom
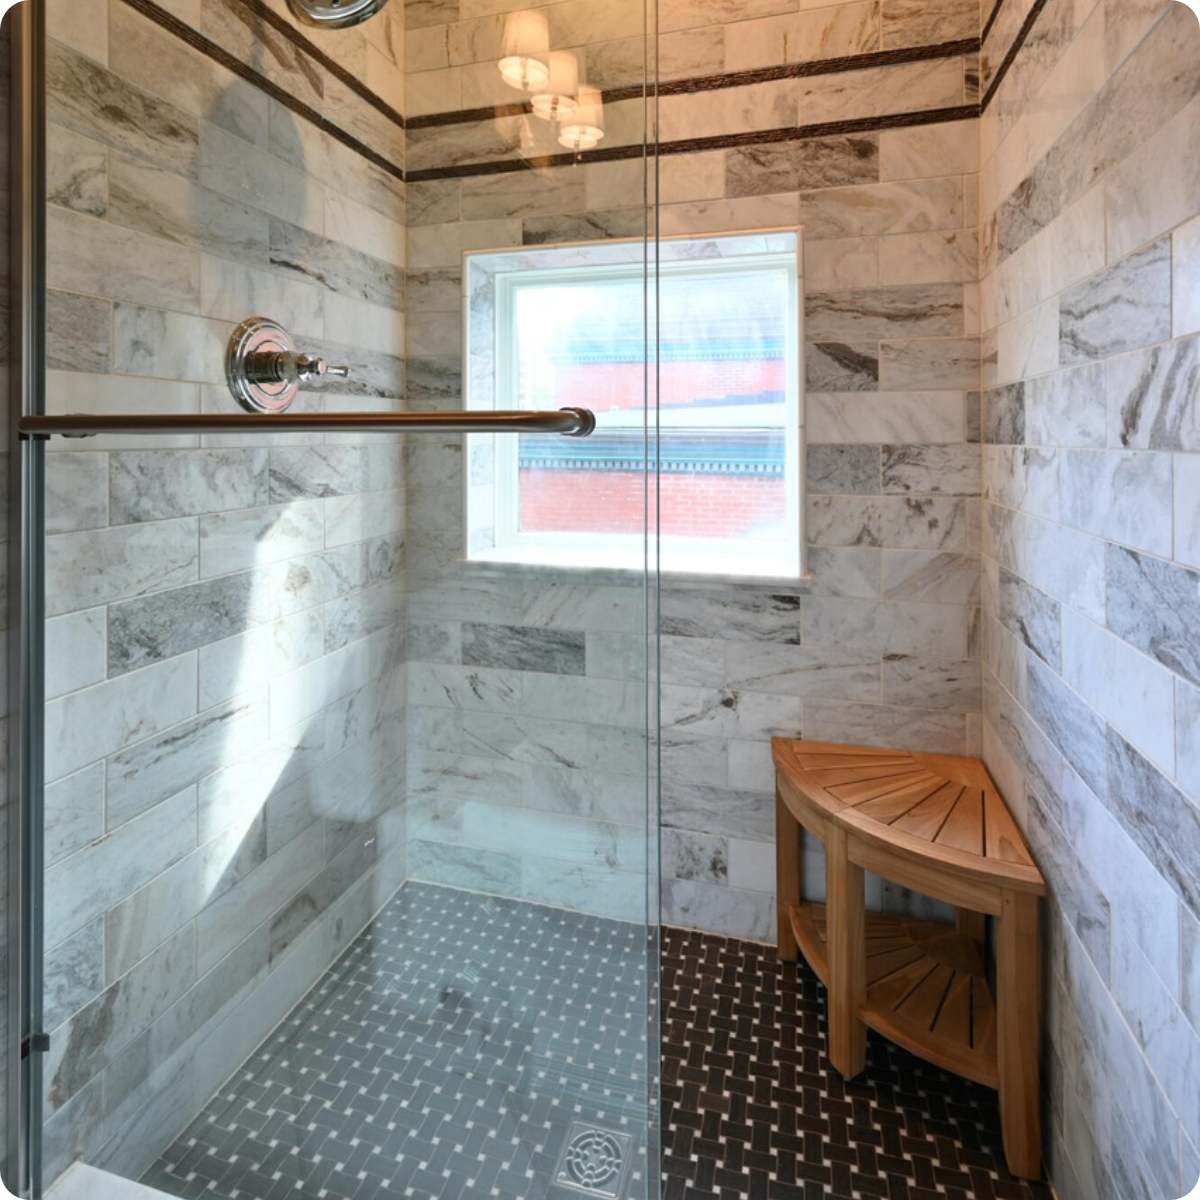
In the primary bathroom, we reinforced the floors once gutted. We closed off the door to the second bedroom, made the toilet area private, and built a transom wall/window to let light in from the bathroom. We laid all marble tile on the floor and in the shower.

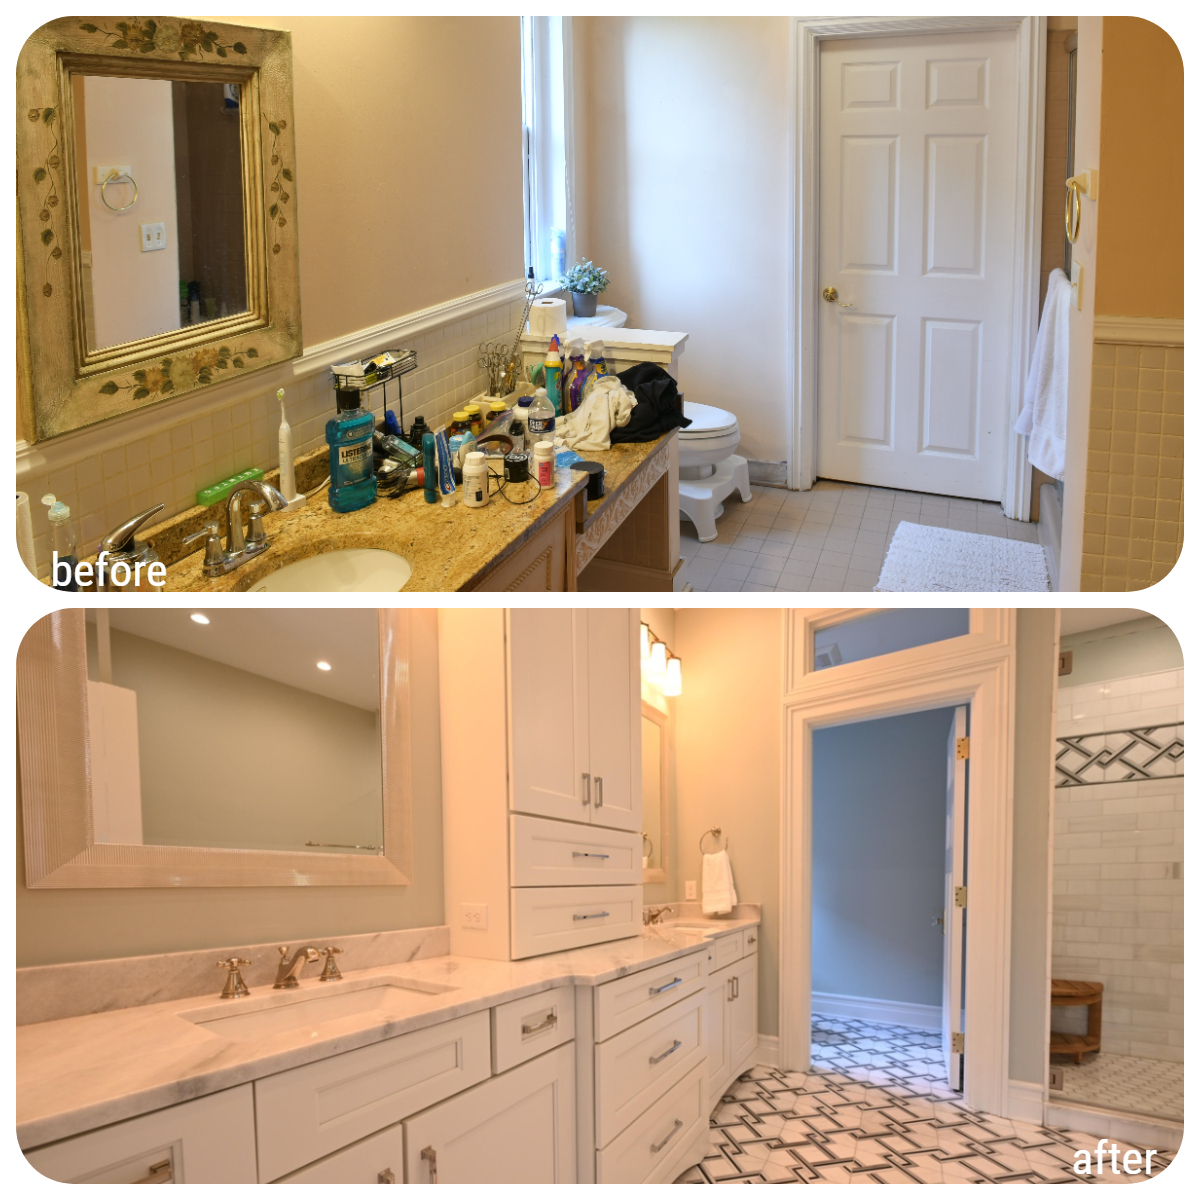 Before & After: Primary Bath
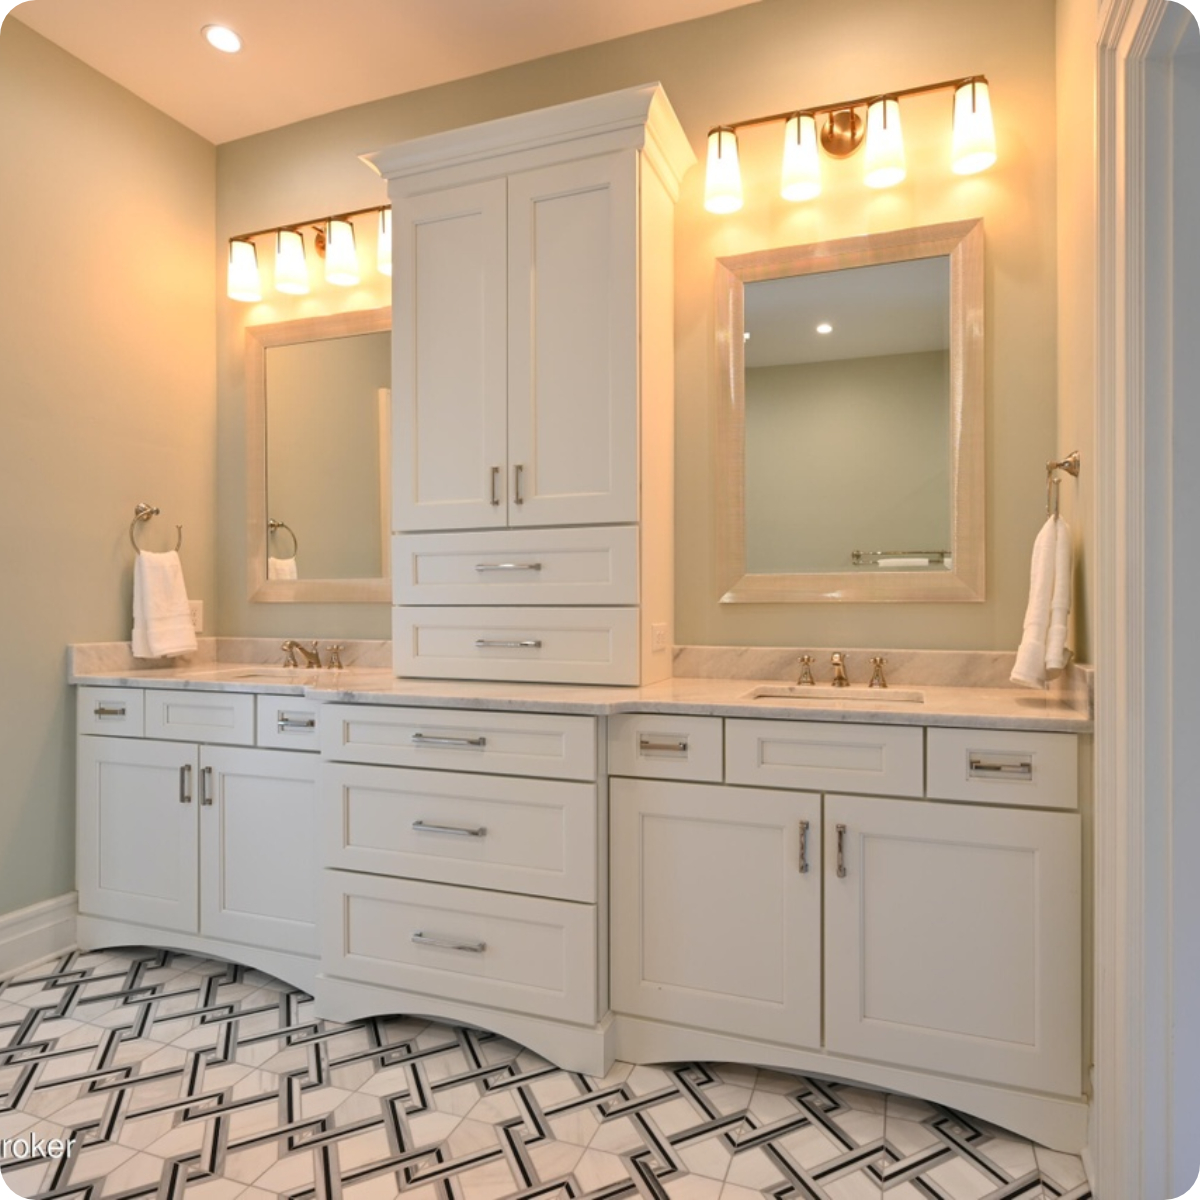
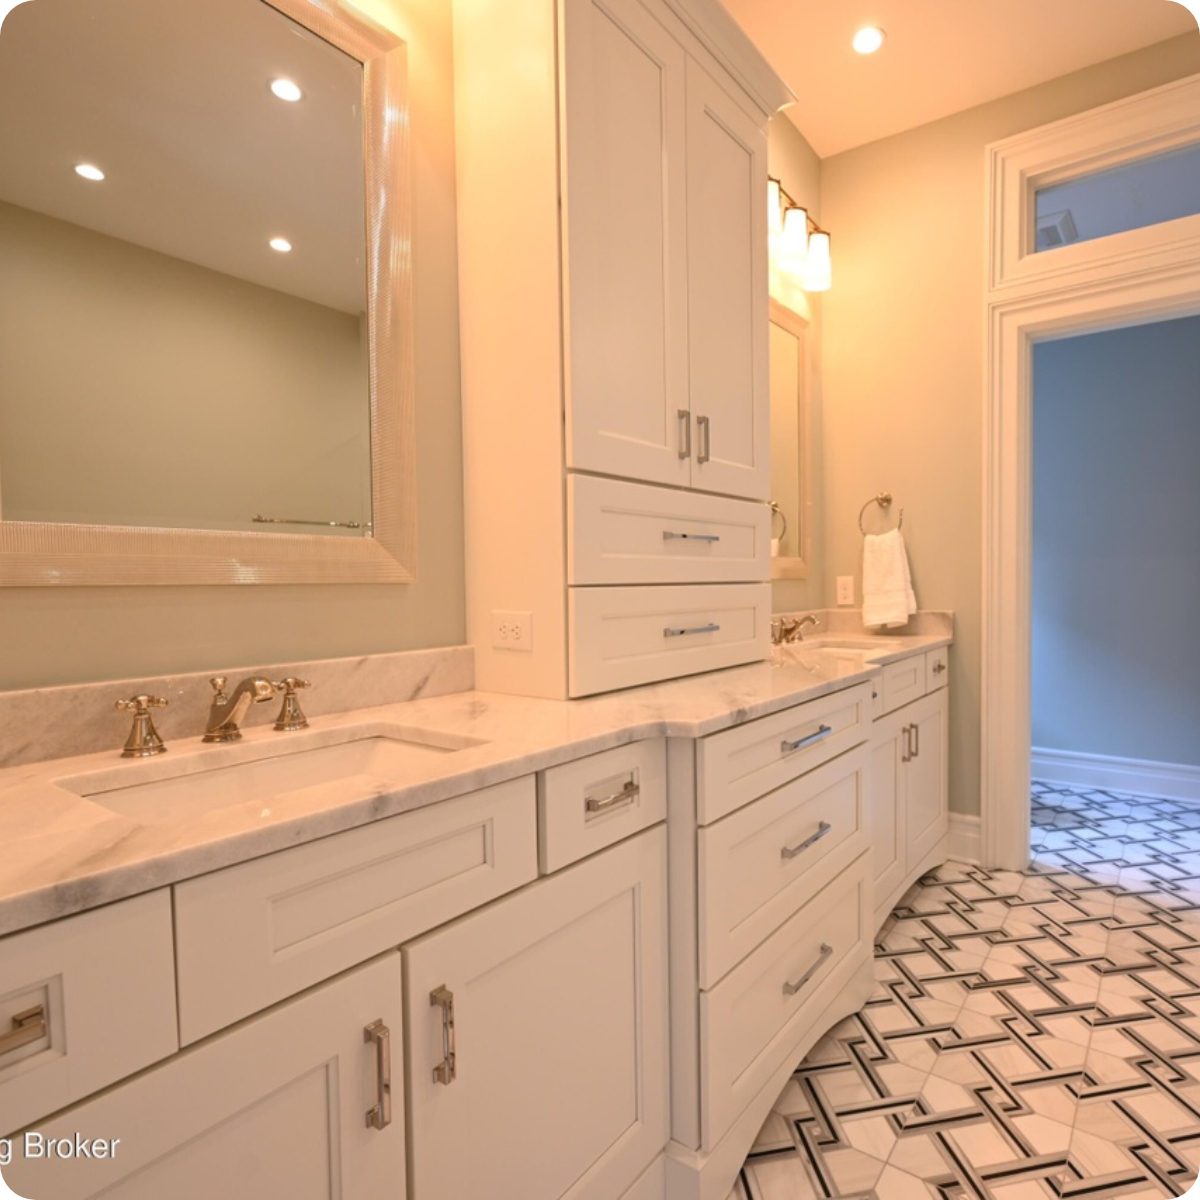
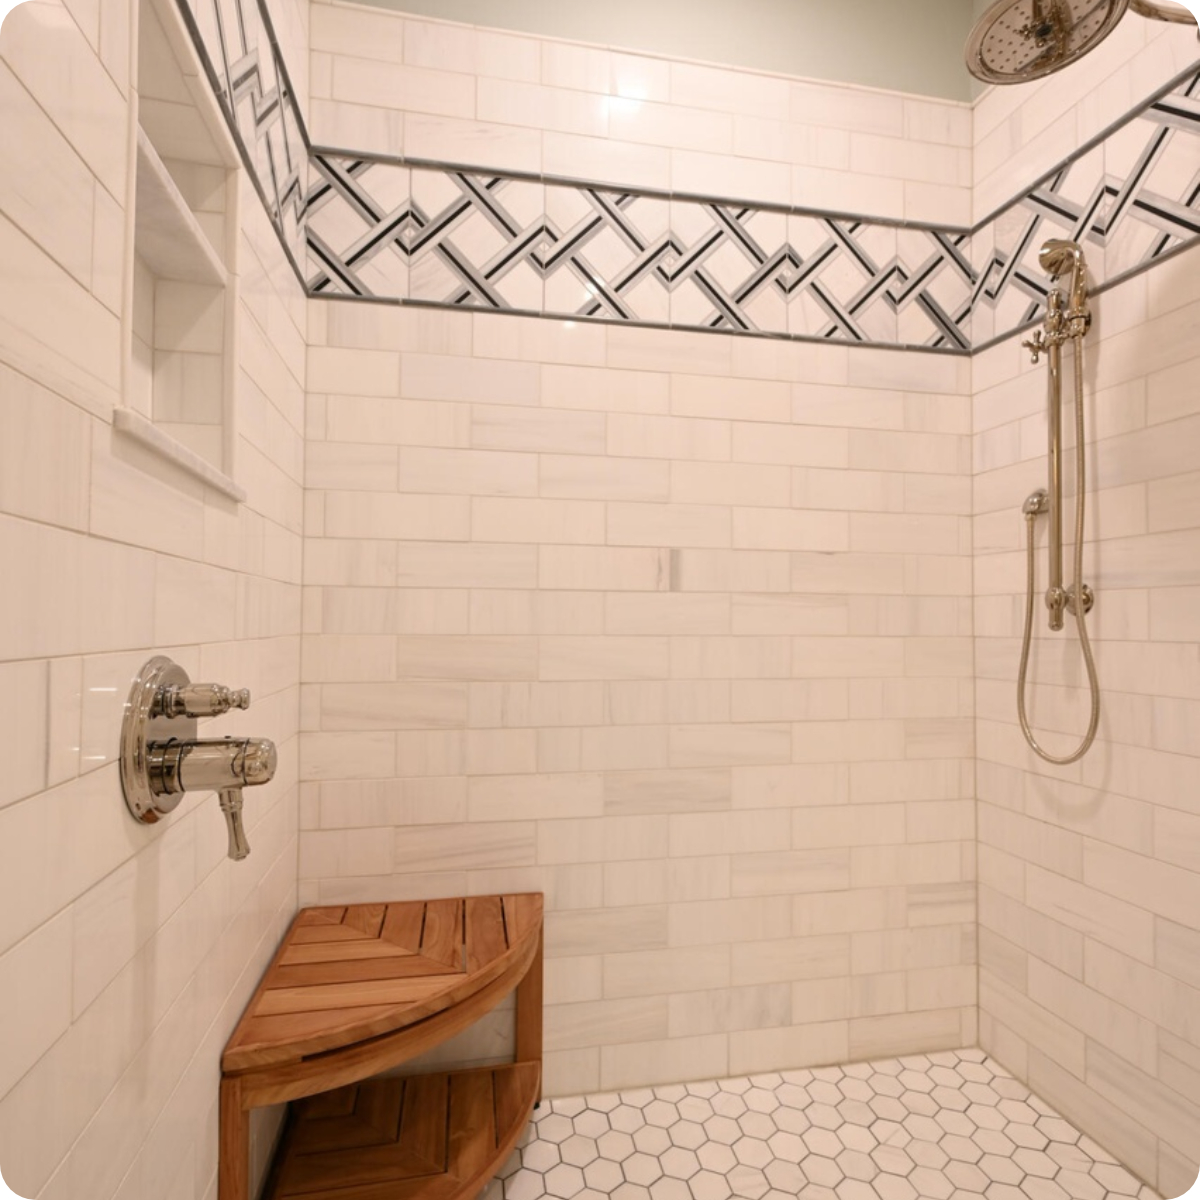
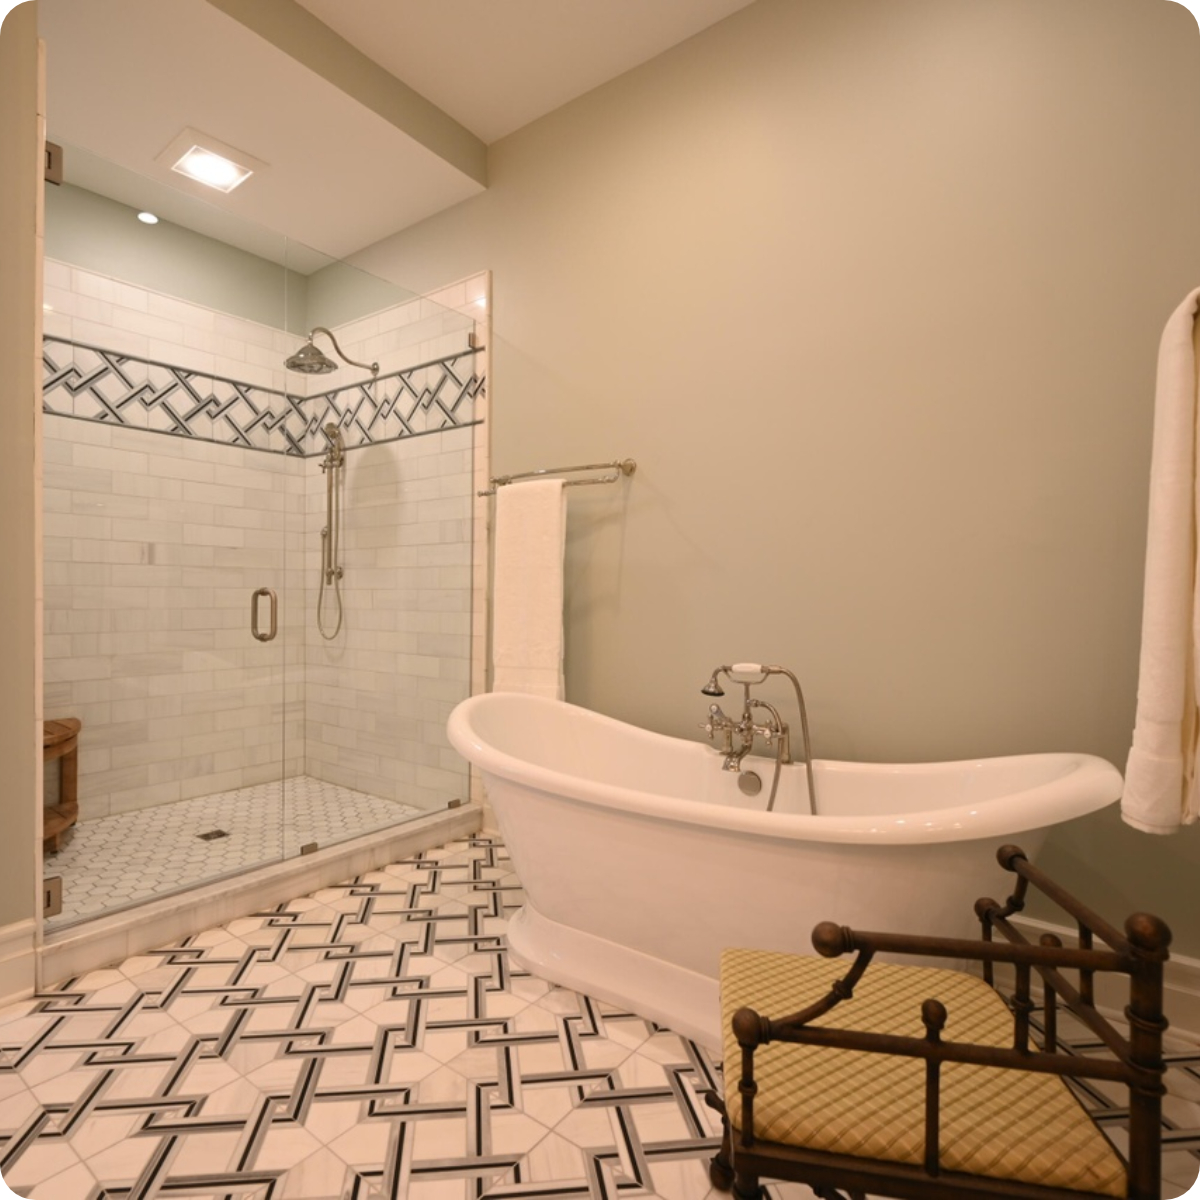 After: Primary Bath
In addition, the second floor has 2 more ample size bedrooms, a full bath that was added and separate laundry room.

The 2nd floor office- In this previous rust bedroom we added a closet, removed a door to the deck, and exposed the brick.
 Before & After: Bedroom
The 2nd Floor Bedroom- This bedroom originally had 2 closets that we refigured into one and used the extra closet space along with space pulled from the hallway to add a full bath. This bathroom was made available to all the 2nd floor bedrooms. We also closed off the door to the primary bath.
 Before & After: 2nd Floor Bedroom
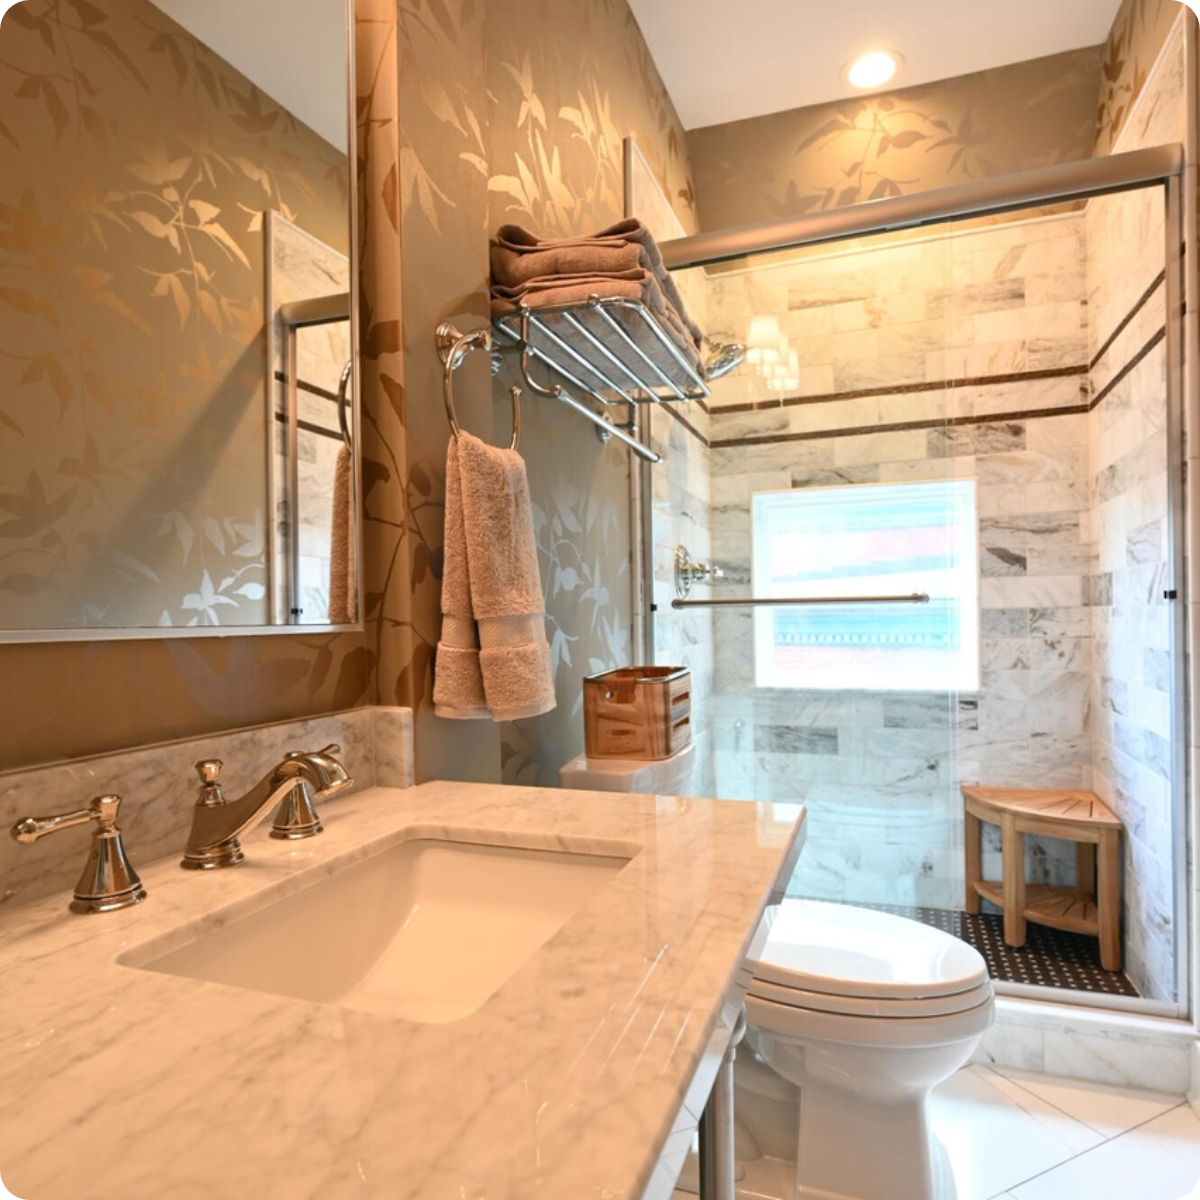
The 2nd Floor Hallway Bath- The bathroom was added from pulling closet space in the bedroom and extra hallway space. All tile and vanity are marble.
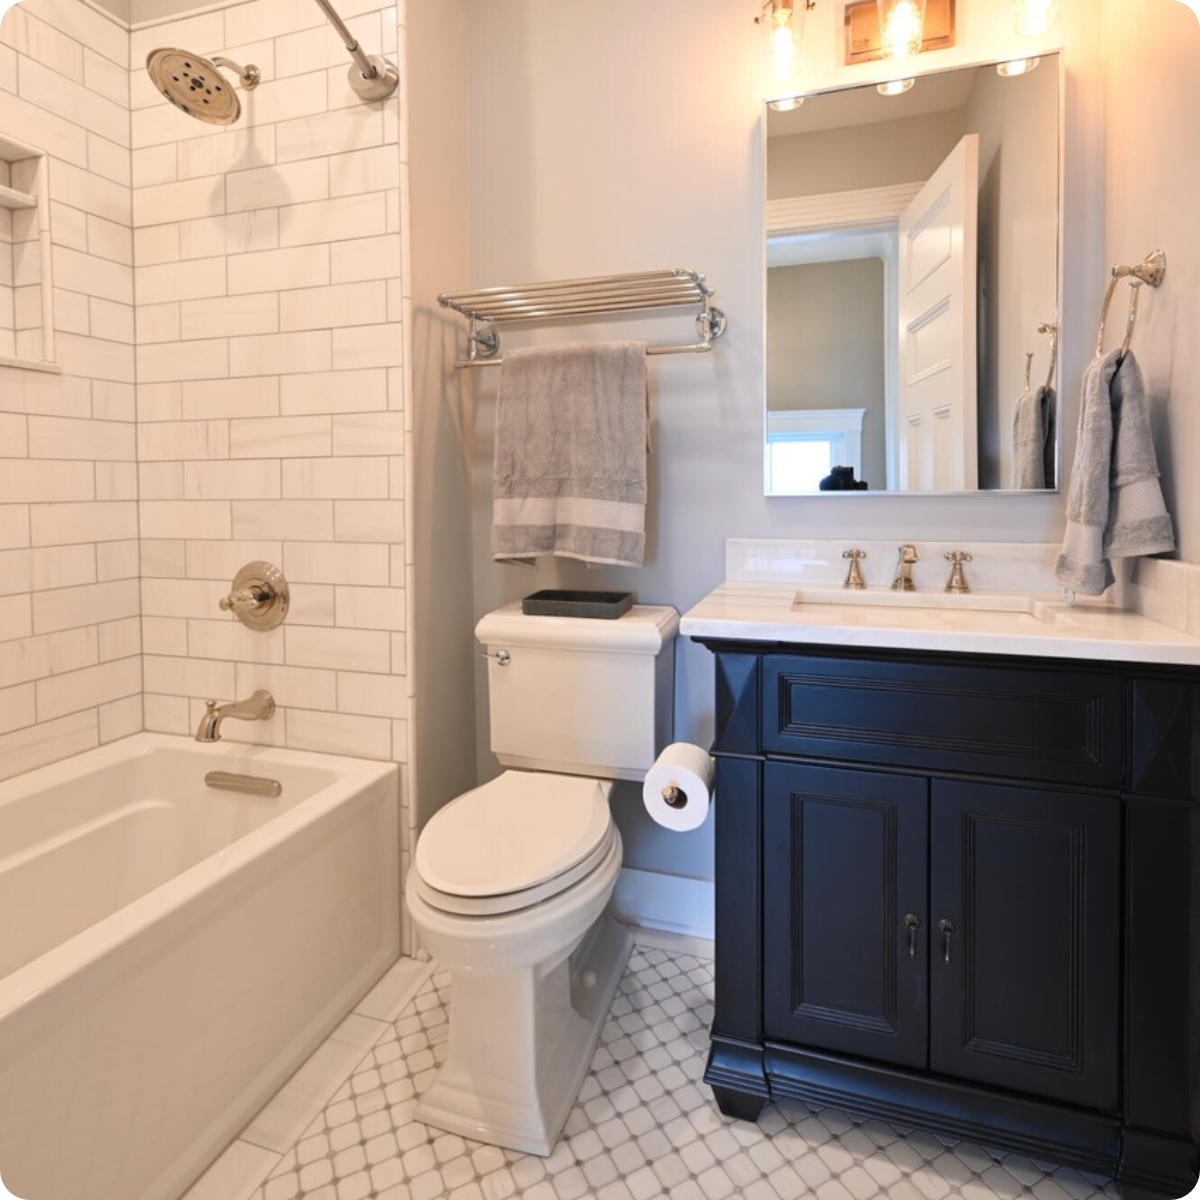 After: 2nd Floor Bathroom
The 3rd floor is as spectacular as the others with 3 bedrooms, a gorgeous third bath, and a huge family room with wet bar and mini fridge.
The 3rd Floor Full Bath- was gutted. The shower window was made watertight by adding a double pane of glass and then tiled. Marble was added to the floors, walk in shower, and vanity.
 Before/During: 3rd Floor Bathroom
 After: 3rd Floor Bathroom
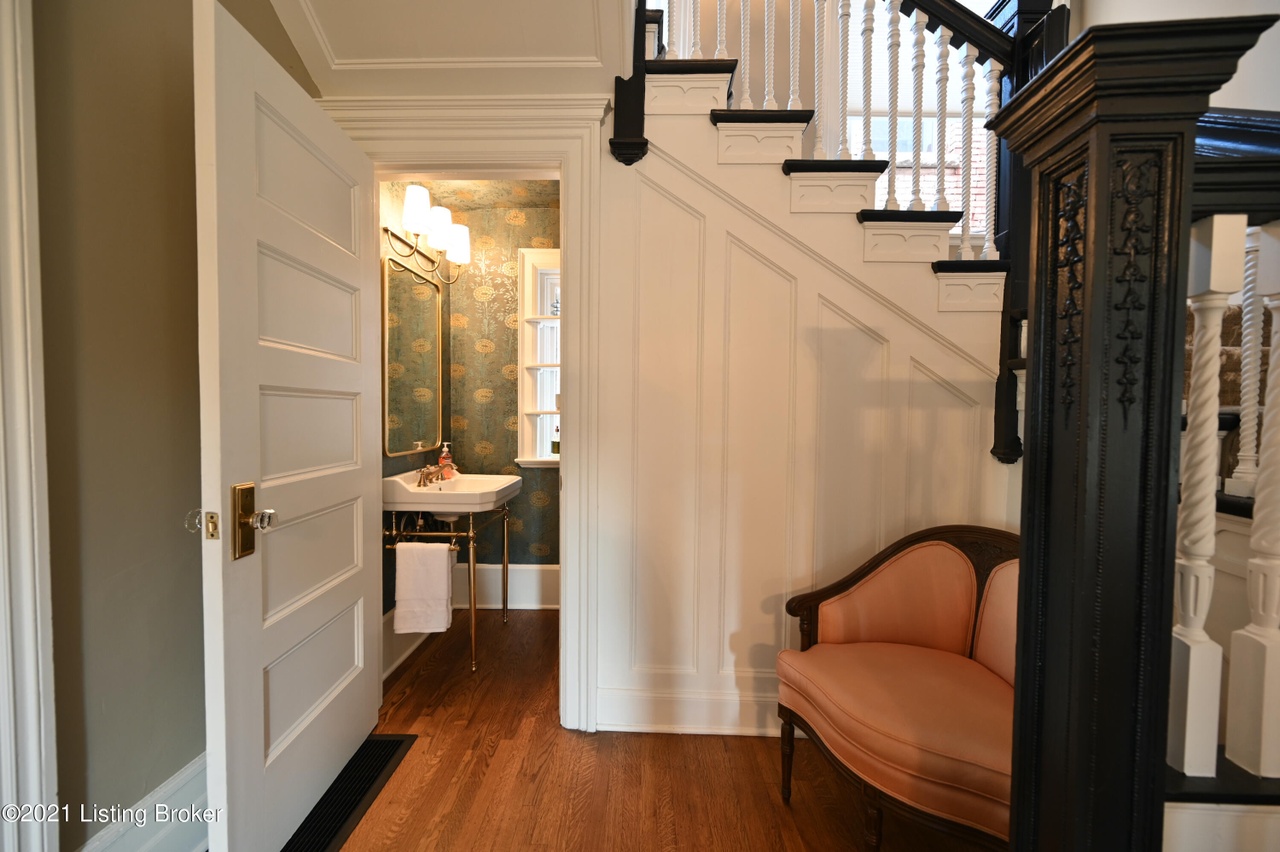
The entire 2nd floor and 3rd floor had new wood floors installed.

 Before: Parkay Flooring
 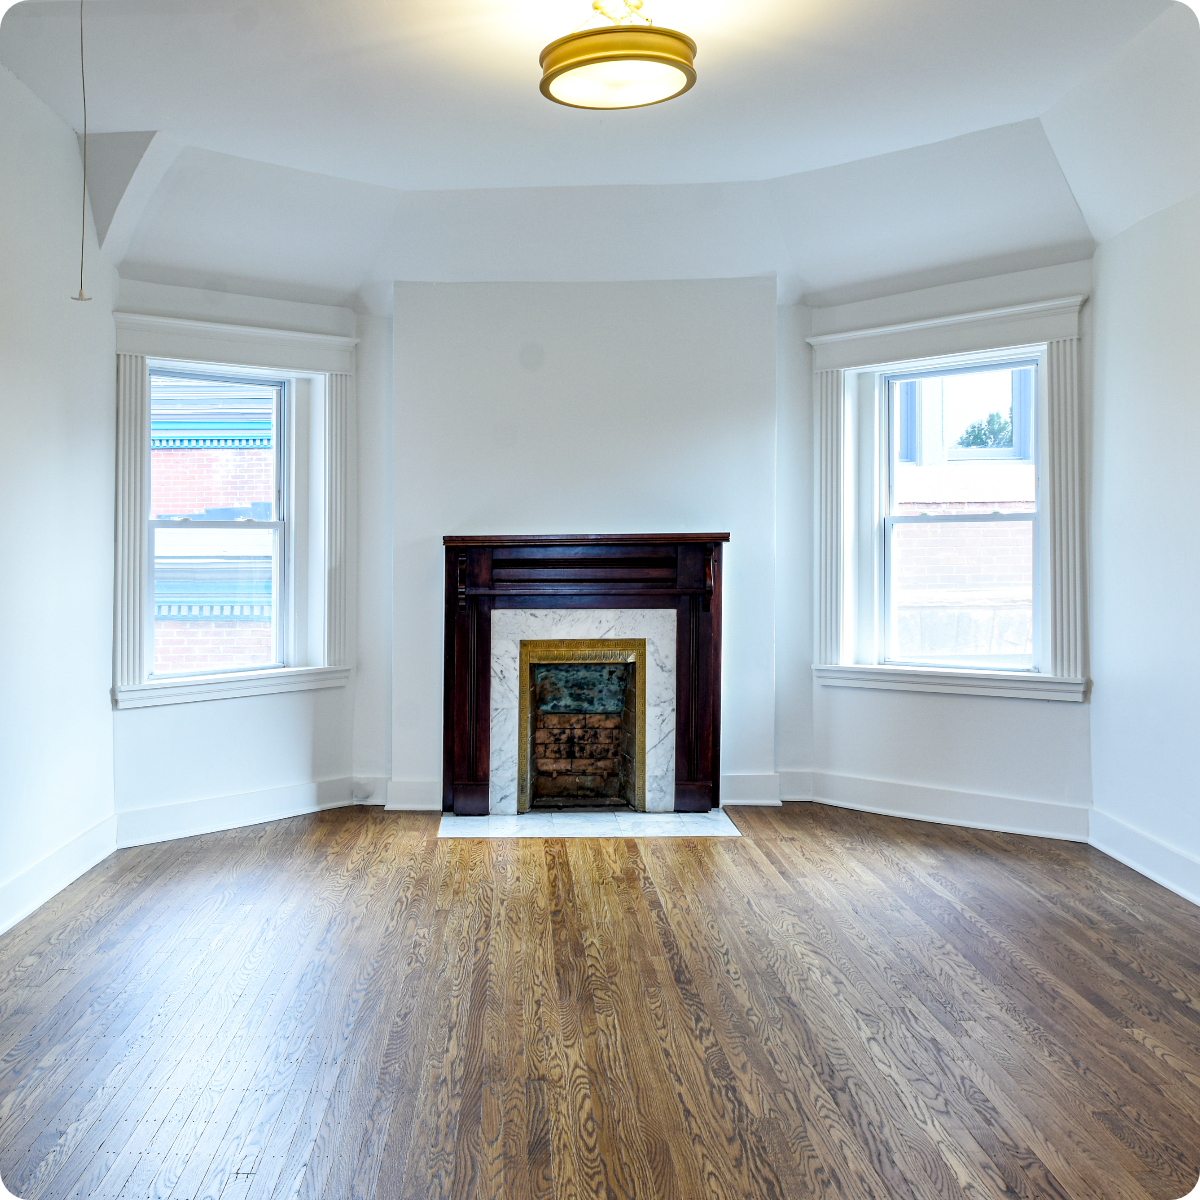 After: Hardwood Floors
A child’s game board was discovered painted on the original floor. This was under the parkay flooring that was laid over the original flooring. This may have been just a decorative design on the landing to look like a rug.
 Child’s game painted on original floor
The 3rd Floor Family Room- was previously being used as a kitchen. In this room, we laid new flooring, re-stained the fireplace, and covered up the imperfections.

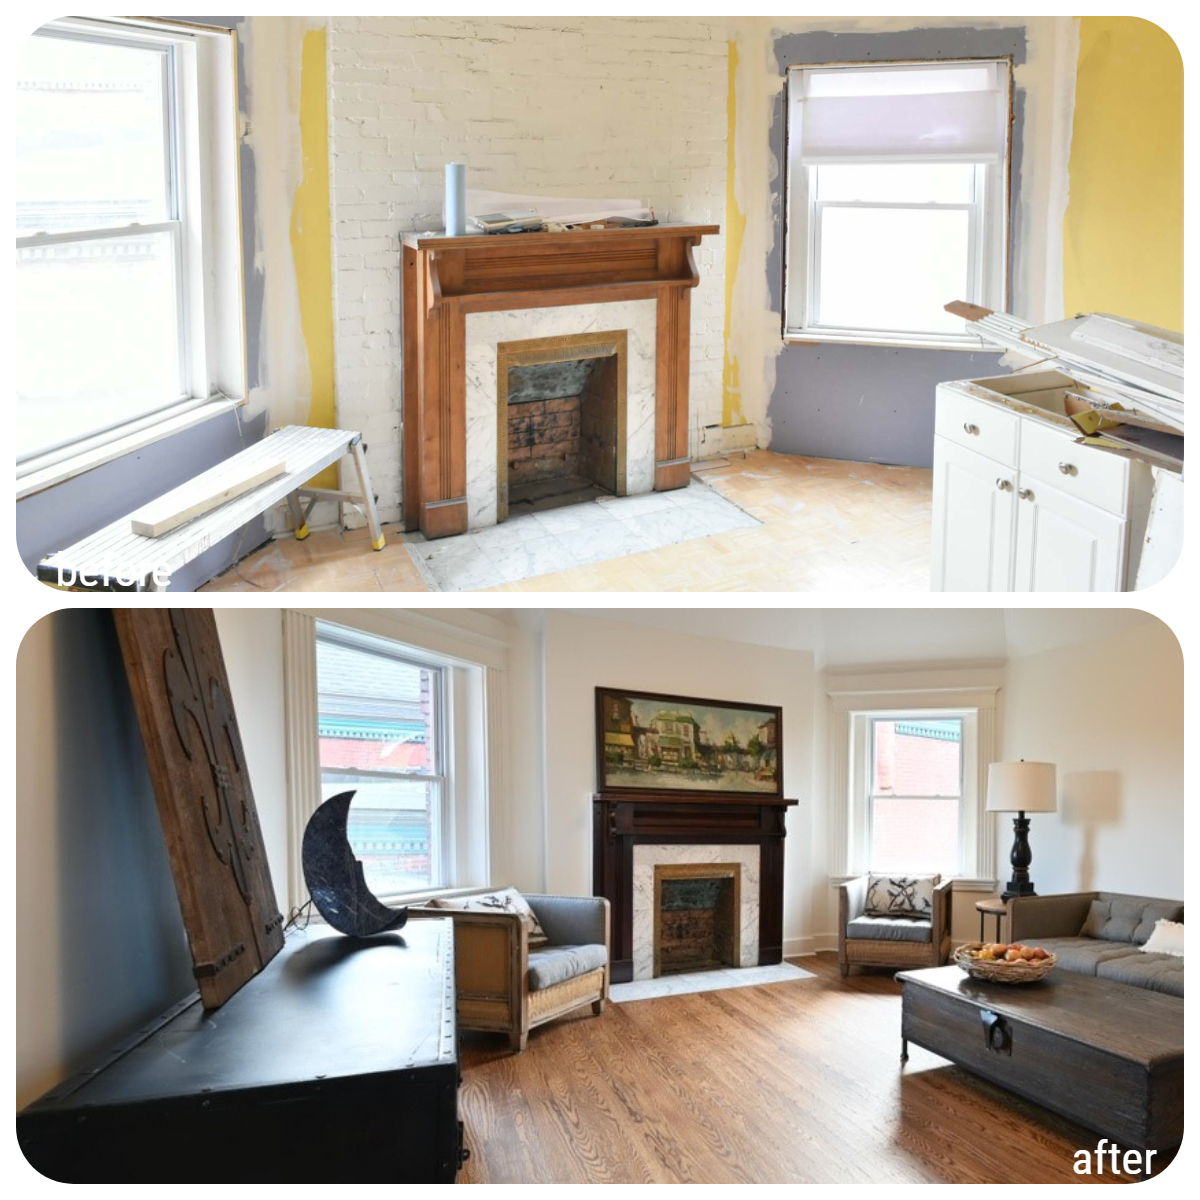 Before & After: 3rd Floor Family Room
The 3rd floor wet bar was added.
The 3rd floor bedroom/game room- In this area the ceiling was crooked and overly angled so we built out the ceiling, framed the fireplace adding architectural detail, and adding height to the room.
 Before & After: 3rd Floor Game Room
The 3rd Floor Twin Bedroom- kept its same footprint had new flooring laid and was painted.
 Before & After: 3rd Floor Twin Bedroom